Today, I’m giving you an overview of the photo album binding. Photo albums can be created using different bookbinding methods, so I’ll focus on the basic building blocks and steps for any photo album. With this information, you’ll be able to plan and create a photo album using a preferred bookbinding technique or one you’re most familiar with.
This method is easily recognized for 4 reasons:
- Traditional landscape format,
- Section spacers to allow for photos, art, etc,
- Wedge-shaped spine until the book is filled
What is a Photo album binding?
- Bookbinding Method or Technique: Photo Album
- Minimum Skill Level: Intermediate to Advanced
- Characteristics: landscape format, wedge shape, heavyweight paper, glassine interleaves, various binding types
- Great for: photos, scrapbooks and art portfolios
- Bad for: novels, journals, drawing, sketchbooks
Characteristics of a photo album binding
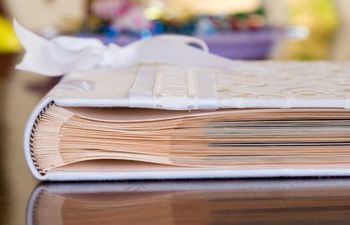
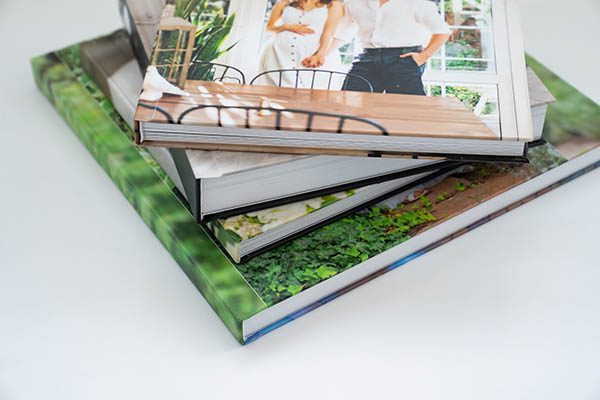
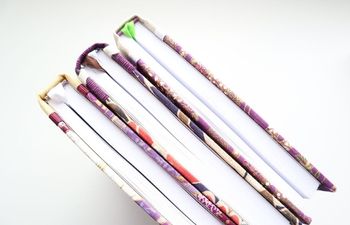
All photo album bindings are characterized by a traditional landscape format and wedge shape. The landscape format allows for various photo sizes and makes the book easier to flip through when laying open.
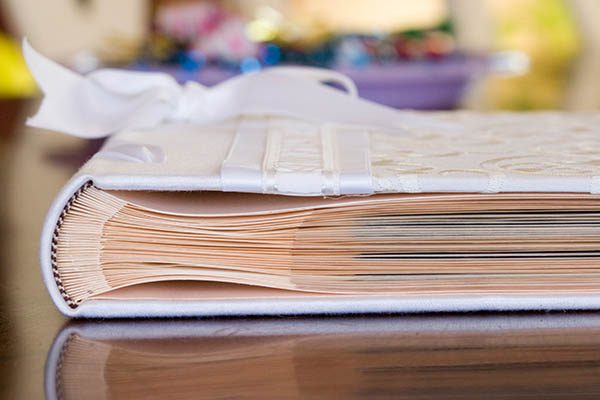
A short tab is placed between every other page at the spine to create space for memorabilia. This gives the entire book a wedge shape until photos are added. The wedge shape is different from the usual 90 degree “L” shape desired in a case binding.
Depending on the size of the book, there may be several inches of space between the edge of the tab and where photo additions begin. This allows the pages to bend easily and cascade open.
The 4 “building blocks” of a photo album binding
- Heavyweight, high quality paper
- Spacers (tabs) between sections, so the book can expand as photos are added
- Interleaving material to protect photos & artwork
- Front and back boards covered in a strong material
Handmade photo albums usually range in size from small (7×5 inches) to very large (12×9 inches). Albums larger than 7×5 will require some type of support at the spine for longevity. Linen tapes are typical for support. Sturdy mull or thick twine are good alternatives.
*Photo albums can also be taller than they are wide. It depends on preference.
Steps to create a Photo album binding
To bind a photo album by hand, the following steps apply:
- Choose a binding type,
- Select cover, paper & interleaving materials,
- Create the wedge-shaped book block with spacers and interleaves,
- Bind the album,
- Label (optional)
Choose a binding type
In the world of book making, there is no “right” or “wrong” way to do something (despite what people tell you). Well-tested methods often become standard. These standards create a foundation to improve and expand skills, but they’re by no means the “only way.”
Photo album bindings are an excellent example of this. While case bound albums are the gold standard due to strength and longevity, there are several other methods to choose from.
Hand sewn:
- Case binding (standard)
- Japanese stab binding
- Coptic binding
Hardware bound:
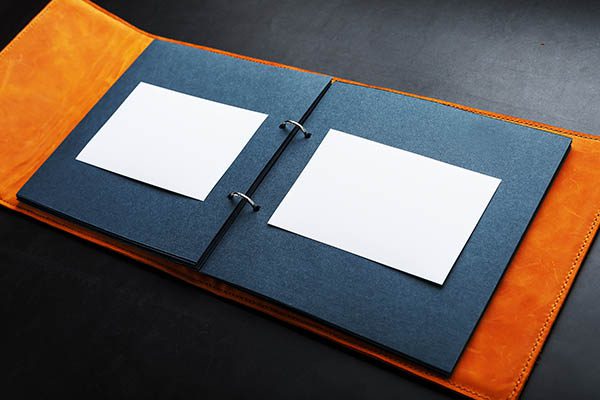
- Ring binding
- Spiral binding
- Post & nut binding
Adhesive-only (no sewing or hardware):
Select cover, paper and interleaving materials
Cover materials
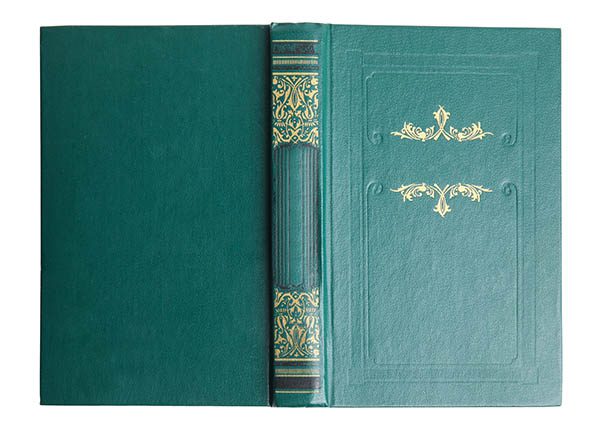
Photo albums are handled frequently, so a strong material is best. Waterproof or water-resistant materials are even better. Coverings like starched Buckram, coated bookcloth and leather are great choices. These materials allow the book to be labeled (stamped, embossed or tooled) for easy identification in your library.
Photo album paper
The paper used in a photo album is much heavier than what you might use in a journal or sketch book. Heavyweight paper will hold photos well and stand up through frequent handling and page turning. I always suggest a thickness of 250 to 300 gs/m for each sheet.
Don’t forget to purchase paper and board with the proper grain direction.
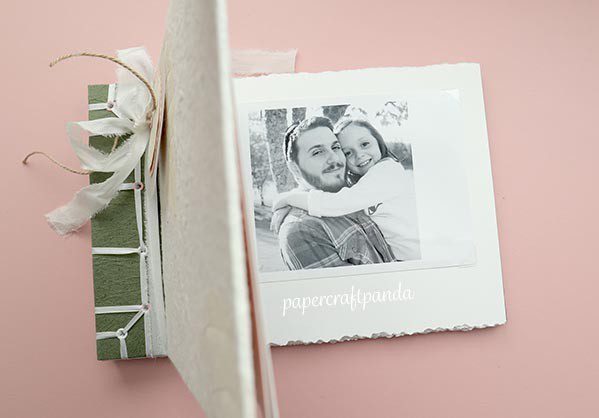
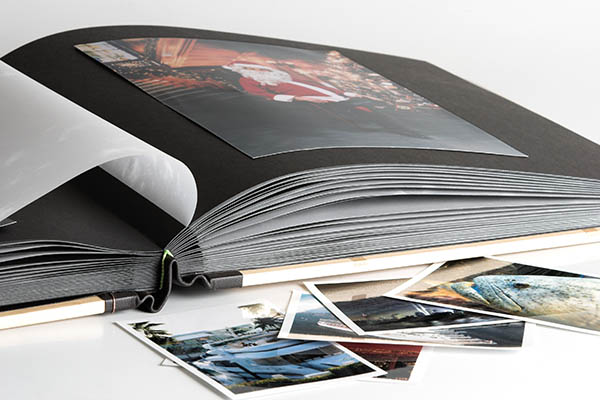
Interleaving materials
An interleaving material keeps photos and artwork safe. This material is glued to the tab on every other page. It lays flat against the photos themselves and acts as a protective layer, so it must be acid-free. Book makers usually choose glassine sheets because of their resistance to grease, air and water. They’re also acid-free and translucent, which makes them perfect for a photo album.
While glassine is great, tissue paper will also work when on a budget or if you’re looking for design alternatives.
Create the wedge-shaped book block with spacers and interleaves
A spacer on every other page to allows room for photos to fill and expand the book without damaging the spine. Book makers refer to these spacers as “tabs.” The chosen binding method determines how to add tabs for every other page.
To create tabs for a casebound photo album:
- Crease one end of every other signature to create a fold for sewing and tab for spacing, OR
- Cut away a portion of every other page in each signature to leave a spacer behind
Bind the album
A fully assembled book block is ready for binding. Depending on which method you choose, this could be a long or short process.
For standard case bound photo albums, sewing on supports and creating a case is necessary. Learn more about the case binding method.
(optional) Label the photo album
Photos track events in our lifetime, so there are usually a few albums present in every house. Choosing a different color for every album is a smart way to differentiate. Labeling is another option if you have the tools or access to do so.
Book makers label albums using one or more methods. Some methods are better than others depending on the cover material. Others, such as hardware, are good for any type of album. This list is just a sample as there are tons of unique ways to label and decorate a book.
- Stamping
- Tooling
- Embossing
- Embroidery
- Hardware (plates, brads, etc.)
I really hope you enjoyed and learned something new from this overview of how to create a photo album using traditional bookbinding methods.
Good luck!
More bookbinding goodness
✨ What tools do I need to get started bookbinding?
- Bookbinding Tools & Supplies Quick Start Guide – learn all about book making tools, which to buy first & where to go online
- Pick up my popular Complete Starter Bookbinding Tools Kit – all the bookbinding essentials in one spot
🌟 Looking for a simple way to start making books?
Try a Complete Book Materials Kit. Each one has everything you need (+ tutorials & videos) to make a beautiful book without all the fuss.
Thank you for taking me along on your book making journey!
Misty


