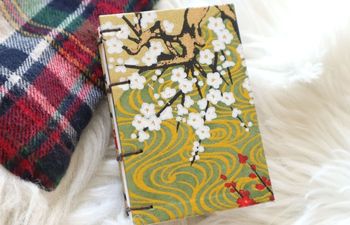
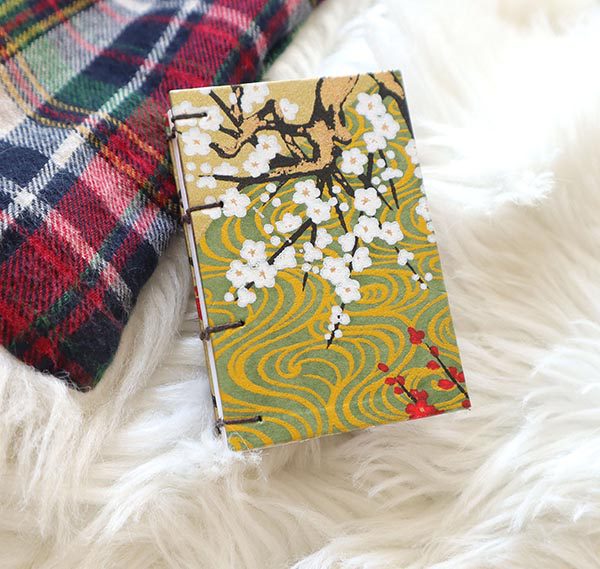
If you’re new to book making and/or simply interested in learning the coptic binding method, this tutorial is for you! I’ll walk you through the steps to sew a coptic sketchbook, but we’ll make it miniature. This is a great way to learn the method, because it requires very few materials and leaves lots of room for general error. Plus, you’ll walk away with a beautiful mini book that can be gifted to someone you know or care about, making it the perfect choice for a unique holiday gift.
I recommend preparing enough materials for two mini books so you’ll always have a second if the first has too many errors for your gift-giving taste.
Bookbinding Tutorial: Mini Coptic Binding
Measurements: 3″h x 2″w
Cost Level: $
Skill Level: Intermediate (this tutorial assumes you know how to sew a link or Kettle stitch)
Total Time: 45 minutes – 1 hour
What is a Coptic Binding?
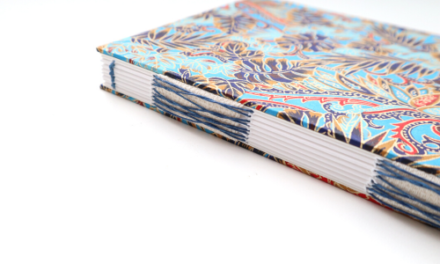
Coptic bindings have been around since the 2nd century AD (so, a long ass time). They’re characterized by an exposed spine and use very little adhesive. The boards are covered separately (no case) and individually sewn to the signatures using strong linen thread. Since the spine is exposed, it’s important to reinforce it as much as possible. This is achieved by adding an even number of sewing stations along the spine and ensuring the inner text block is flush with the top and bottom boards.
Coptic bindings make awesome sketchbooks and journals because they lay open flat on any given page. Since the spine is exposed, it also offers a lot of creative potential for the book artists out there.
Now that you know what these are, let’s make one!
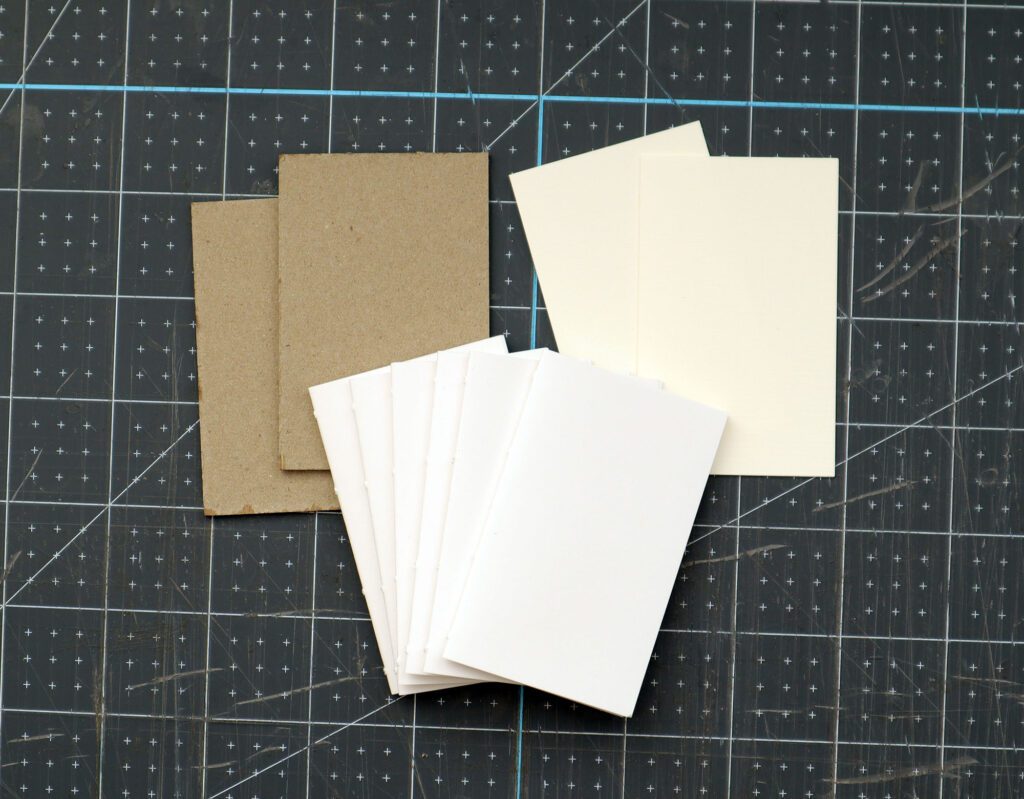
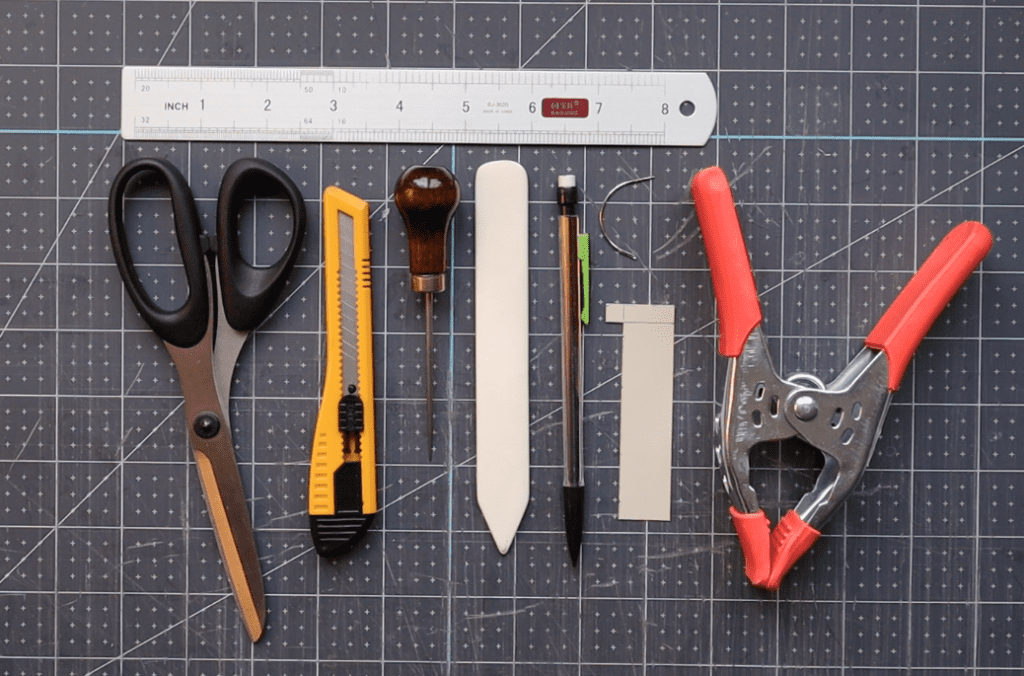
Mini Coptic Binding Materials:
- 18 sheets of your favorite paper cut to size 3″h x 3-3/4”w; folded size 3″h x 1-7/8“w
- 2 endsheets, each cut to size 3″h x 3-3/4”w; folded size 3″h x 1-7/8“w
- Two pieces of book board (or up-cycled cardboard), each cut to size 3″h x 2″w
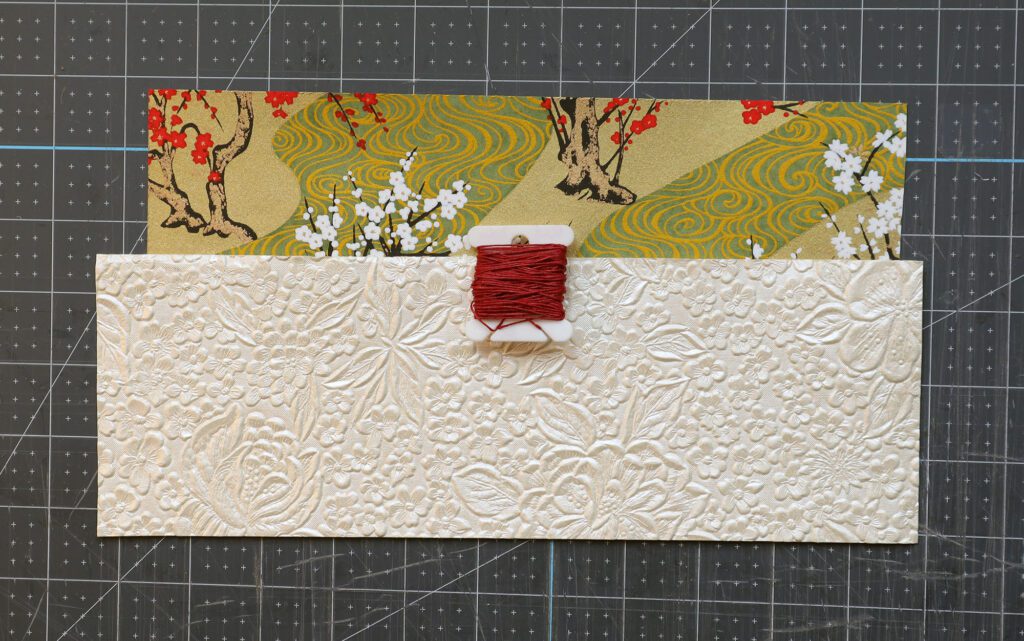
- 2 sheets of cover paper (60-85gsm is perfect), each cut to size 3-1/2″h x 2-1/2″ wide
- 2 endpapers of your choice (to be glued down to the boards), each cut to size 2-3/4″h x 1-5/8″w
- 1 strip of scrap paper 1″h x 3-1/4″w, to be used as a template
- 1 sheet of newsprint or thin waste paper to absorb water
- Waxed thread of choice, 9x book height (roughly 27″)
- PVA adhesive (Elmer’s Glue will also work)
Tools
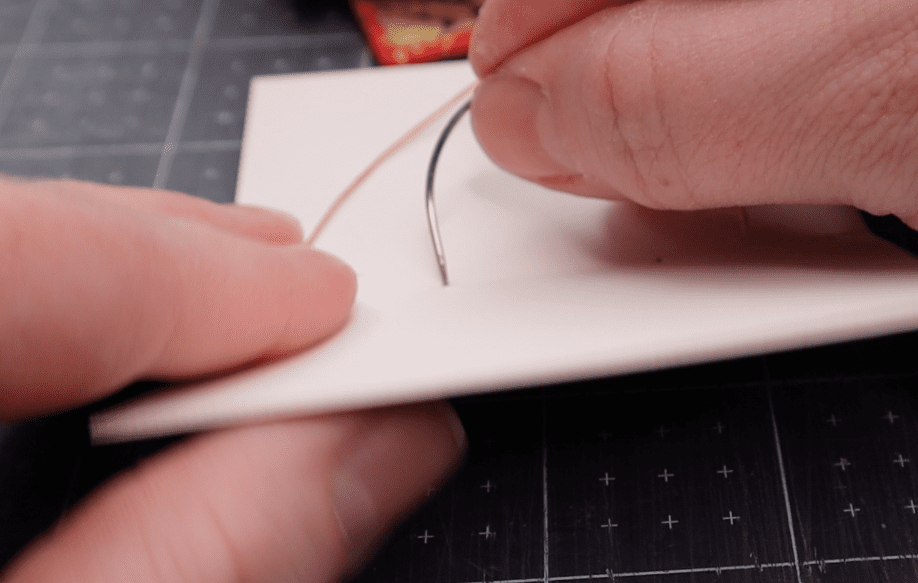
- Awl, 6″ tapered
- Small curved binding needle (straight will also work, but curved is easiest to work with)
- Bone folder
- Olfa knife
- Ruler
- Scissors
- Pencil
- Heavy book or weighted bean bag
- Optional:
- paste brush (or just use your fingertip)
- corner jig (can also use your ruler or simply “eyeball” it)
Steps:
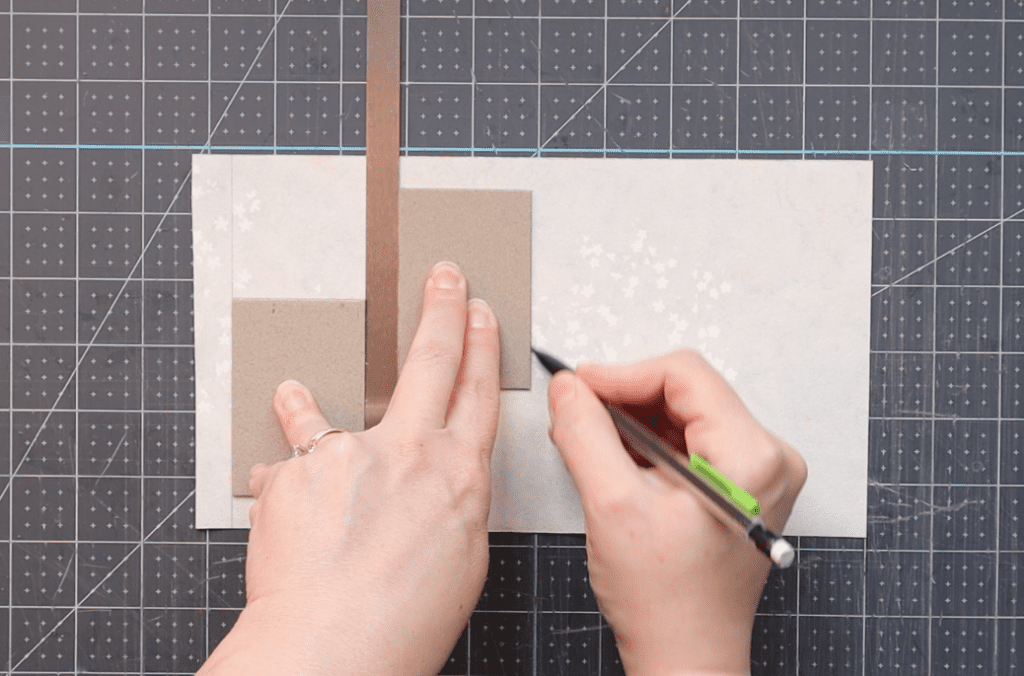
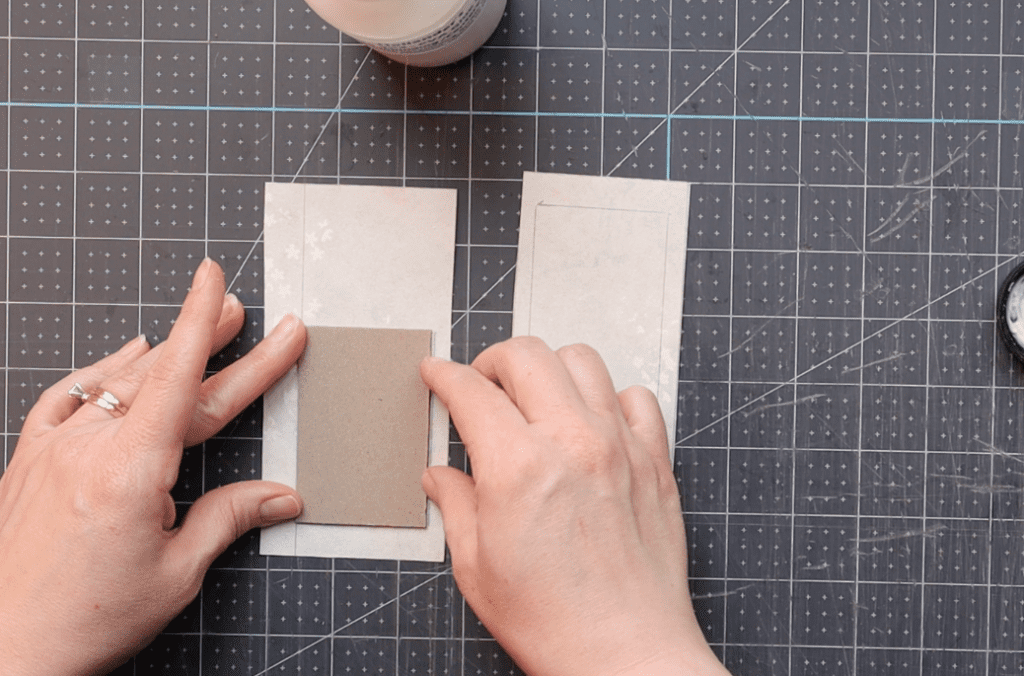
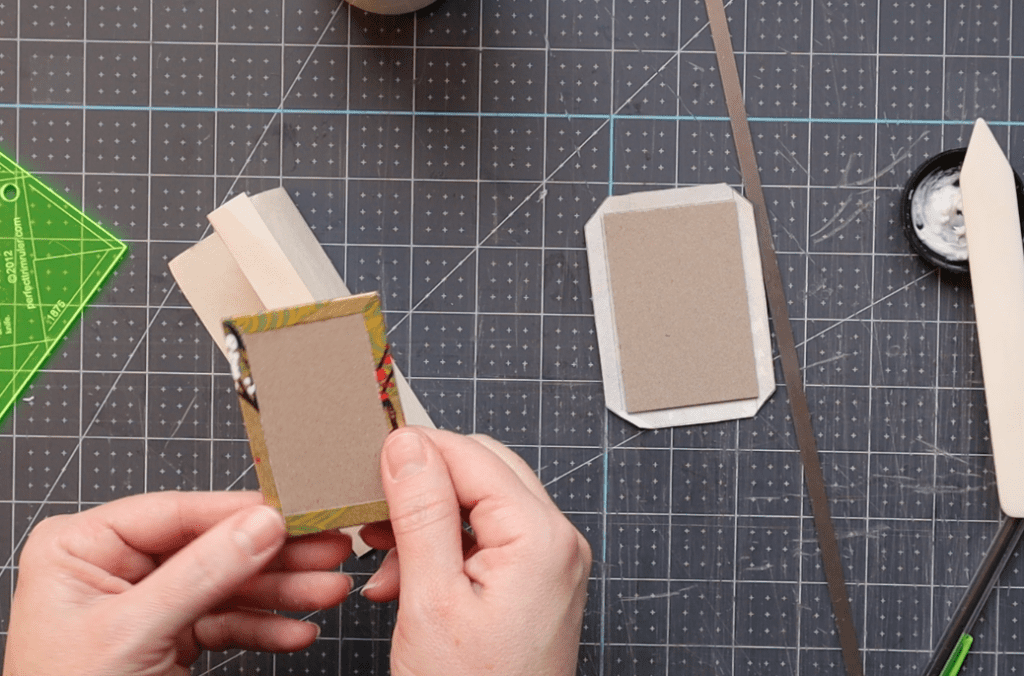
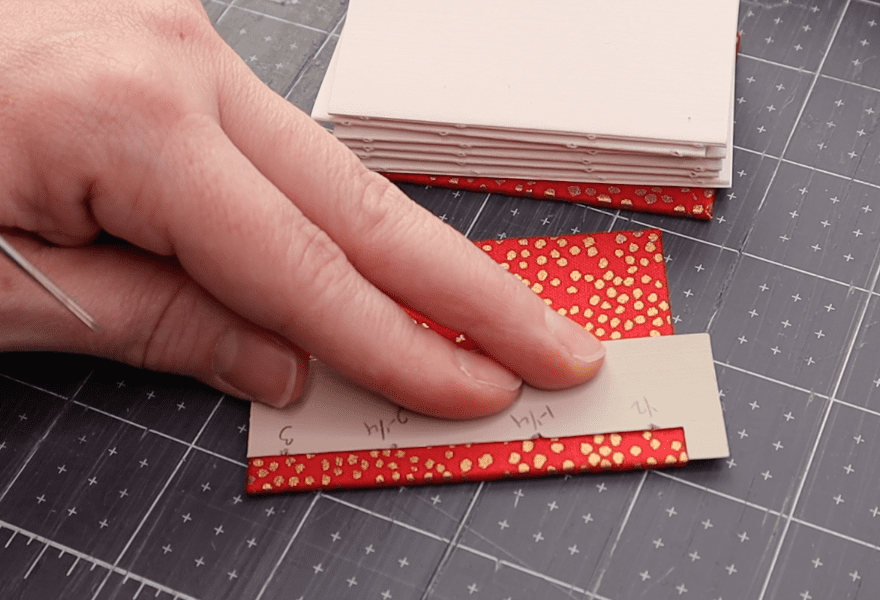
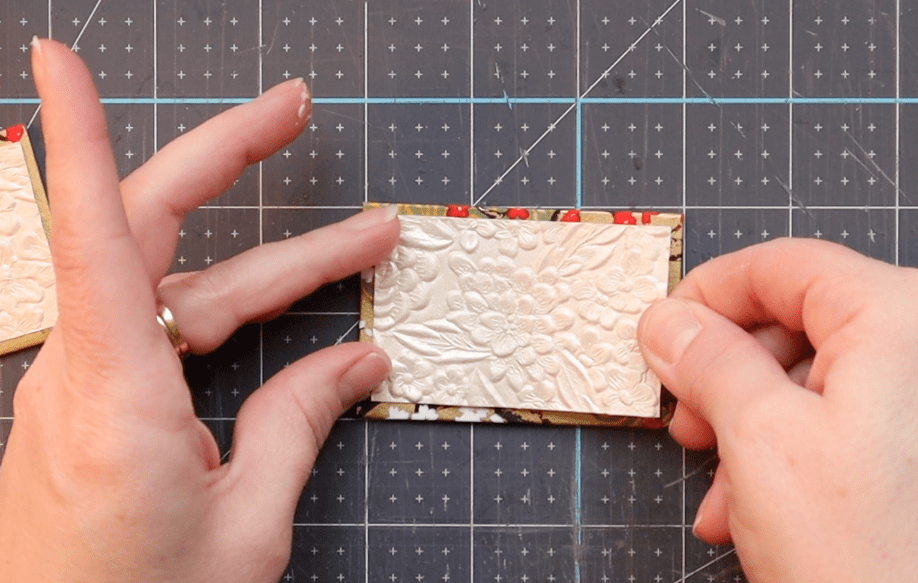
Cover the mini boards
- Position one board onto the back of each cut piece of cover paper, roughly centered so that there is 1/4″ of excess material around each edge
- Using a pencil, trace the position of the each board
- Apply a thin layer of glue to the back of each board
- Position the board glue-side down onto the cover paper inside the trace marks
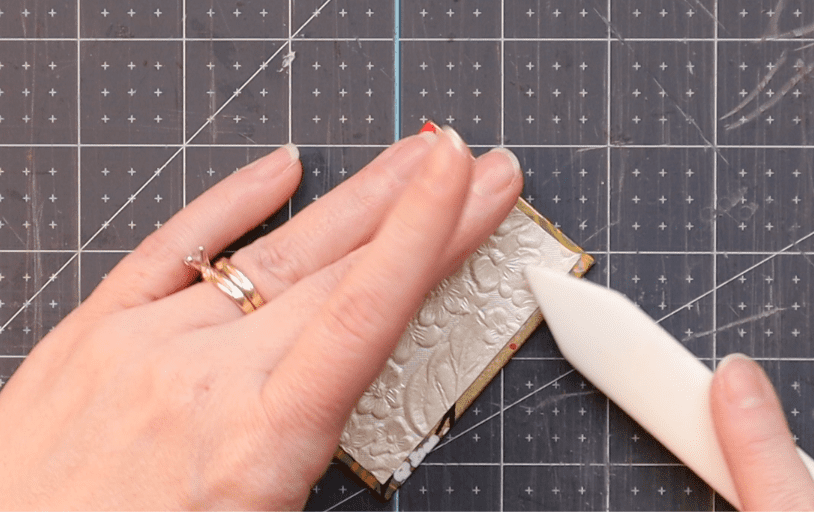
- Press each board with your fingertips, and then smooth with a bone folder to remove excess air
- Turn the board over and smooth the cover paper softly with a bone folder
- Once smoothing is finished, return the cover paper to a face down position (with board up)
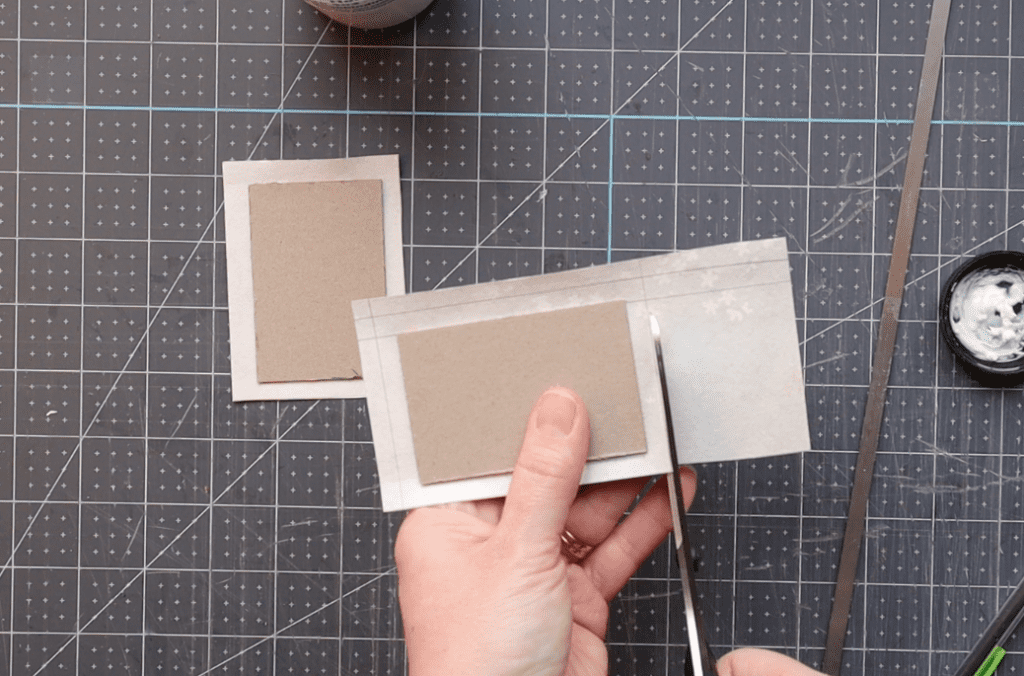
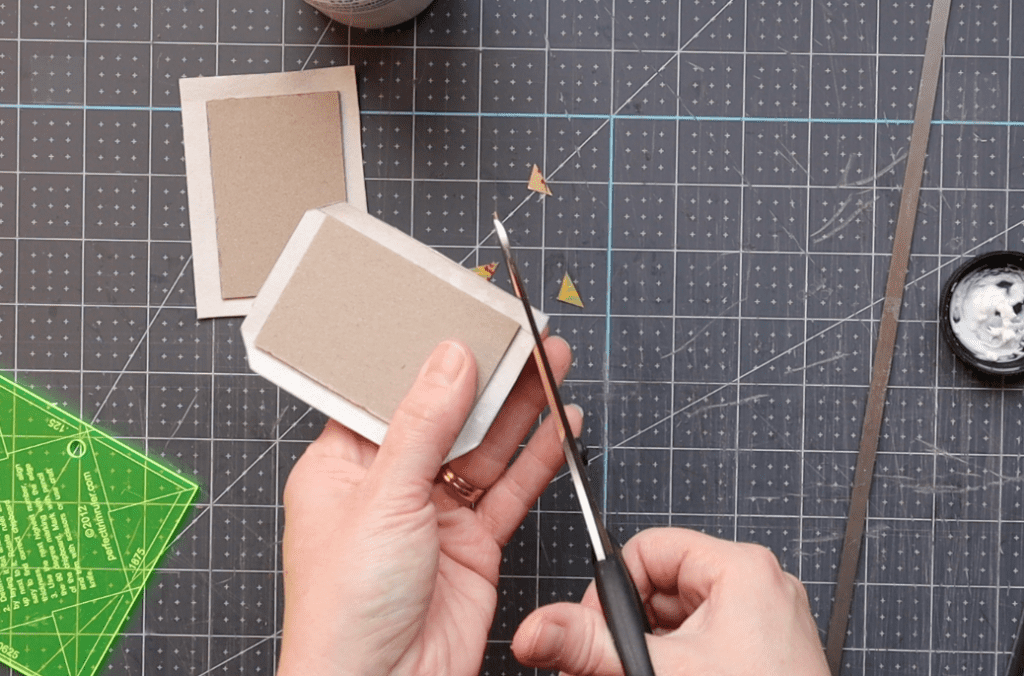
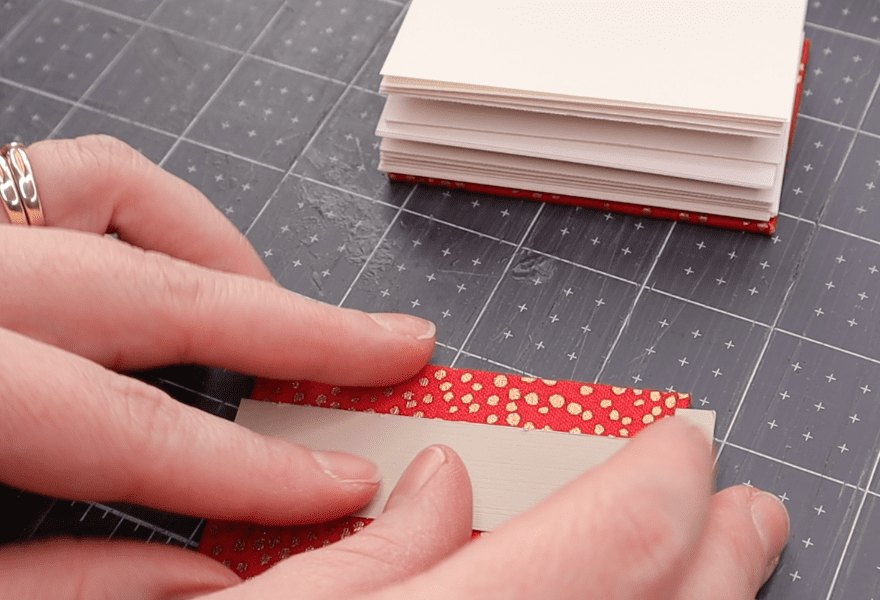
- Using your ruler, measure outward from each corner 1/8″
- With a scissor, cut diagonally across the mark for each corner
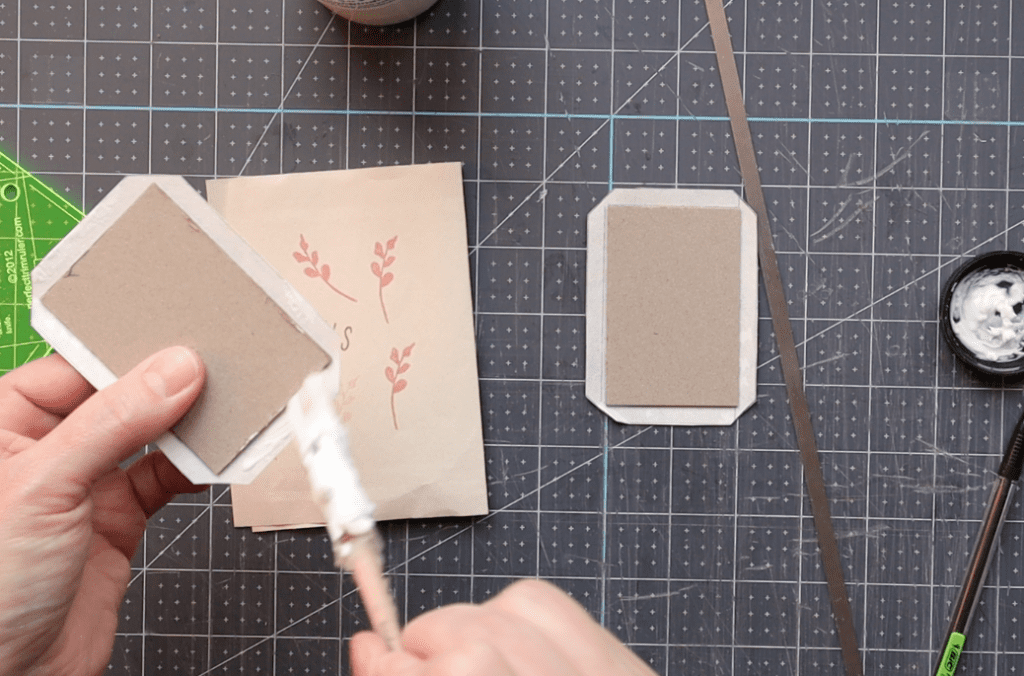
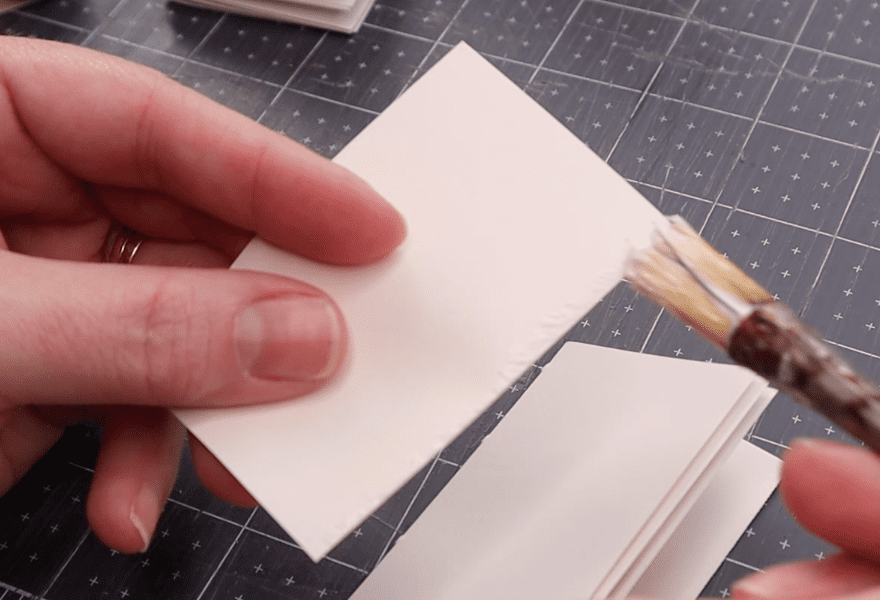
- Apply adhesive to the top and bottom using a fingertip or small paste brush
- Fold the top and bottom edges over the board and press with your fingertips to remove excess air and glue
- Apply adhesive to the left and right edges using a fingertip or small paste brush
- Turn in each corner using the tip of your bone folder (technical video below)
- Fold the edges over the board and press with your fingertips to remove excess air and glue
- Sandwich the tiny boards between a sheet of newsprint and a heavy book or weight and set aside for 5 minutes
Video Technique: measuring & turning corners
*More on this can be found here in my Casebinding tutorial series
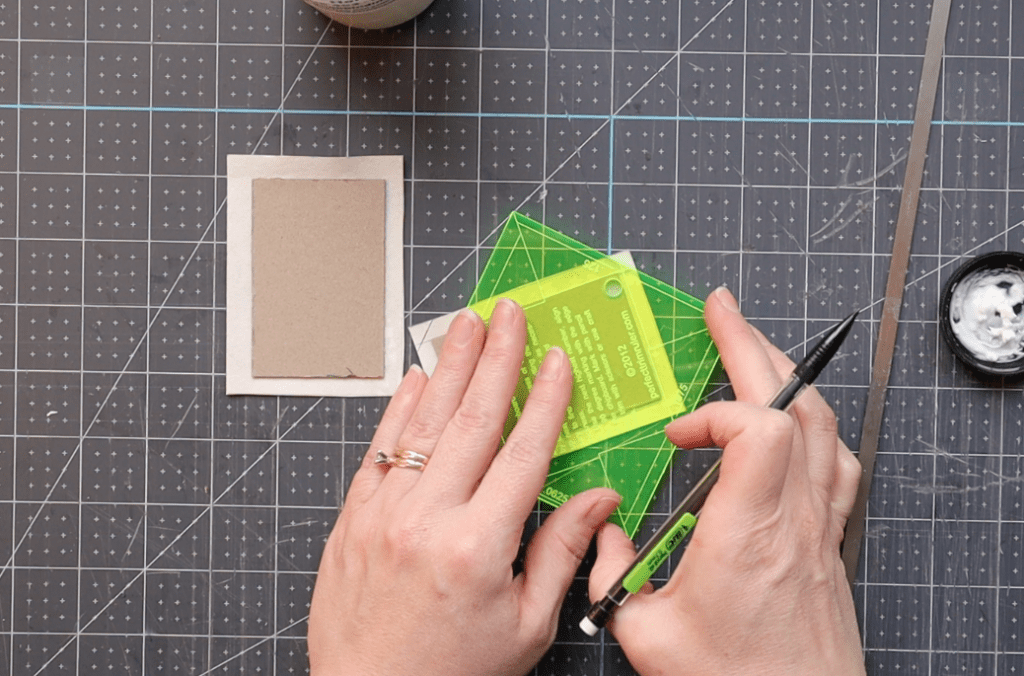
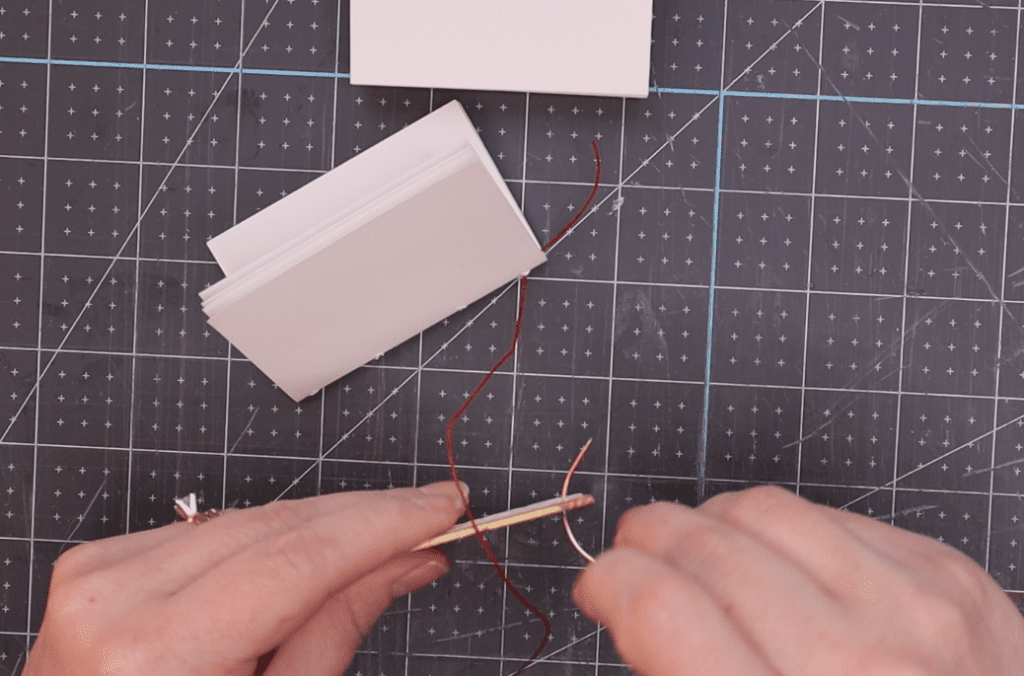
Create a piercing template
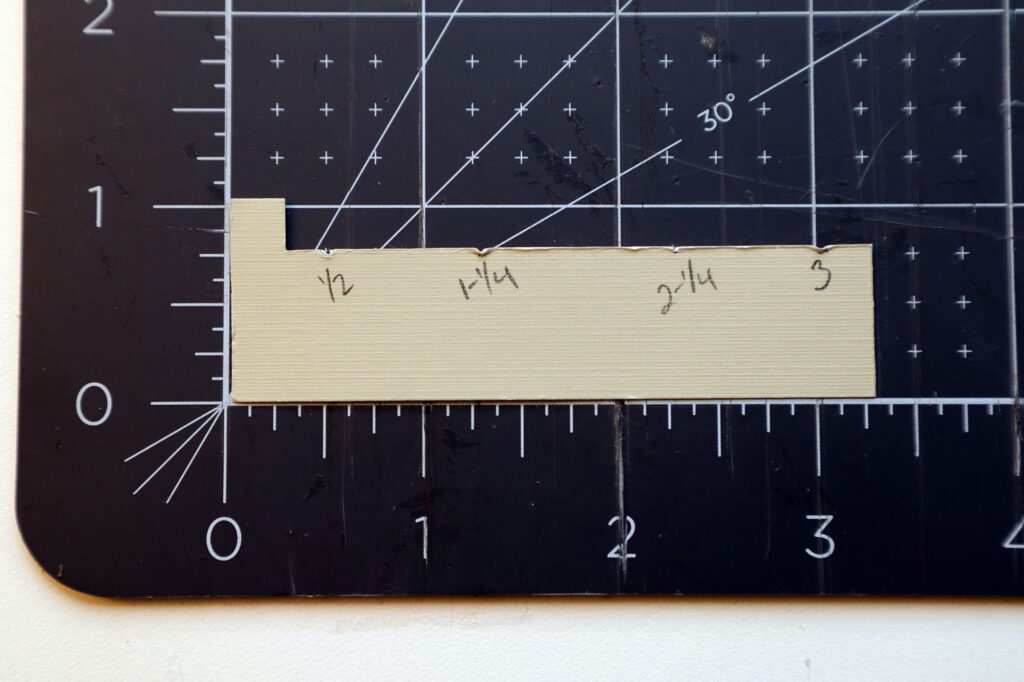
- Hook Template
- Measuring to the right from zero at 1/4″ and up from zero at 1-3/4″ inch. Make a mark with your pencil
- Using a ruler, draw a line from that mark to the right edge and from the mark upward
- Using an Olfa knife, cut along the two lines you’ve just created to make a “L” shape. The piece you’ve cut away is 1/4″ in width, making it easy for you to mark your boards later on
- Using a ruler, measure and mark 4 sewing stations on the horizontal edge (mine are 1/2″, 1-1/4″, 2-1/4″ and 3″)
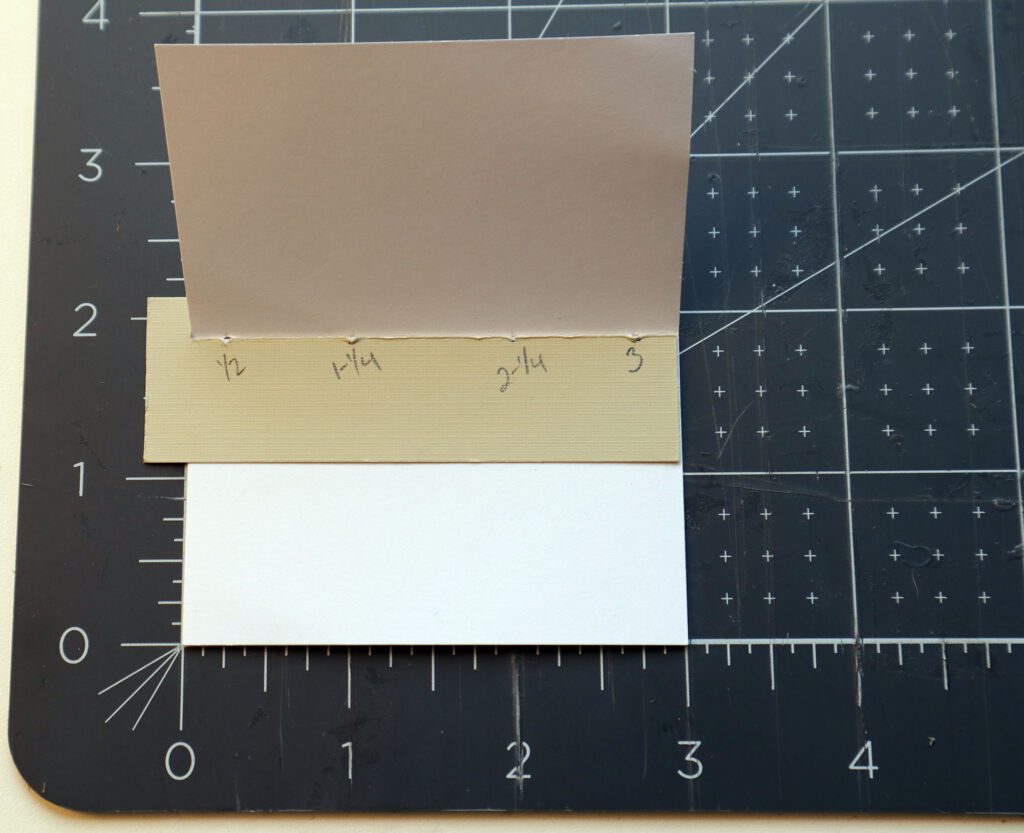
- Regular Template
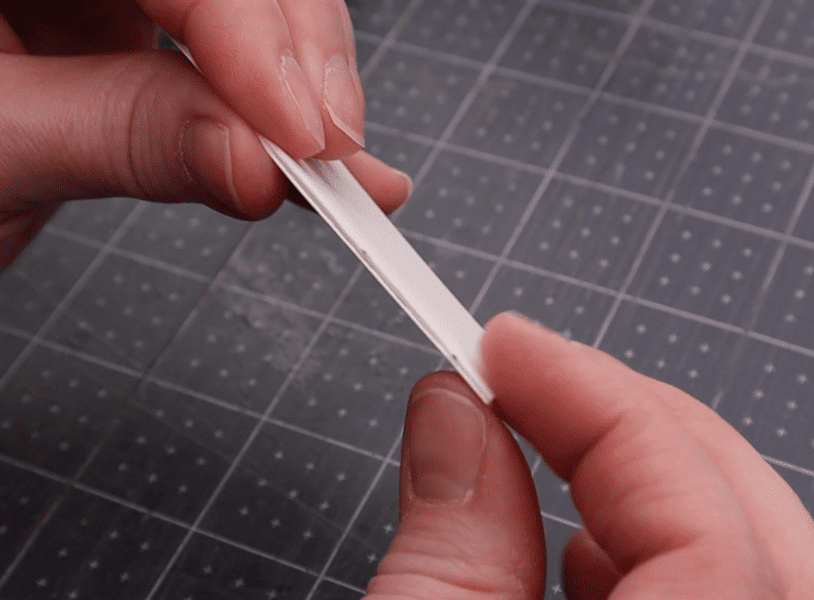
- Cut a strip of paper to 3″ wide by 3/4″ tall
- Using a ruler, measure and mark 4 sewing stations on the horizontal edge (mine are 1/2″, 1-1/4″, 2-1/4″ and 3″)
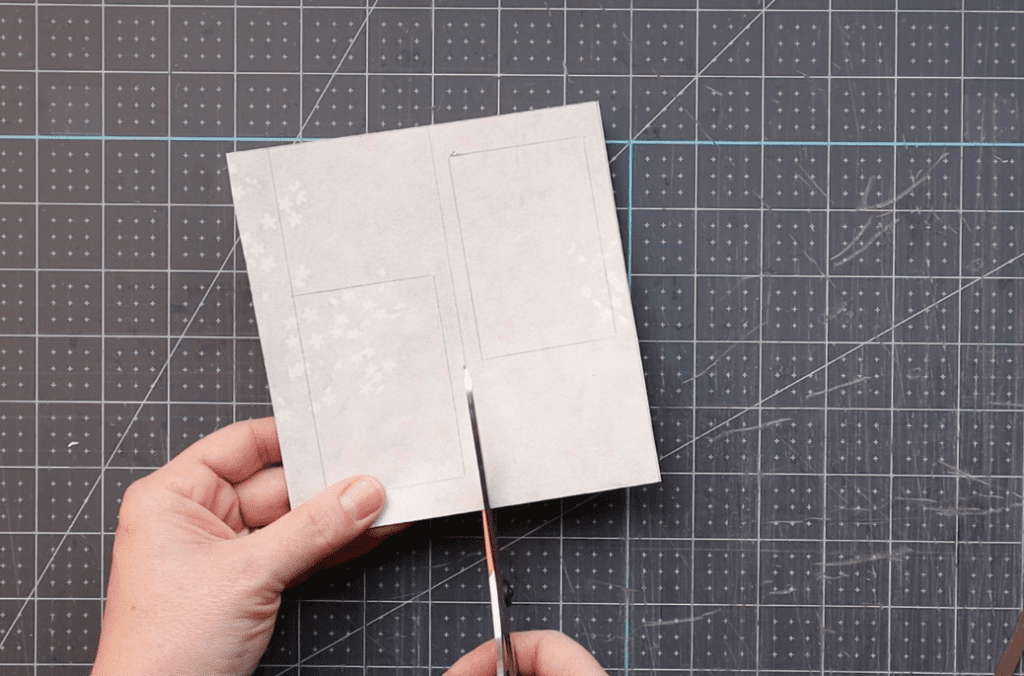
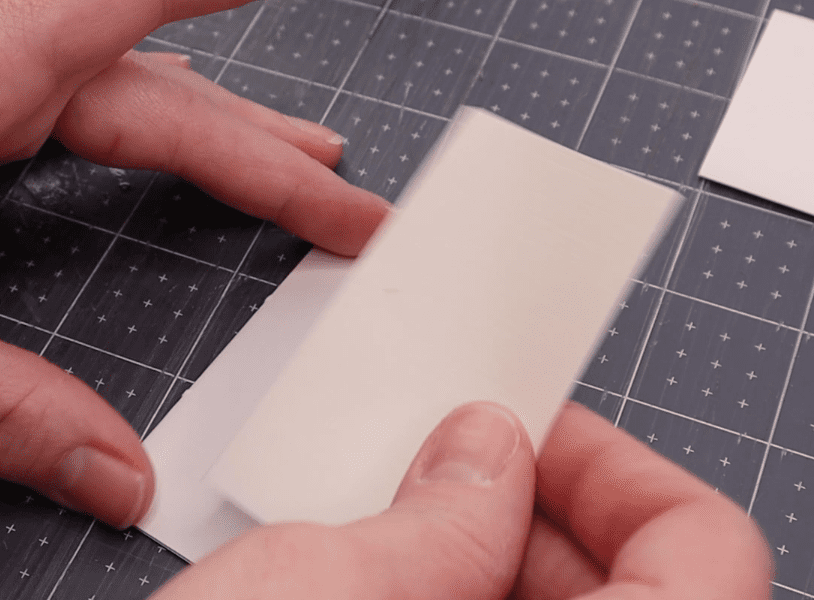
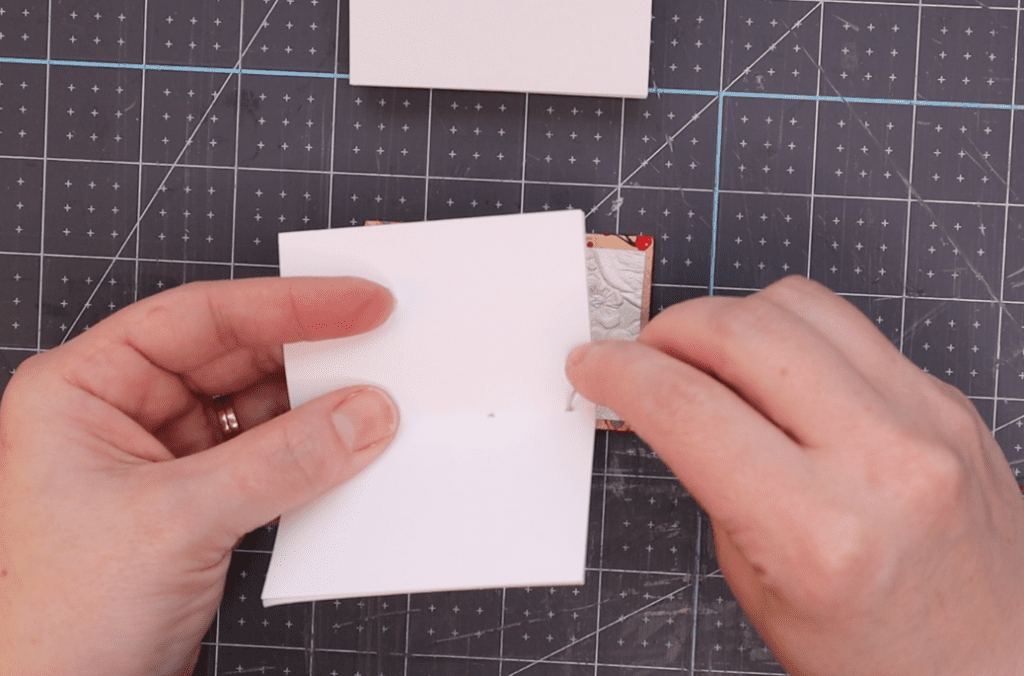
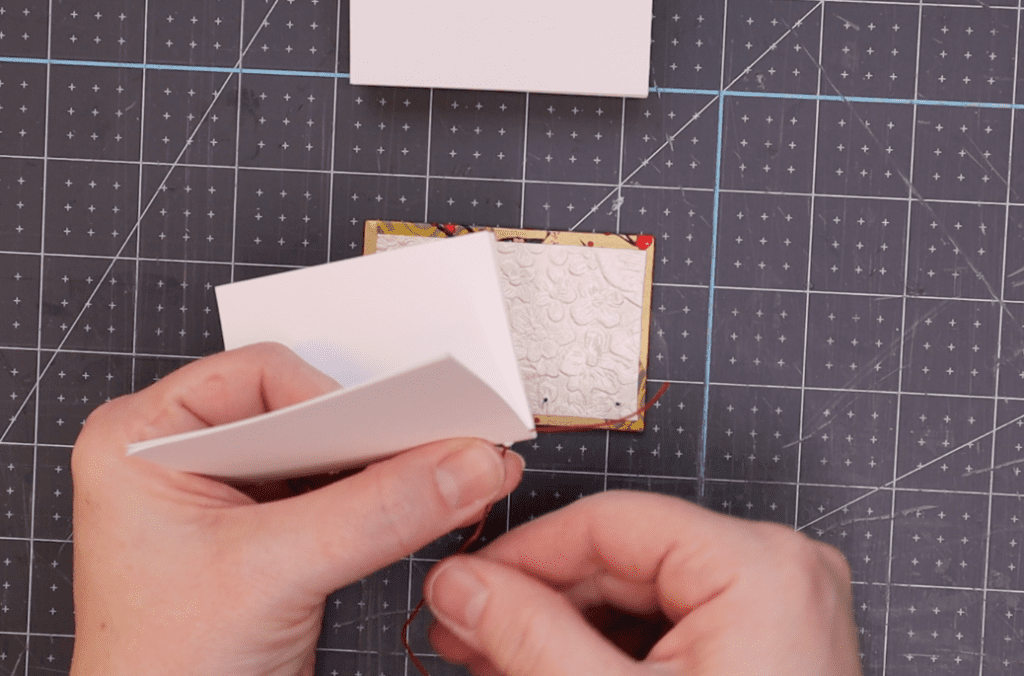
Fold & assemble signatures
- Break the 18 sheets of paper into stacks of 3 sheets each. You should end up with 6 stacks
- Using the fold down method, fold each stack in half and crease with a bone folder from center outward to right and left
- Fold each of the 2 end papers in half individually and crease with a bone folder
- Open each signature and line up the template with the inner crease
- Mark each sewing station with a pencil
- Using a tapered awl, pierce the sewing stations at the marked locations. Repeat with all 6 signatures

Video technique: folding the signatures for a mini coptic binding
Video technique: marking & piercing sewing stations for a mini coptic binding
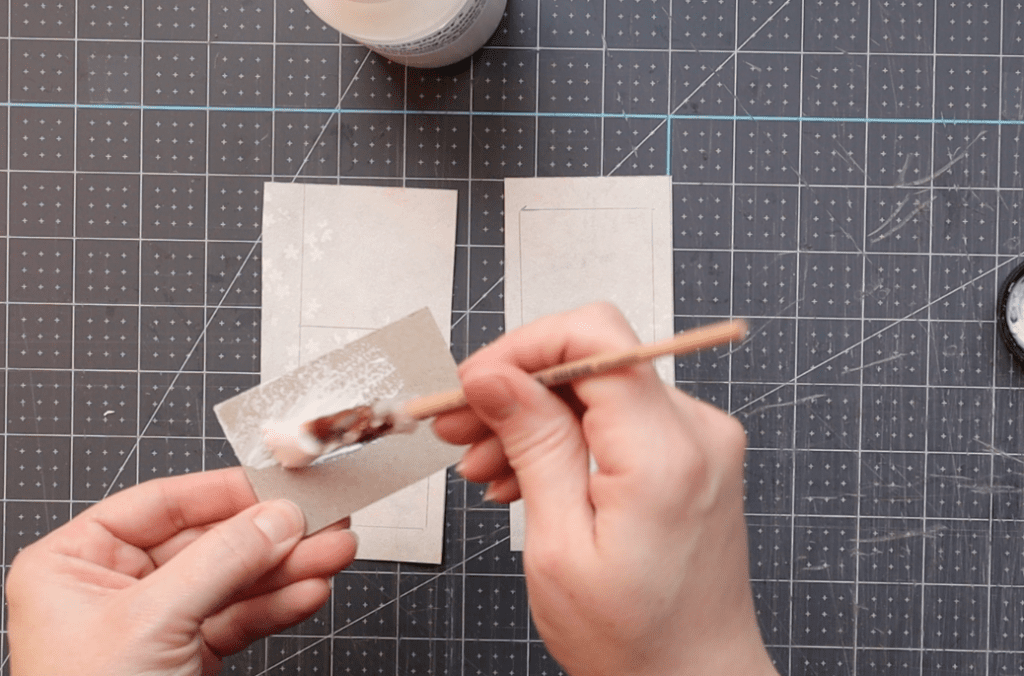
Prepare the endsheets (called “tipping in”)
In this step, we’re going to glue two individual endsheets to two individual signatures. In bookbinding, we call this “tipping in.” It’s a quick and easy way to attach the endsheets to the book without sewing them in directly.
- First, choose the top and bottom signatures. Make sure they don’t get out of order
- Apply a small amount of glue the edge of one endsheet (less than 1/8″ wide)
- With the glue side down, line up the creased edges of the endsheet and signature. Press down
- Smooth the edge with a bone folder to remove excess air
- Repeat this process with the second signature
Video technique: tipping in the endsheets for a mini coptic binding
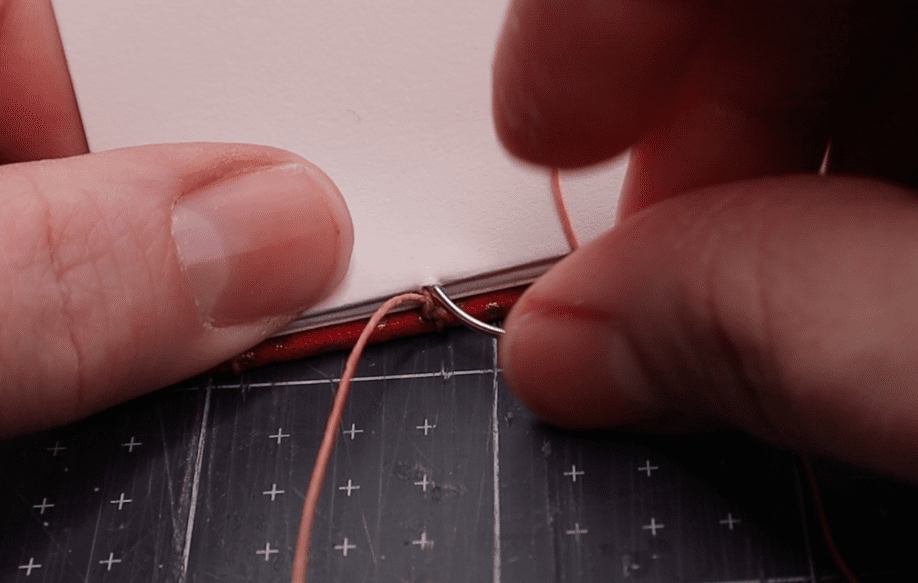
Pierce the board sewing stations
- Remove the weights from your mini boards
- Sandwich the folded signatures between the tiny boards and determine which one will be the front of the book and which one will be the back
- Lay the top board down on a cutting surface and position the template on top (be sure the “hook” of the template is outside the book, as shown below)
- Pierce each sewing station with an awl. They should be 1/4″ in from each edge. This is what the “hook” helps us to achieve, as the hook itself is 1/4″ wide
- For the bottom board, reverse the template like a photo negative and repeat the process. This part can be tricky, so take your time
Tip: when piercing sewing stations in board, move the tapered awl about 1/4″ through the board to increase the hole size slightly. Don’t overdo it. The hole should be just slightly larger than the thickness of your needle eye.
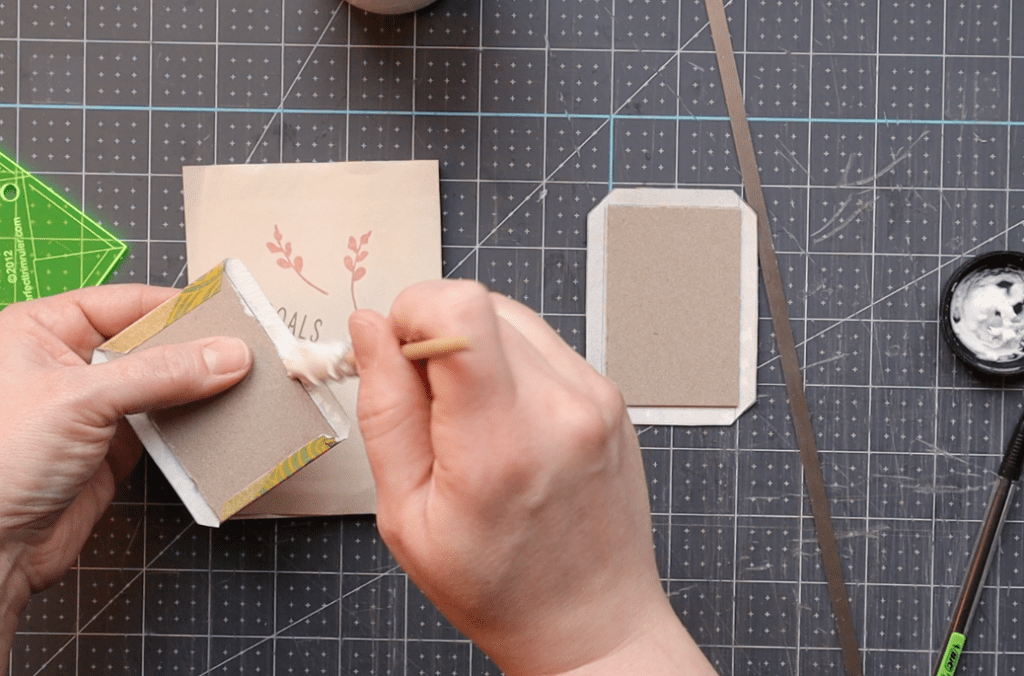
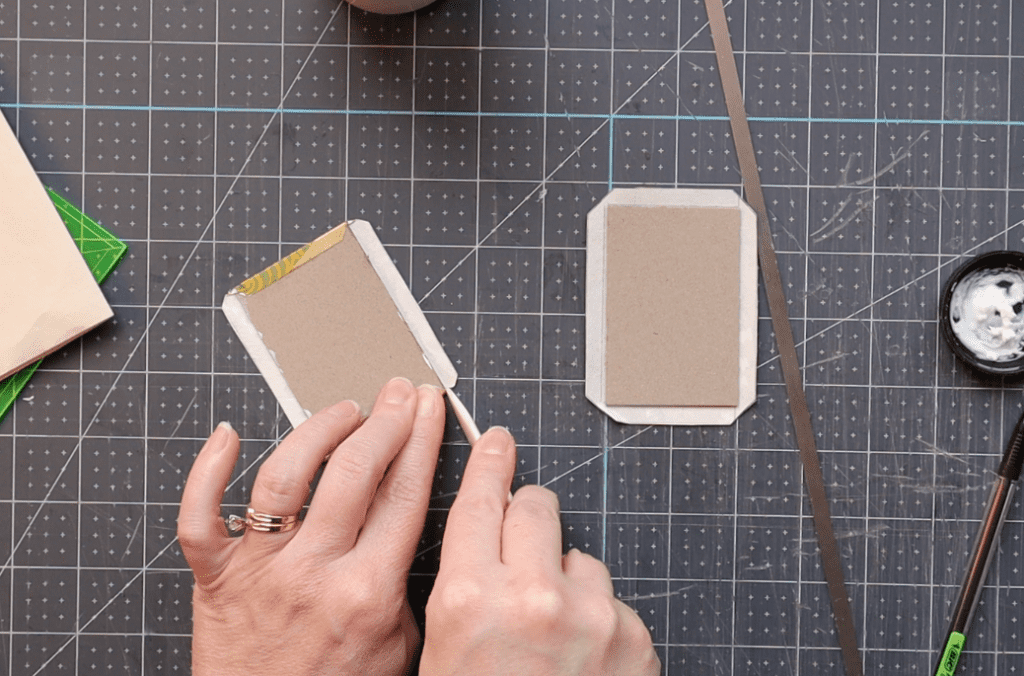
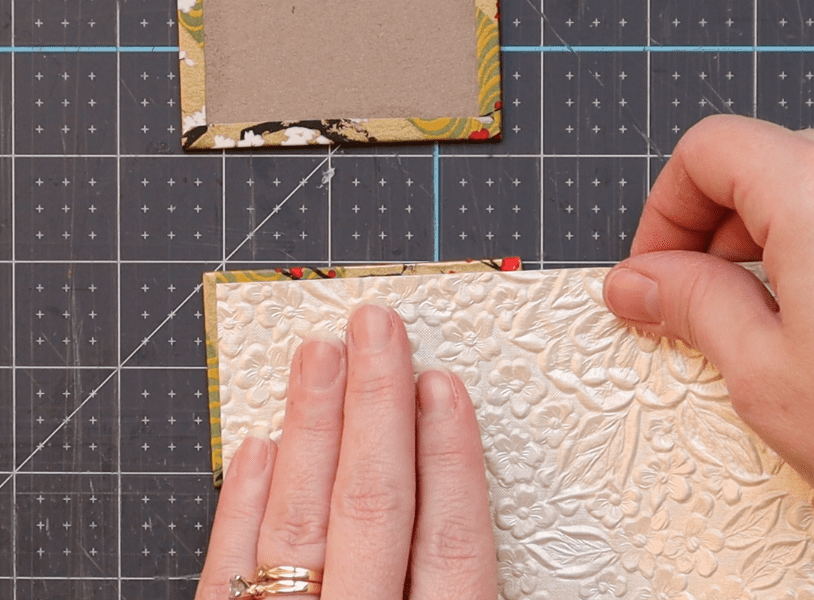
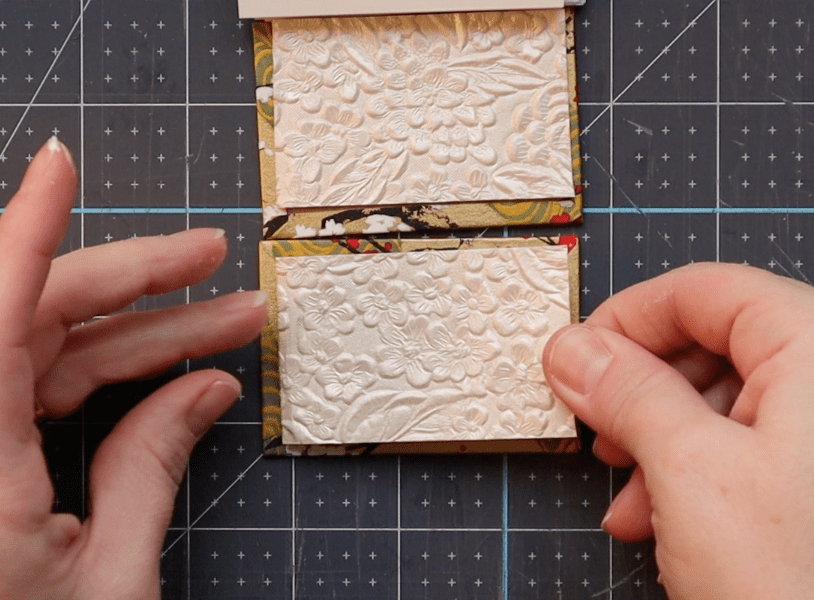
Glue down the endpapers
- Turn each tiny board over so the cover paper is face down. The exposed board should be facing up at you
- Apply a thin layer of PVA to the back of each endpaper and position it on the board so it is roughly centered with 1/8″ around each edge
- Press the sheet into place with a bone folder, removing excess air bubbles
- Repeat this process with the second board
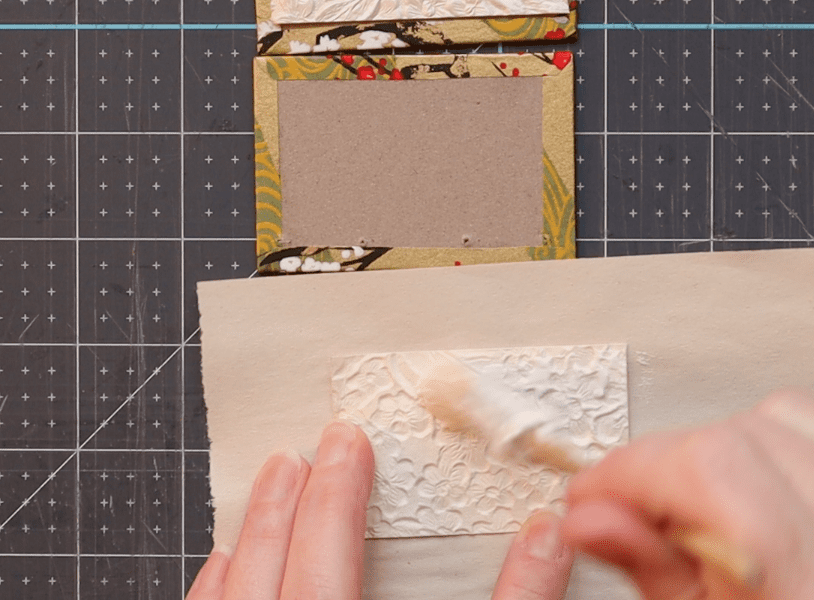
- The endpapers will cover up the holes you’ve pierced, and that’s okay! Use your awl to “re-pierce” each hole. This creates a smaller, less visible hole on the endpapers
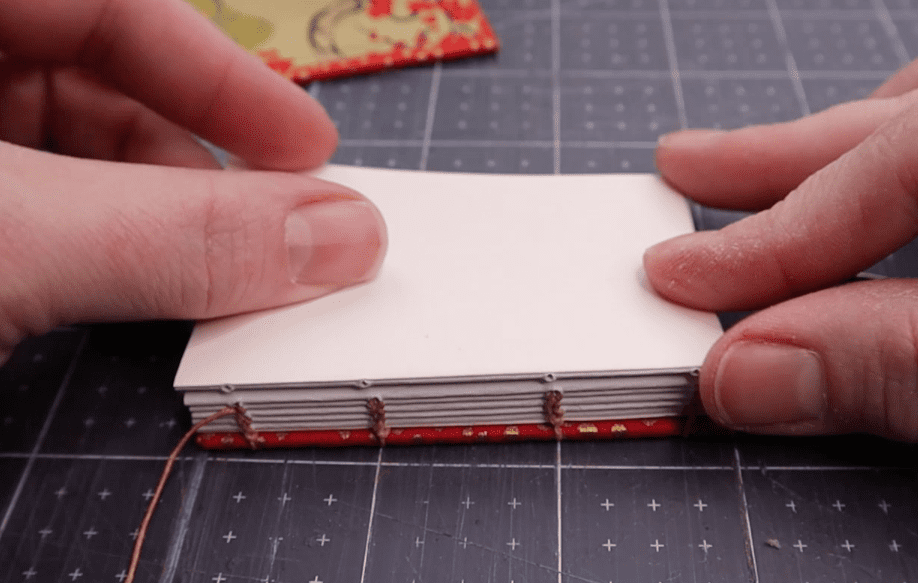
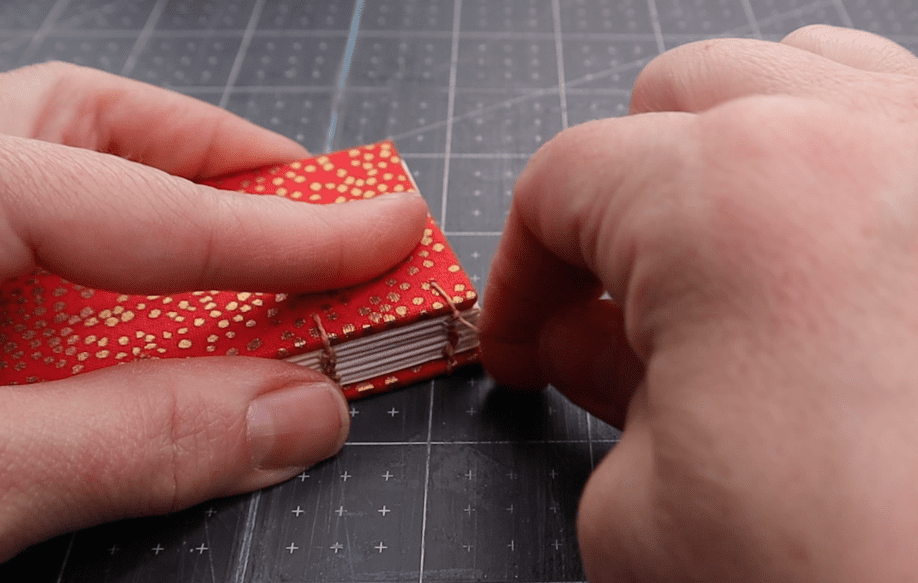
Sew the coptic binding
Before we get started, let me just say there are many different ways to sew a coptic binding. The method I’ll show you today is the most basic (and easiest, in my opinion), but it’s not the only one out there.
The steps to attach the boards can be hard to understand in written text, but I’m going to give it my best try! I’ve broken this into three stages:
- Attaching the board and first signature
- Sewing the second signature
- Attaching the last board and signature
If you get confused and are able, feel free to watch the videos!
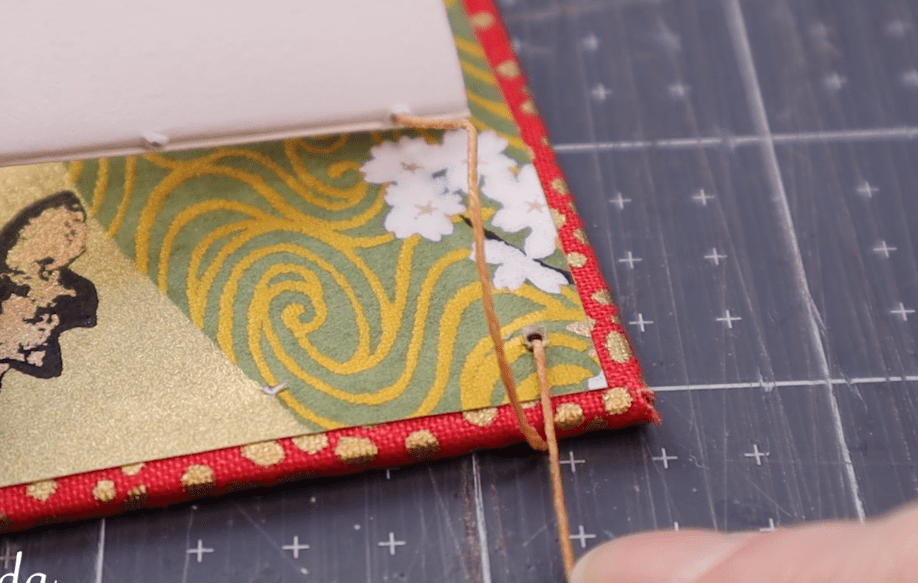
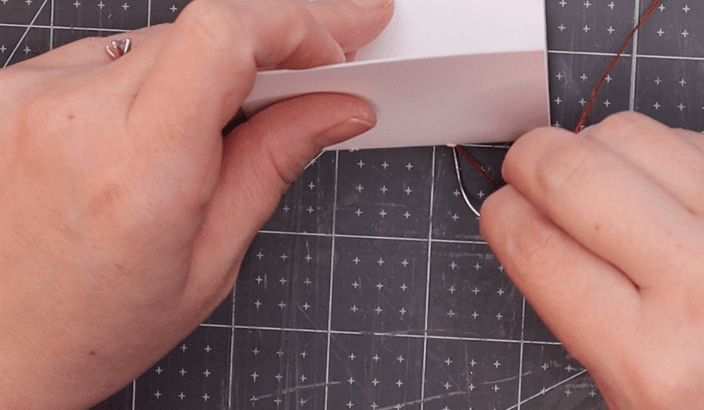
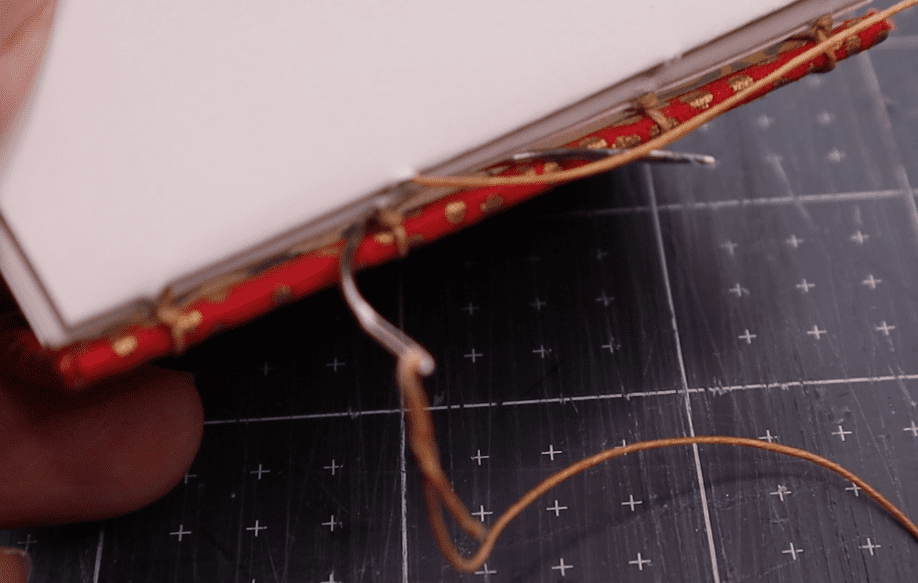
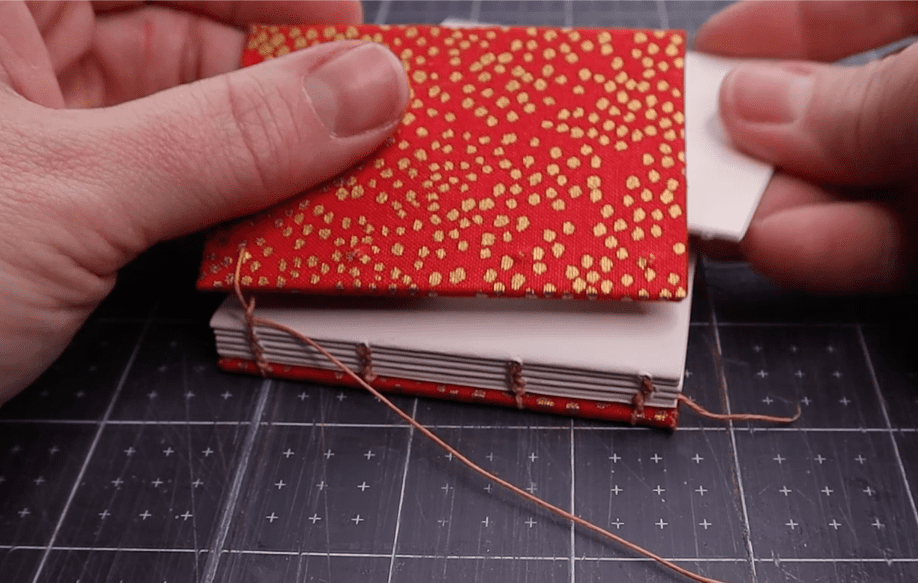
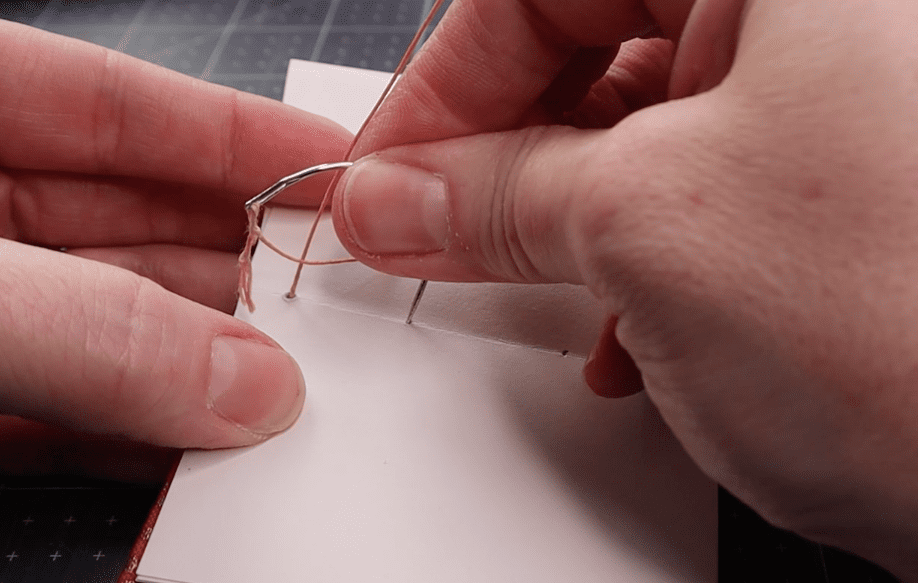
Sewing the board + first signature
This is probably the most tricky part (and of course, it comes right at the beginning)! The idea of this step is to “tie” the front cover to the first signature. To do this, we’ll sew through the first signature and into the holes you’ve pierced on the cover. If at any time you’re unsure, check the images below or watch the technique videos!
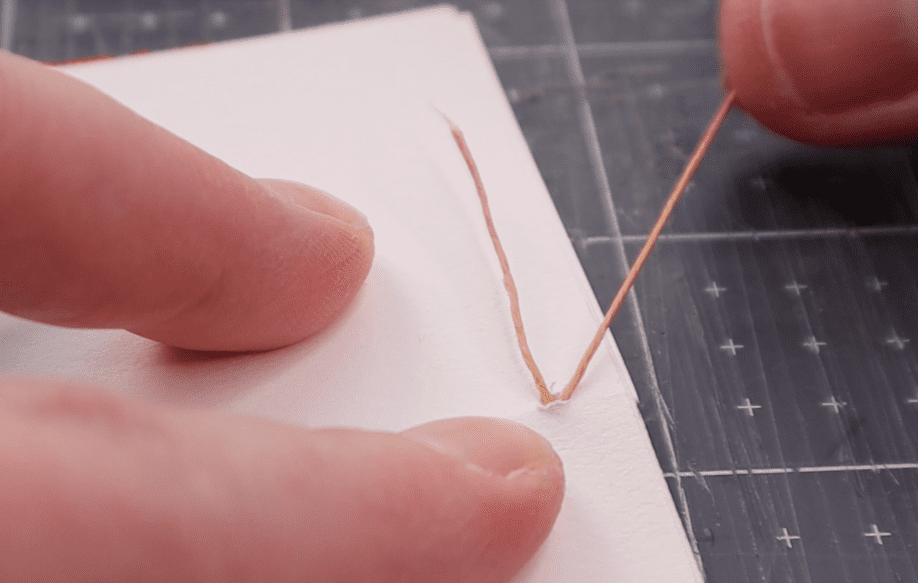
- Start at the first hole inside the first signature at the top of the book
- Move through the hole to the outside and pull until only 2″ of thread is left inside the signature
- Move around the spine edge onto the outside of the side cover. Go through the corresponding hole on the cover, from outside to inside
- Move the board down so it is flush with the first signature and pull the thread. This will tie the board and first signature together
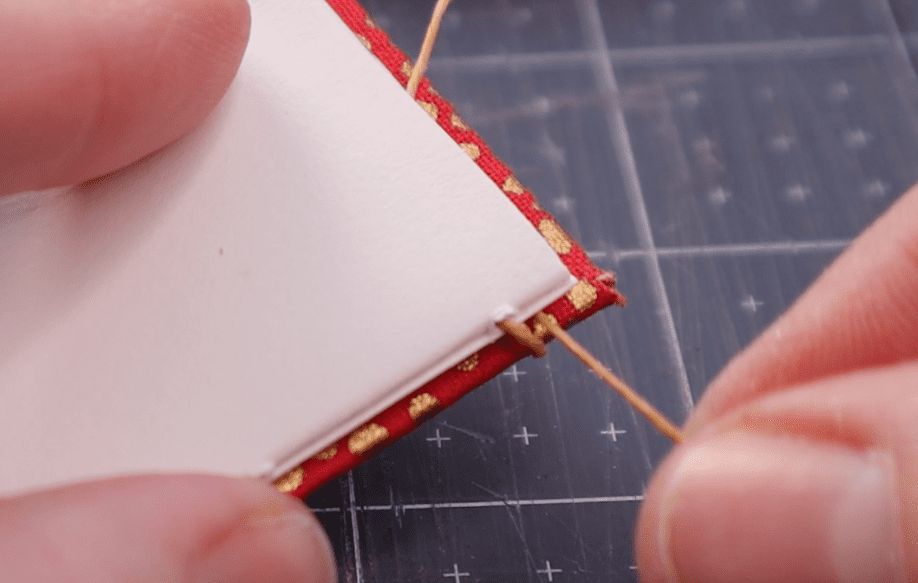
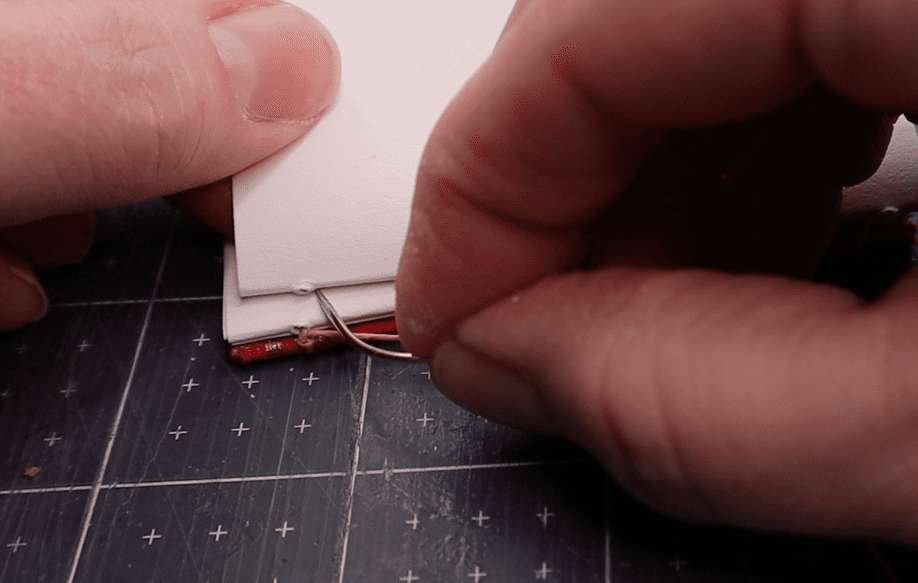
- Slip the needle behind the thread that connects the first signature and board. Pull it through and away from the spine
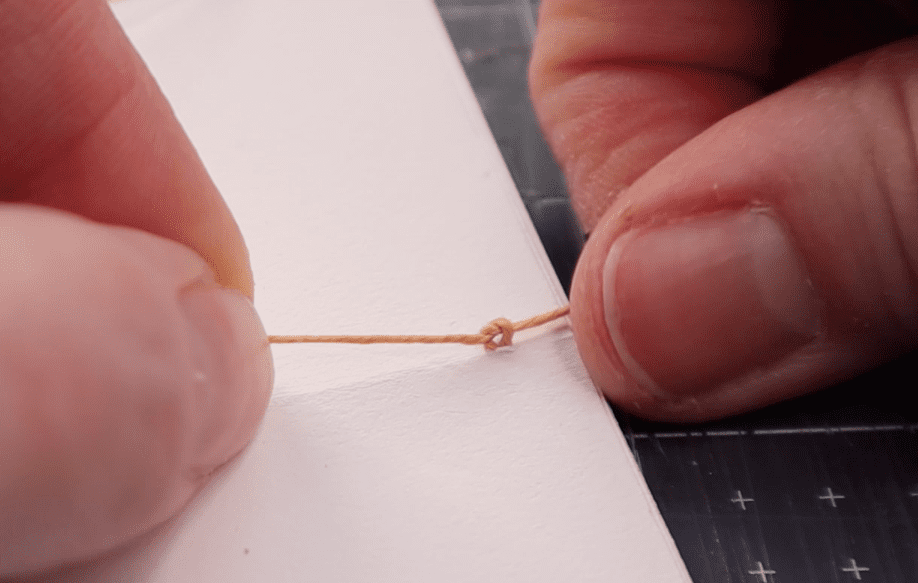
- Return the needle into the first signature and, once completely pulled through, tie it off with the 2″ of reserved thread
- Repeat this process for each sewing station until the first board and signature are held together
- Once at the end (bottom of the book), return the needle into the corresponding hole in the next signature
Video technique: sewing the first signature to the cover of a coptic binding
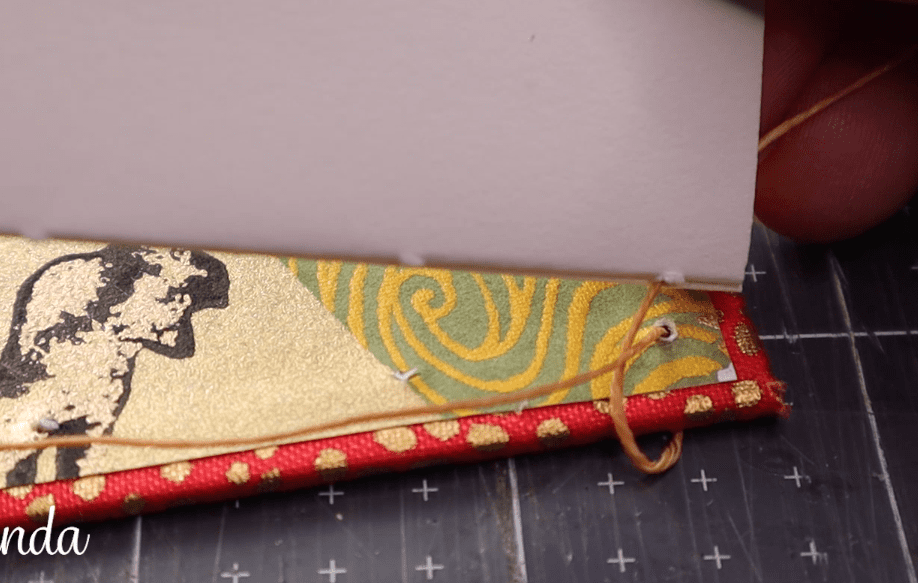
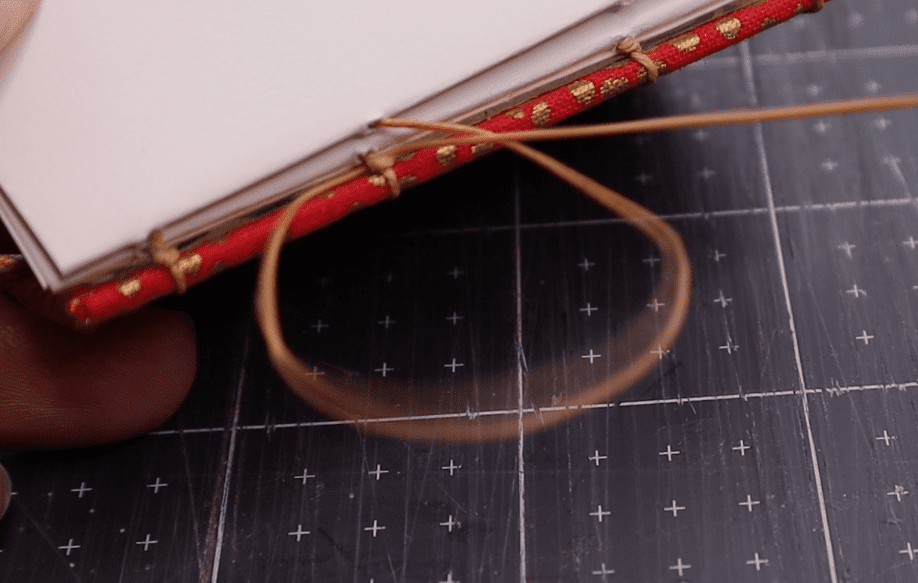
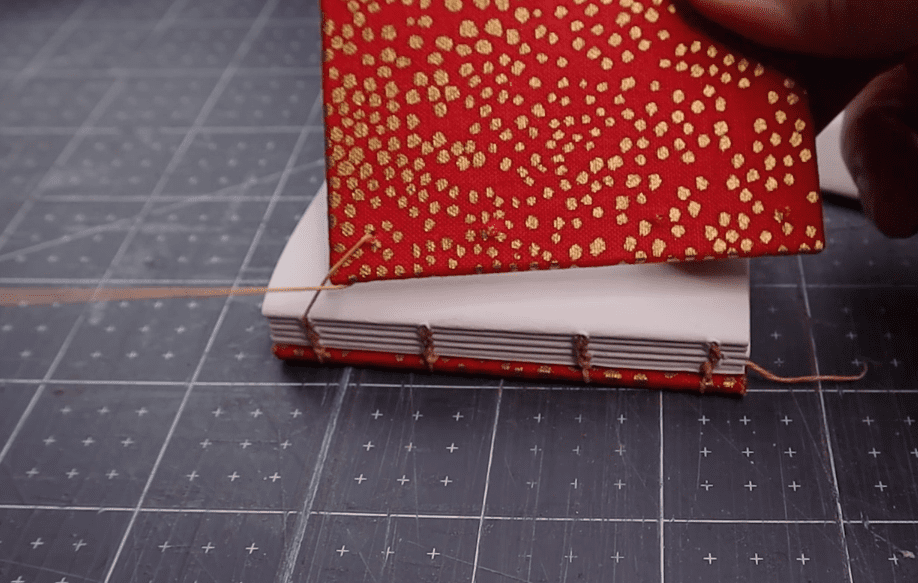
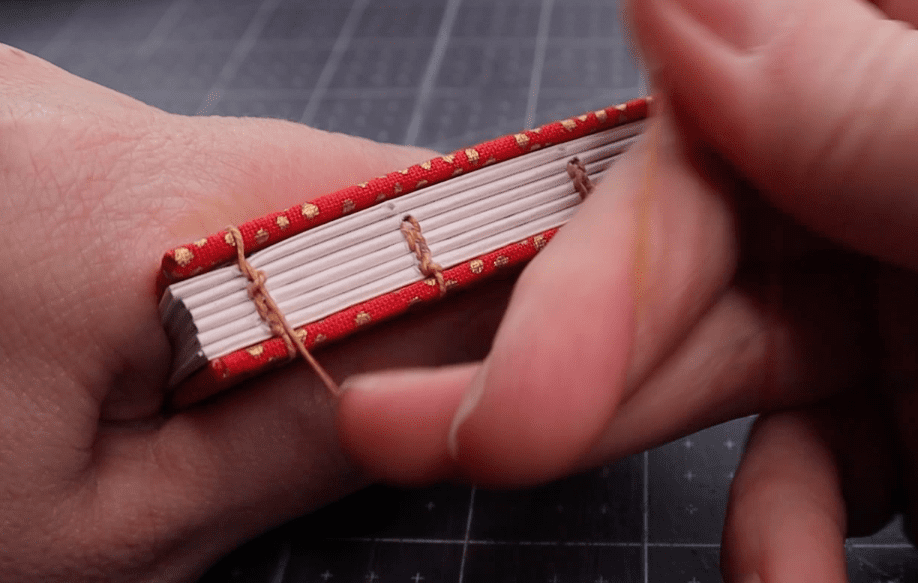
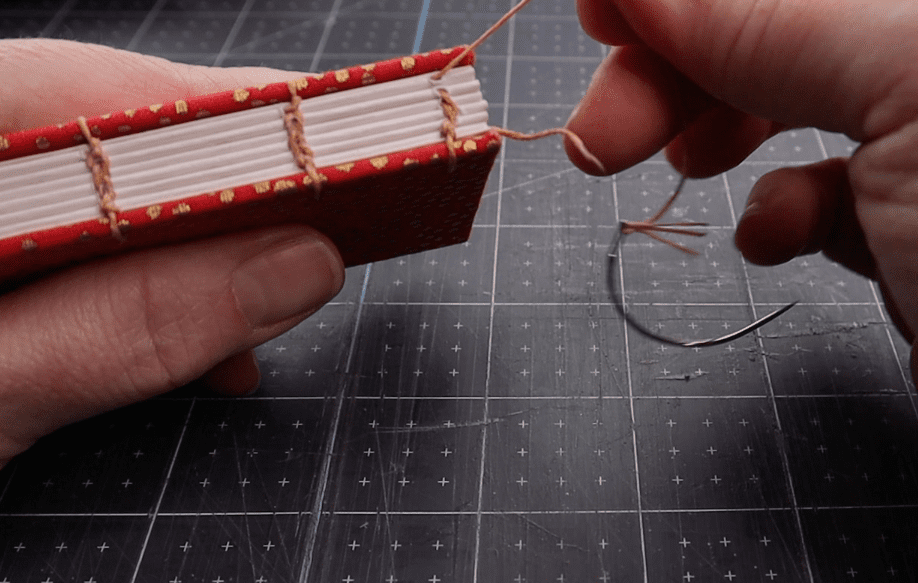
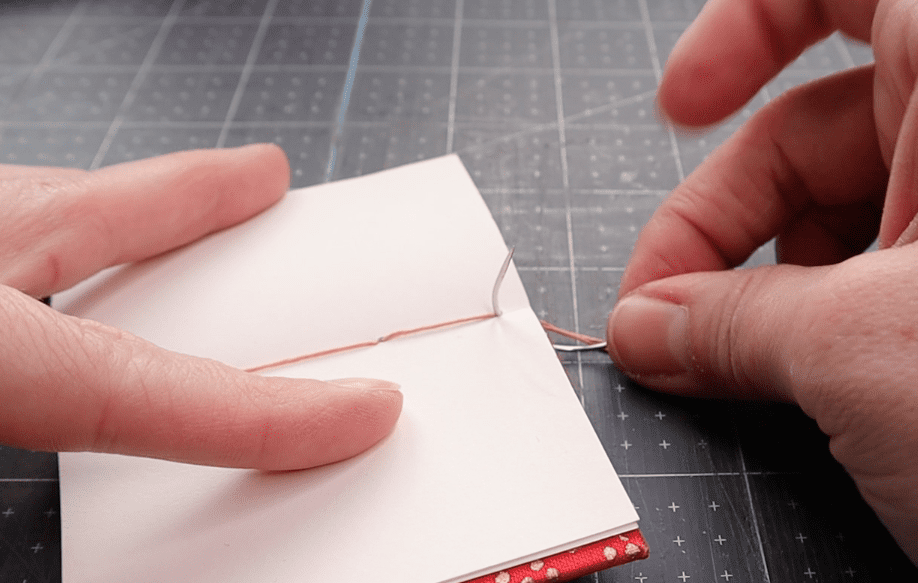
Sewing the second signature
While the first signature is arguably the “hardest,” the second one can also be tricky. This is because you’re securing the second signature to the first by looping your needle behind the thread holding the first signature and board together. It’s unlike any other signature by far, so that’s why I’m calling it out separately. Again, if you get confused, check the images or watch the videos 🙂
- The needle will be inside the second signature. From here, move it through the next hole from inside to outside and pull thread tight
- Once outside, take the needle under the threads connecting the board and first signature. Pull tight
- Return the needle into the second signature through the same hole, careful not to pierce the previous thread
- Repeat this process until the 3rd, 4th and 5th signatures are in place
Video technique: sewing the second signature of a coptic binding
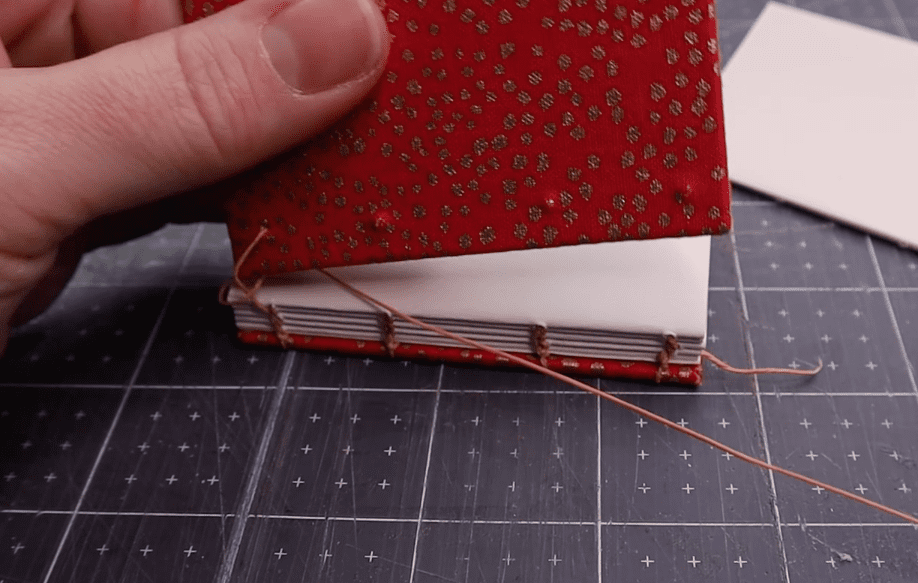
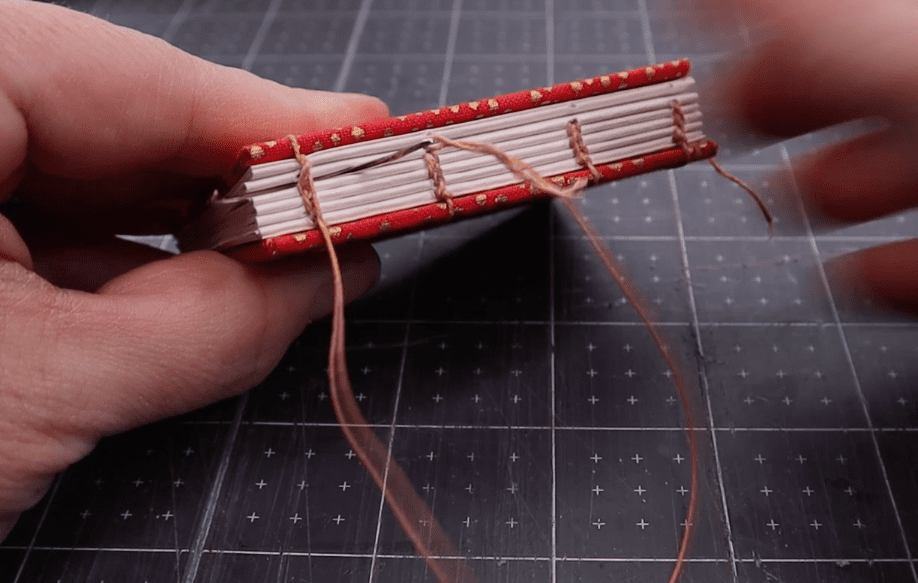
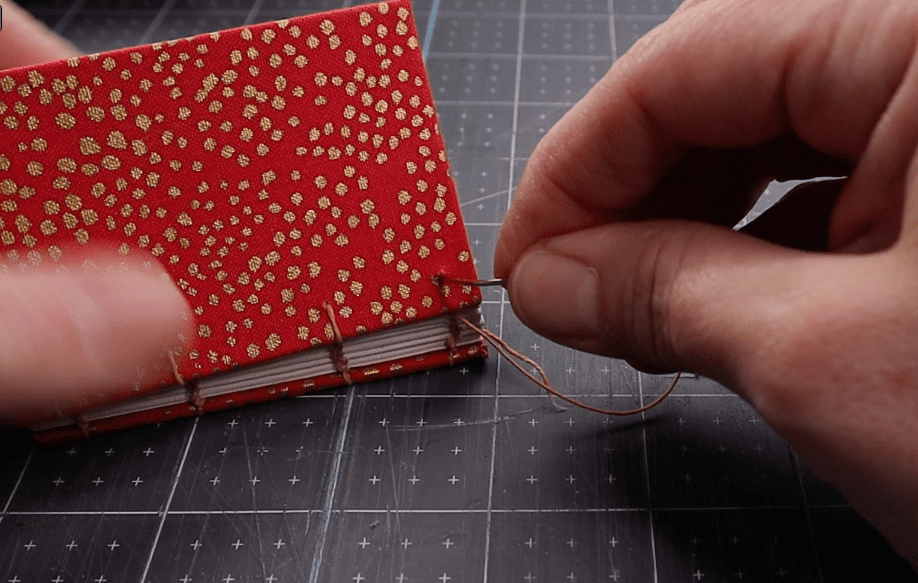
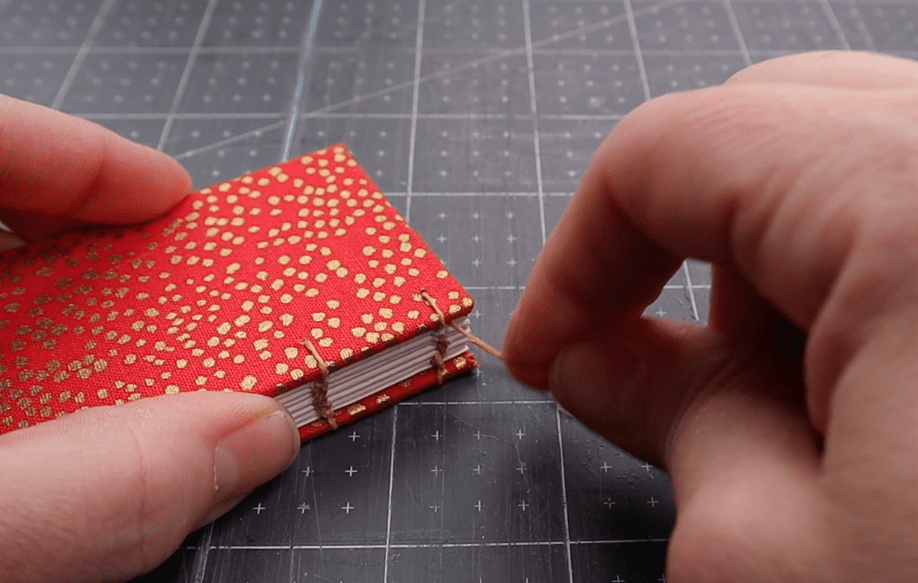
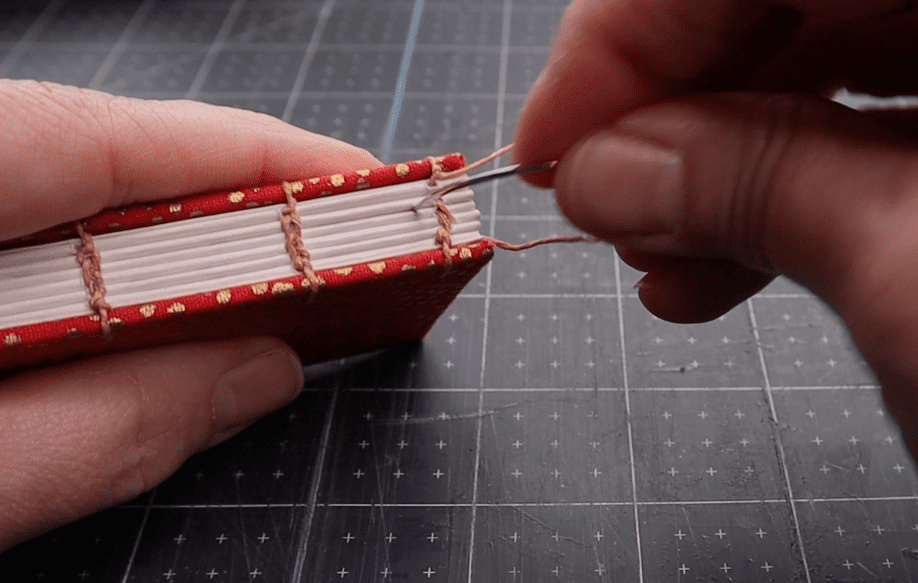
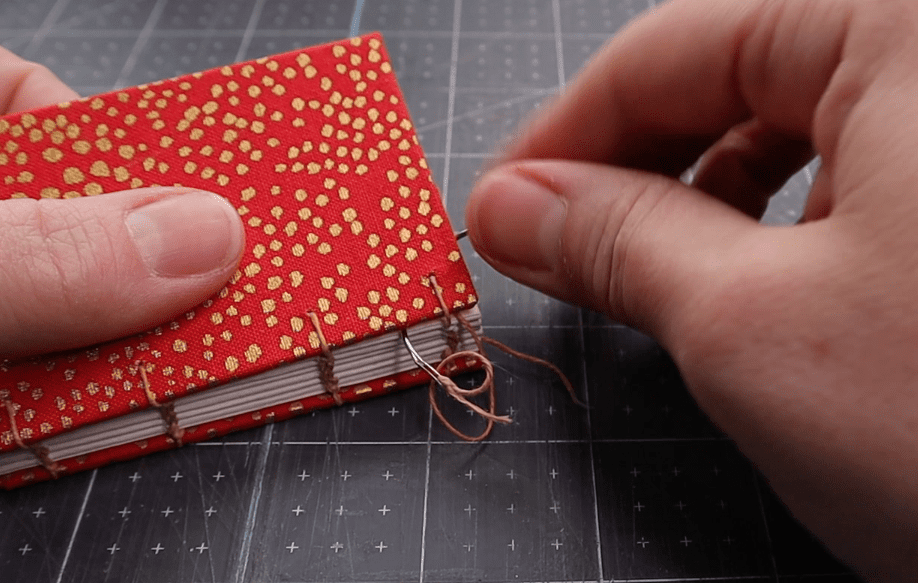
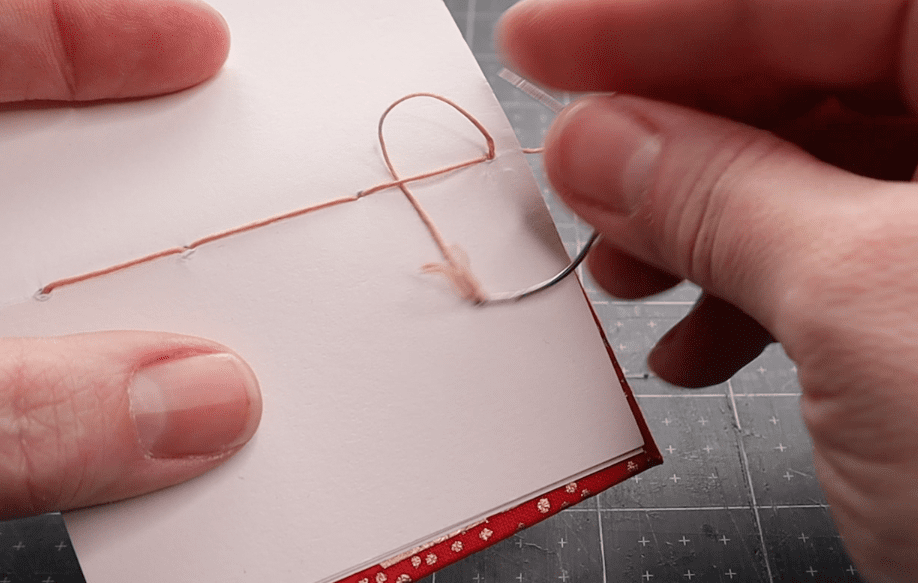
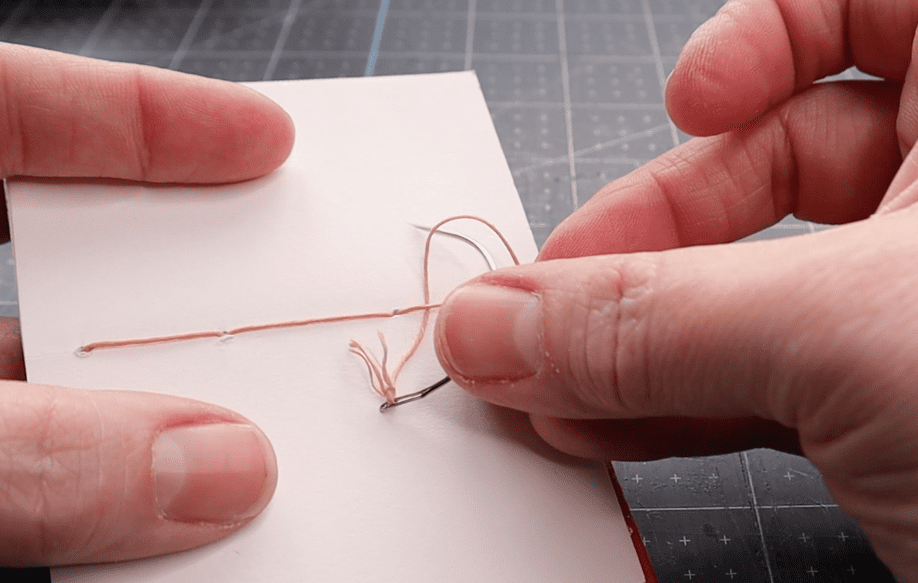
Sewing the final signature and board
This part sounds a lot like the first step (where we attached the first signature to the cover), but there is one major difference: instead of starting inside the signature, we’ll begin with the board and attach the signature second. Sounds crazy, but hear me out – it will make sense once you sew it!
- Do not return the needle into the corresponding hole of the final signature. Instead, sandwich the final signature between the 5th signature and the board and hold it in place
- Move the needle into the board from outside to inside at the corresponding hole
- Once the needle is through, wrap it around the thread like you did when connecting the first signature and board
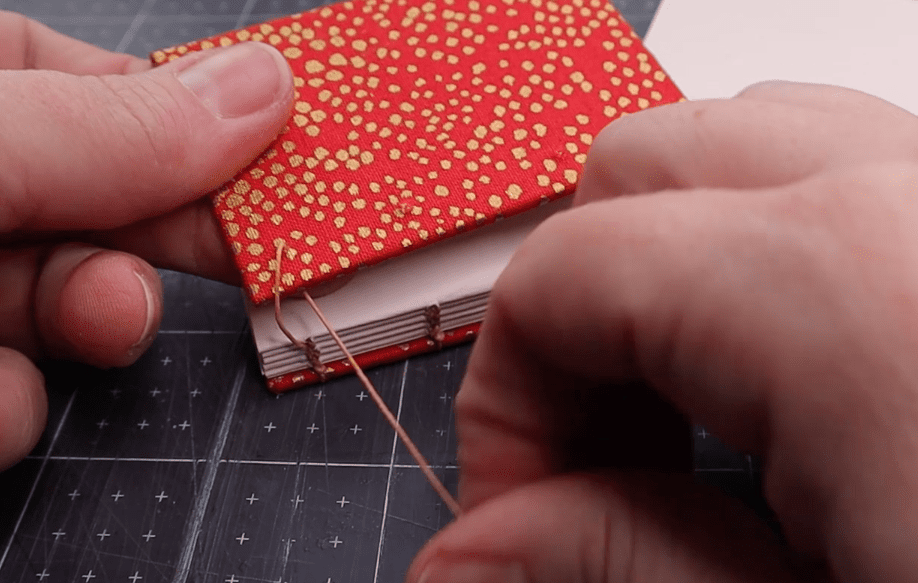
- Next, slip the needle between the 4th and 5th signatures
- Return the needle into the corresponding hole of the final signature. This will be a little tough because the hole can be hard to see, so take your time
- Once inside the final signature, return the needle through the next hole and repeat the process for all stations
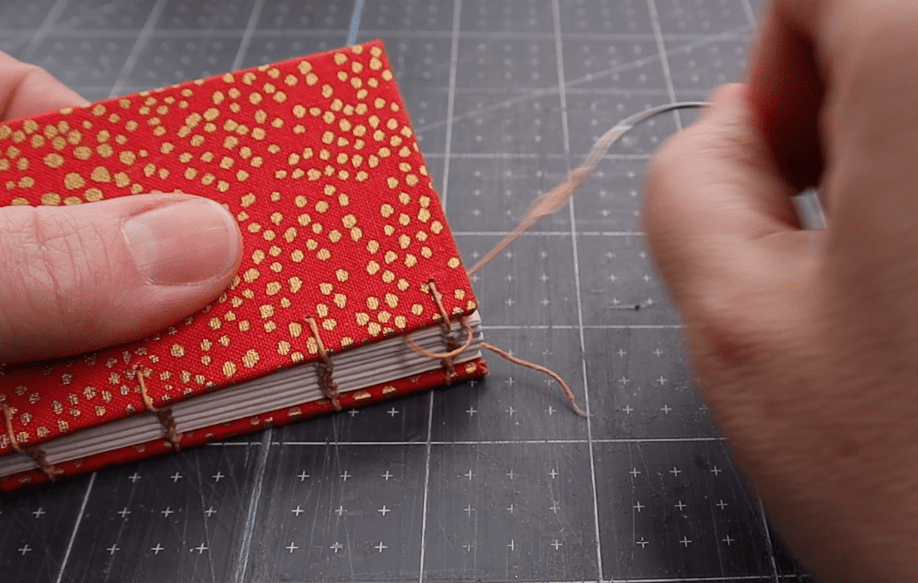
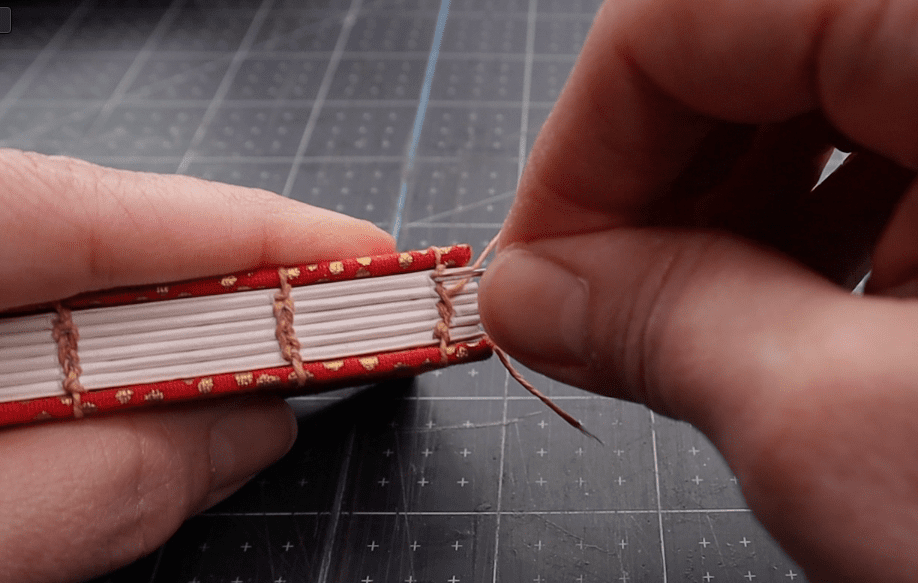
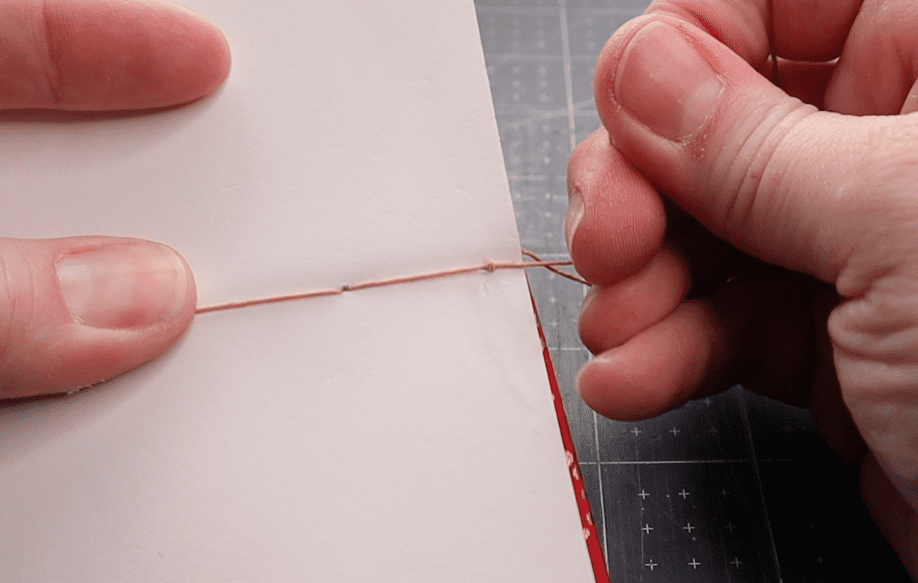
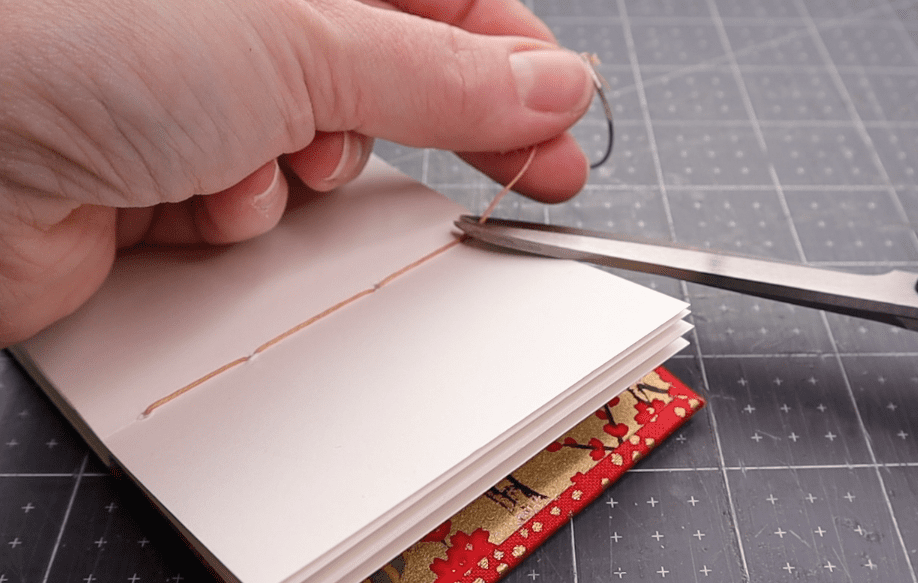
- Once you’ve reached the end, move the needle back into the final sewing station of the last signature. Inside, tie it off by looping it behind the thread just prior and into a knot
- Using a scissor, trim away any excess thread at the start and end of the book


Video technique: sewing the second signature of a coptic binding
Full Video: Make a Mini Coptic Journal
Watch the entire process from start to finish in this full length video with every step and close up included!
How to Use Your Mini Coptic Journal
Someone might look at this cute little book and say to themselves, “But, Misty, it’s so small…how could this book ever be useful to anyone?”
WELL, I’m glad you asked! ?
While it’s true that mini books are less likely to hold a year’s worth of thoughts, they’re perfect for:
- Dream journals – wake up and write whatever words come to mind to describe your dream
- Quick sketches – see a bird? Sketch a bird!
- Storybooks – turn the little book into a story for a special child or friend. Use stamps, embellishments and ephemera to create stunning mini pages
- Birthday & special occasion gifts – everyone loves a mini book because they’re adorable! Knowing it was handmade makes it that much more special
- Tree ornaments – depending on the final weight, these little books can go up on someone’s holiday tree
These are just a few ideas for the mini coptic, but I’m sure there are many others out there!
Share this with someone who needs it!
Last thought – if you know someone who might like to learn this binding method, please share! I’m happy for others to see and use my tutorials to learn the art of bookbinding!
More bookbinding goodness
✨ What tools do I need to get started bookbinding?
- Bookbinding Tools & Supplies Quick Start Guide – learn all about book making tools, which to buy first & where to go online
- Pick up my popular Complete Starter Bookbinding Tools Kit – all the bookbinding essentials in one spot
🌟 Looking for a simple way to start making books?
Try a Complete Book Materials Kit. Each one has everything you need (+ tutorials & videos) to make a beautiful book without all the fuss.
Thank you for taking me along on your book making journey!
Misty


