
Today, I’m giving you an overview of the Pamphlet binding method. This beginner-friendly technique is perfect for new binders because it requires zero adhesive and only a couple tools (most of which can be found at home).
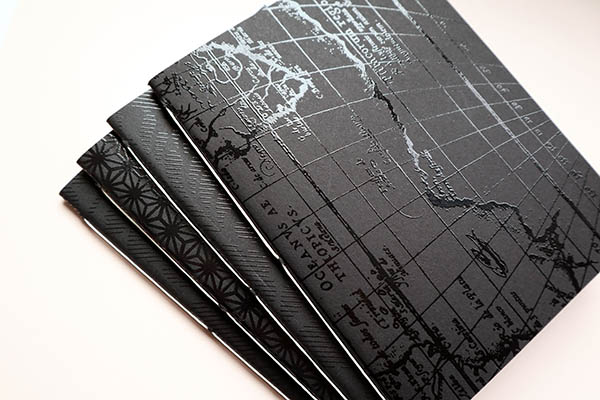
The pamphlet binding method can be traced all the way back to the late 4th century and was first used in codices wrapped in leather. Today, pamphlets are used in everything from gifts to wine tasting journals to advertisements and informational flyers.
This method is well-known for 3 reasons:
- it’s one of the easiest book forms to make
- zero adhesive required
- creative stitches, simple sewing patterns & soft covers
Now that you’ve got some basics, let’s jump into the details.
What is a Pamphlet binding?
- Bookbinding Method or Technique: Pamphlet binding
- Minimum Skill Level: Beginner
- Characteristics: Soft cover, single folded signature, 3, 4, 5 and 6-hole sewing patterns most common
- Great for: Whiskey and wine tasting journals, theater pamphlets, classroom book making projects
- Bad for: large books that would require structural supports

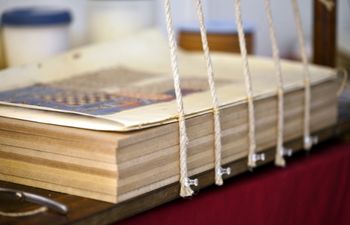
Pamphlet bindings are characterized by a single signature where all pages are usually held together with thread sewn in a specific pattern (3, 4, 5 or 6-hole techniques are most common). The number of holes will depend on the thickness of the final book. If you’re making a thin book, 3 holes will have plenty of strength. A thick or heavily used book would do better with 4, 5 or 6 holes.
Pamphlets are unique in that the cover and signature have identical measurements and are folded down at the same time. This makes it an easy binding for new book makers to try.
There are only four items required to make a pamphlet:
Since the binding requires so few tools & materials, it can be a great low cost project for classrooms & community centers where budgets may be tight.
The number of holes used in a pamphlet binding can also be a creative decision. Some book makers will go for a higher number of holes (a dozen or more!) in order to sew a beautiful pattern or add visual contrast.
Now that we know a few things about the pamphlet binding, let’s jump into the steps to make one.
Steps to create a Pamphlet binding
There are two primary steps for this technique:
- Creating the book block,
- Sewing the pamphlet
STEP 1: Create the book block
The book block of a pamphlet binding is created by folding a stack of papers into a single signature. The cover of the pamphlet is folded down with the paper (unless you are making a wrapped pamphlet, which uses a slightly different technique for the cover). The fold can be creased with the palm of your hand, fingertips or a bone folder.
Quick tip: When creasing the fold, hold the fore edges strongly in place with your fingertips. Press your thumbs at the center and smooth outward toward the edges. This helps to create a nice, even fore edge.

STEP 2: Sew the pamphlet
To sew a pamphlet binding, you’ll need to choose a stitch type and hole pattern. Some stitches will need a certain number of holes to complete, while others can be sewn with any number of holes. There are lots of different stitch types out there (I’ll do another post on that later), but here is a list of the most common (in alphabetical order):
- Bow tie stitch
- Chain stitch
- Dash stitch
- Dot Dash stitch
- Hitch stitch
- Laced Dash stitch
- Saddle stitch
- Twist stitch
To help you understand how these patterns differ, I’ve created some tutorials:
- 3-Hole Pamphlet Binding examples:
- 5-Hole Pamphlet Binding example:
- 6-Hole Pamphlet Binding example:
As always, you’re welcome to make up your own patterns. Combine two of these, expand on one… the list is endless. Have fun with it!
More bookbinding goodness
✨ What tools do I need to get started bookbinding?
- Bookbinding Tools & Supplies Quick Start Guide – learn all about book making tools, which to buy first & where to go online
- Pick up my popular Complete Starter Bookbinding Tools Kit – all the bookbinding essentials in one spot
🌟 Looking for a simple way to start making books?
Try a Complete Book Materials Kit. Each one has everything you need (+ tutorials & videos) to make a beautiful book without all the fuss.
Thank you for taking me along on your book making journey!
Misty


