If you’d like to learn how to make a smaller version, be sure to check out my post, How to Make an A6 size French Link Stitch Journal.
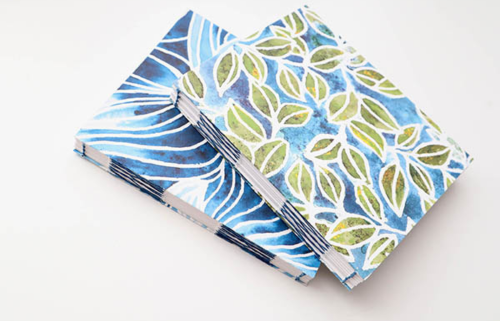
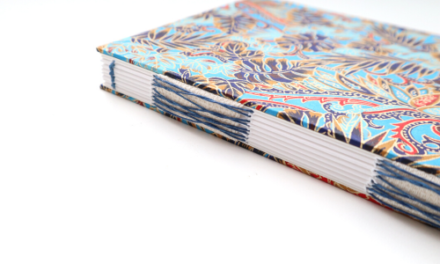
Bookbinding Tutorial: Wide Format French Link Stitch Journal
Measurements: 168mm x 130mm (6.625″ x 5.125″)
Total Time: approx. 90 mins to 2hrs
Materials needed:
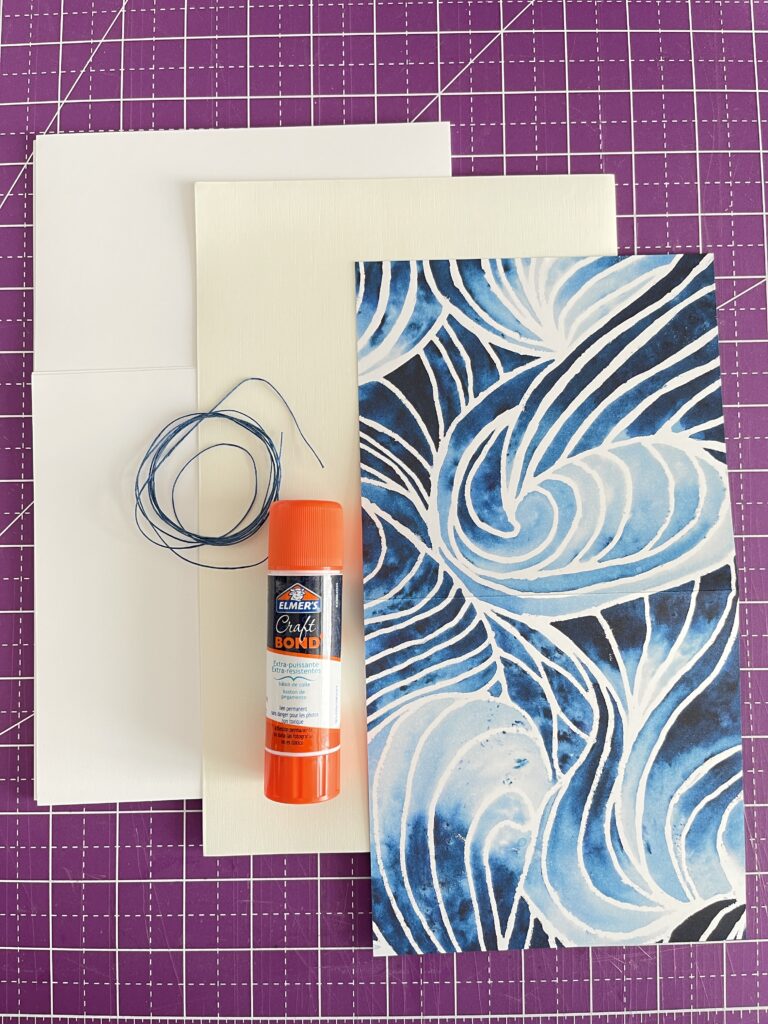
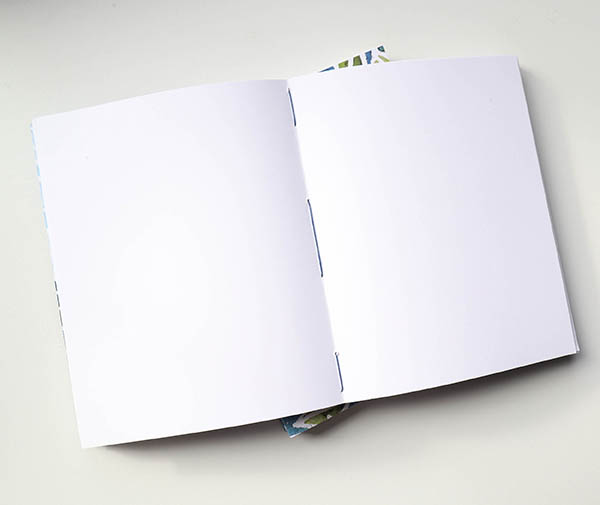
- 32 sheets of 70 or 80lb text weight paper
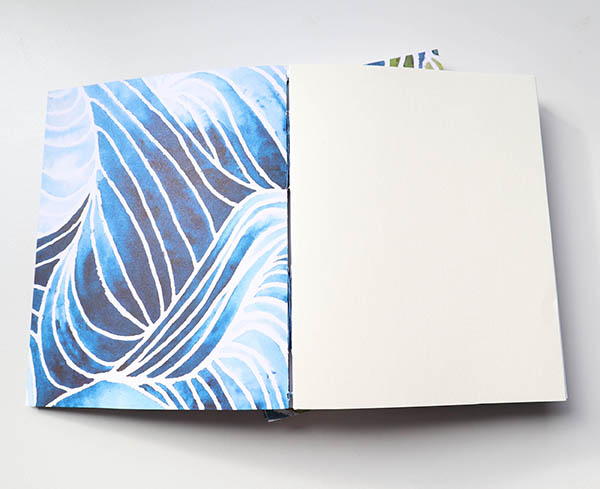
- 2 pieces of 120lb (or heavier) double-sided decorative cardstock
- 2 sheets 100lb cover stock for endsheets (in a coordinating color)
- 72″ of 2 or 3-ply waxed linen thread
- Glue stick OR liquid PVA
Measurements to use for cutting:
- Signatures and endsheets: 164mm x 128mm (6.5 x 5.0″)
- Decorative cardstock (120lb): 164mm x 132mm (6.5 x 5.25″)
- Template: signature holes pierced at 6mm, 25mm, 63mm and 100mm, 138mm and 152mm (roughly 1/4″, 3/4″, 2-1/4″, 3-1/2″, 4-1/2″ and 4-3/4″)
Recommended tools:
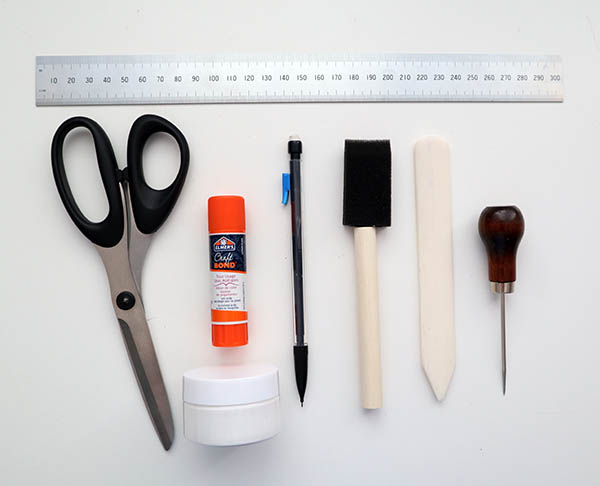
- Ruler
- Scissors
- Pencil
- Awl or thick needle
- Bone folder OR use your fingertips to crease
- Curved or straight needle (your choice)
- Paste brush (if using wet glue)
- Heavy book(s), weighted bean bag or other object to press
- Extra sheets of scrap paper for gluing
- A damp towel to wipe glue from your fingers
Steps to create your wide format French Link Stitch journal:
Step 1: Fold & Assemble Signatures and Covers
- Break the 32 sheets of paper into stacks of 4 sheets each. You should end up with 8 stacks
- Using the fold down method, fold each stack (also called signatures) in half and crease
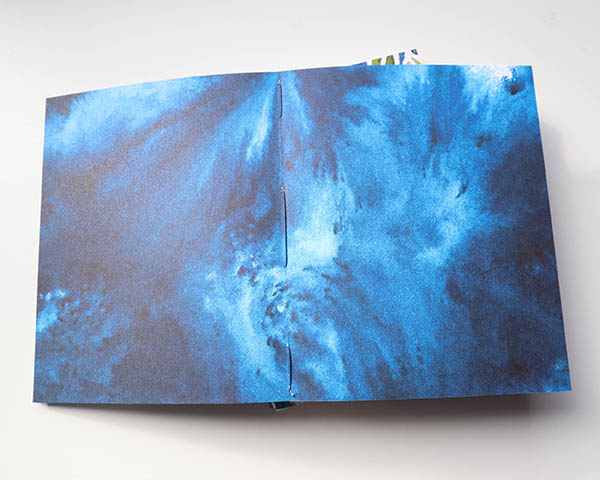
- Fold each of the 2 endsheets in half individually and crease
- I’m using a Stampin’ Up! brand card stock that comes in size 12×12″. Fold each sheet in half, using care to go with the grain
- Cut the excess width and height away so each cover “signature” is 164mm x 132mm (6.5 x 5.25″)
- Lay all under weight to press for 10-15mins
Step 2: Punching the sewing stations
Create a punch template

Before piercing stations, you’ll want to design a punch template. The template should have an even number of stations and include:
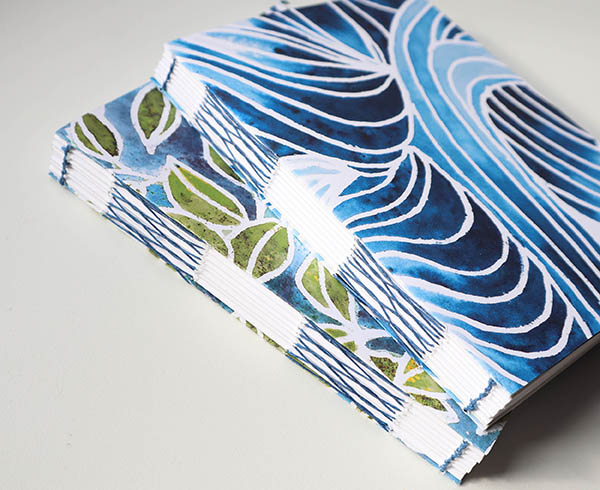
- a Kettle stitch at the head and tail,
- at least two sections in the center for the French Link Stitch pattern (each set will contain two sewing stations each)
Since the spine is unsupported, I usually go with a size somewhere between A5 and A6. These two sizes will give you plenty of room to space out the French Link so it’s noticeable.
Pierce the sewing stations


Once the template is ready, it’s time to punch the sewing stations.
Line up the template with the inside of each folded signature. Using an awl, pierce through the spine of each signature at the marked location. Use care not to make the hole too big. The needle should be able to pass through with very little drag.
Apart from the signatures, you’ll also punch the front and back covers in the same locations.
If you’re using endsheets, do not punch them. They should be glued to the first and last signatures only.
Step 3: Sewing the pattern(s)
French Link Stitch designs range from simple to intricate, but we will focus on the simple method in this post. To begin, assemble the covers, endsheets (if you have them) and signatures in the following order:
- Front cover, folded and pierced
- Endsheet, folded and tipped onto the first signature
- Signatures in the order they were assembled
- Endsheet, folded and tipped onto the last signature
- Back cover, folded and pierced
Step 1: Attach the cover to the first signature
Thread your needle. I like to use a 2 or 3-ply waxed thread, but you can use any thread you like. Wax does help keep things in place, so I always recommend using some unless it compromises the design.
- Start from the back of the book. You’ll sew the back cover to the first signature. To do this, begin by running the needle into the Kettle station at the tail of the cover
- Once inside, pull the thread until about 2″ remains outside
- Move the needle from the inside to the outside through the next closest station
- Repeat this pattern of moving into and out of the cover signature until you come to the final Kettle station at the head
- You should be outside. Add the first signature on top, lined up from head to tail
- Move the needle into the first signature at the head Kettle
- Now move the needle outside through the first link stitch station
- Once outside, move the needle behind the thread directly below, around and then and then up into the next hole of the signature. This will create a cross over (the “x” pattern begins)
- Repeat this process until you get to the tail Kettle station
- Once outside the tail Kettle, tie the 2″ piece of thread from the cover to the first signature using a single knot.
- Now move the needle into the first signature again via the tail Kettle station
- Tug lightly until the knot pops inside the first signature (this hides the knot)
- At this point, I like to make a second knot by sliding the needle behind the thread just before the knot itself, but it’s not required
- Move the needle back out the tail Kettle station
- Slide the needle behind the connection you just made between the front cover and first signature
- Tie a Kettle stitch
- Add the next signature on top and enter through the tail Kettle
- Repeat the entire process, tying a Kettle stitch at each end once reached, until you get to the final cover signature


Step 2: Attach the final cover to the last signature
- Once you reach the final cover signature, repeat the process as usual
- At the tail Kettle, slide the needle behind the connection between the final two signatures and tie a Kettle stitch
- Return into the back cover signature through the tail Kettle once more
- Inside, create a knot by sliding the needle behind the thread just before the tail Kettle station
- Clip away the excess, leaving about 2-3mm


Admire your new French Link Stitch journal
Now that you’ve completed all of the above steps, you should have yourself a beautiful French Link Stitch journal that lays completely flat for capturing your thoughts and/or illustrations.
It takes time to get the tension on each stitch just right, so don’t lose heart if your spine is a big wiggly. This is normal. As you continue to make these books, you’ll get better at figuring out the right tension.
Full Video: DIY French Link Stitch journal using double sided card stock
I hope this post has helped you learn to sew a characteristic French Link Stitch journal. It’s an incredibly fun and beautiful exposed spine technique that I think you’ll love to use in your books.
Complete book materials kits
Each kit includes all the tools, supplies & materials to make one beautiful book.
More bookbinding goodness
✨ What tools do I need to get started bookbinding?
- Bookbinding Tools & Supplies Quick Start Guide – learn all about book making tools, which to buy first & where to go online
- Pick up my popular Complete Starter Bookbinding Tools Kit – all the bookbinding essentials in one spot
🌟 Looking for a simple way to start making books?
Try a Complete Book Materials Kit. Each one has everything you need (+ tutorials & videos) to make a beautiful book without all the fuss.
Thank you for taking me along on your book making journey!
Misty


