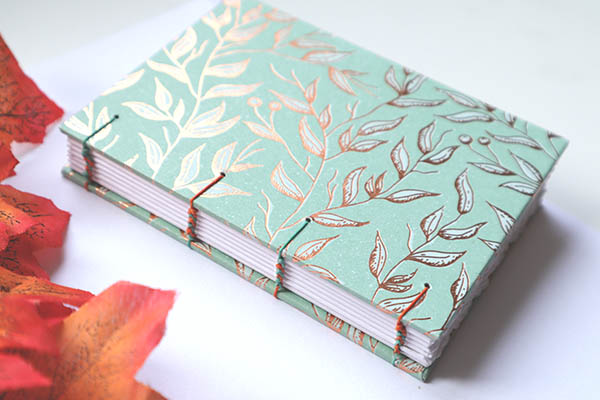
If you’re into Coptic bindings and looking for a new challenge, this one is for you. In today’s tutorial, I’ll teach you how to make a four needle coptic journal with a super cute autumn theme. You don’t have to follow this theme, though. Feel free to make the book using whatever papers you have on hand or pick a few that inspire you. The size of this book is perfect for a first-time attempt at using four needles. This tutorial will build on the concepts taught in my Mini Coptic Journal and Double Needle Coptic Journal tutorials, so be sure to check them out if you haven’t already.
Now, let’s make a book!
Bookbinding Tutorial: 4 Needle Coptic Binding
Measurements: 130mm H x 93mm W (roughly 5-1/8″h x 3-5/8″w)
Cost Level: $
Skill Level: Intermediate (this tutorial assumes you know how to sew a link or Kettle stitch)
Total Time: 2 hours

FOUR NEEDLE COPTIC BINDING MATERIALS:
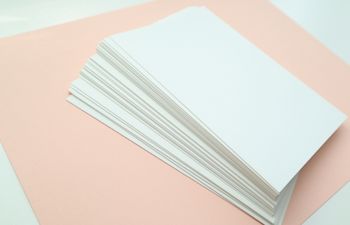
- 20 sheets of your favorite paper cut to size 130mm H x 186mm W (folded size: 130mm H x 93mm W)
- 18 sheets will be used to make 6 signatures (3 sheets per signature)
- 2 individual sheets will be folded and used as endsheets to protect the first and last signatures
- Two pieces of book board (or up-cycled cardboard), each cut to size 130mm H x 93mm W
- 2 sheets of cover paper (60-85gsm is perfect), each cut to size 140mm H x 103mm W
- 2 pieces of paper (to be used as endpapers) of your choice (to be glued down to the inner boards), each cut to size 125mm H x 85mm W
- 1 strip of scrap paper at least as tall as one board and 25-35mm W (to be used as a hole punch template)
- 1 sheet of newsprint or thin waste paper (computer paper works) to absorb water
- 4 strings of waxed thread, each 530mm (21″) long (I used 2 orange and 2 sage colored threads)
- PVA adhesive (Elmer’s Glue will also work)
Tools
- Awl, 6″ tapered
- 4 curved binding needles (straight will also work, but curved is easiest to work with)
- Bone folder
- Paste brush (25mm wide is best)
- Olfa knife
- Ruler
- Scissors
- Pencil
- Heavy book or weighted bean bag
- Optional:
- straight needle awl (no taper)
- heavy duty awl (if using 0.9 or thicker book board)
- punch cradle
- steel spacers
- corner jig (can also use your ruler or simply “eyeball” it)
- apron or damp towel to wipe glue from fingers (if you’re messy like me)
Quick Menu
- Fold & assemble signatures
- Prepare the endsheets
- Create a punch template
- Mark the board inset line
- Pierce the boards and signatures
- Cover the boards
- Glue down the endpapers
- Sew the four needle coptic binding
STEPS:
Fold & assemble signatures
- Break the 18 sheets of paper into stacks of 3 sheets each. You should end up with 6 stacks
- Using the fold down method, fold each stack in half and crease with a bone folder from center outward to right and left
- Fold each of the 2 end papers in half individually and crease with a bone folder
Prepare the endsheets (called “tipping in”)
In this step, we’re going to glue two individual endsheets to two individual signatures. In bookbinding, we call this “tipping in.” It’s a quick and easy way to attach the endsheets to the book without sewing them in directly.
- First, choose the top and bottom signatures. Make sure they don’t get out of order
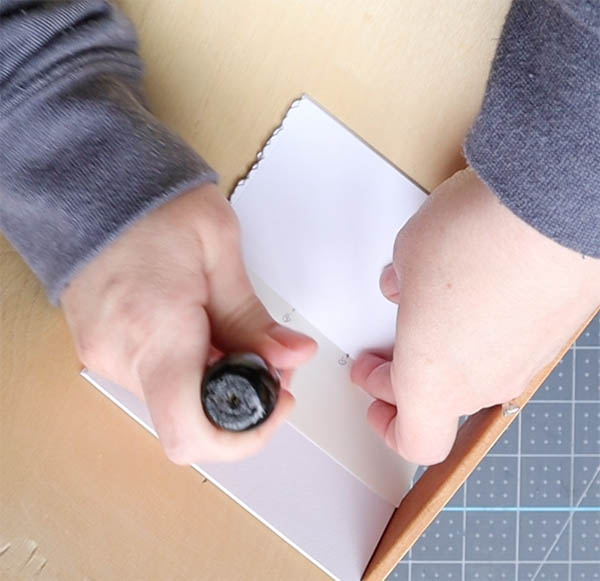
- Apply a small amount of glue the edge of one endsheet (less than 3mm or 1/8″ wide)
- With the glue side down, line up the creased edges of the endsheet and signature. Press down
- Smooth the edge with a bone folder to remove excess air
- Repeat this process with the second signature
- Place both signatures under weight for 5 minutes to let the glue set.
- Once dry, reassemble the signatures in order.
Create a punch template
The strip of paper should be as tall as one of the boards. If it is taller, fold the excess over the edge of the board to create a line (see my photo below). Cut away the excess using this line as a guide or leave the excess in place and use the line as a stop point for your ruler.
Using a ruler, make a mark at the following locations:
- 10mm
- 50mm
- 80mm
- 120mm
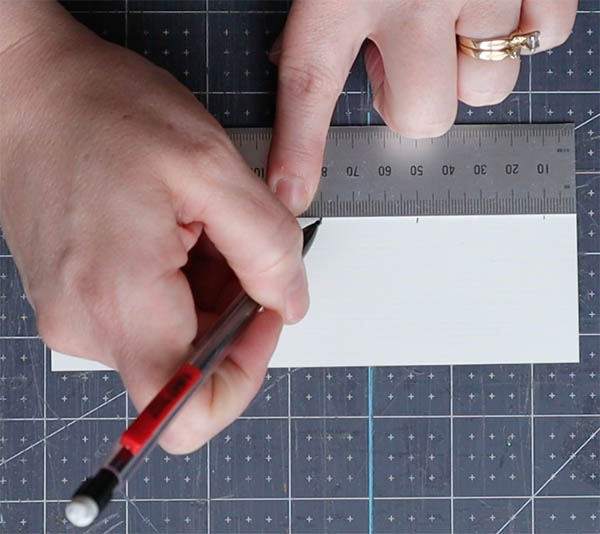
Mark the board inset line
To support an exposed spine, the sewing stations should be about 10mm inset from the spine edge of each board. Measure 10mm in from the spine edge and make a mark at the top and bottom of the board. Repeat this process for the back board. Use a ruler to make a line by connecting the dots.
Pierce the boards & signatures
Use the template you just made to mark and pierce the boards and signatures.
Boards
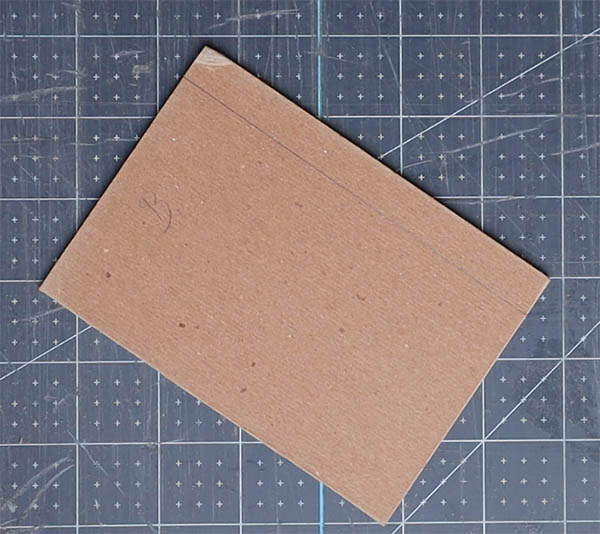
- Sandwich the folded signatures between the boards and determine which one will be the front of the book and which one will be the back.
- Tip: Mark the front board with an “F” and the back board with a “B” to keep the order correct
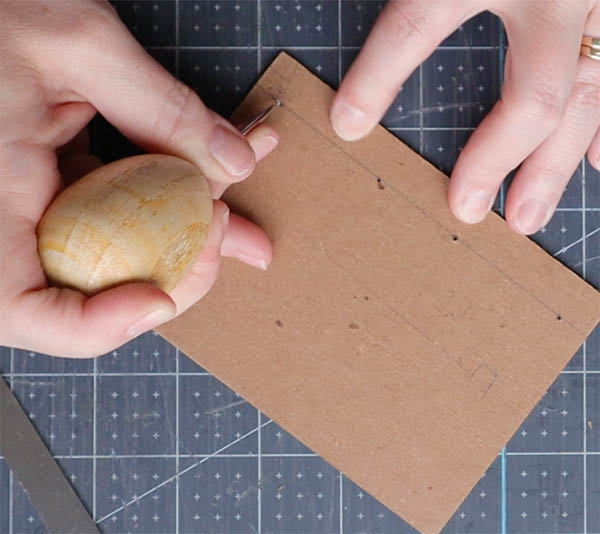
- Lay the top board down on a cutting surface and position the template on top
- Slide the template so it aligns with the 12mm or 1/2″ inset mark you created
- Pierce each sewing station with an awl
- Tip: Use a heavy duty awl if you’re working with thick board
- For the bottom board, reverse the template like a photo negative and repeat the process. This part can be tricky, so take your time
Technique Tip: when piercing sewing stations in board, create the opening using a tapered awl. Move the tapered awl about 2mm into the board. Set the tapered awl aside and use a straight needle awl to finish the opening. This will ensure the opening is the same width throughout, creating an evenly sewn binding. When passing a needle through the board, it should feel slightly snug but not too tight.
Signatures
- Open each signature and line up the template with the inner crease
- Mark each sewing station with a pencil
- Using a tapered awl, pierce the sewing stations at the marked locations. Repeat with all 6 signatures
- Tip: Use a punch cradle to make this fast and easy
Cover the boards
- Position one board onto the back of each cut piece of cover paper, roughly centered so there is 10mm of excess material around each edge
- Using a pencil, trace the position of the each board
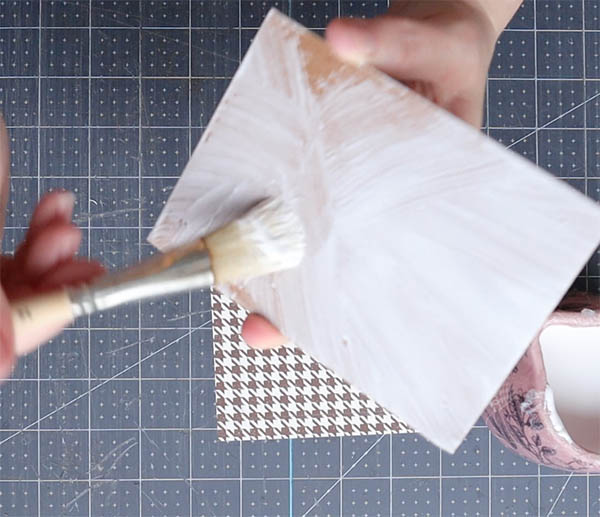
- Apply a thin layer of glue to the back of each board
- Position the board glue-side down onto the cover paper inside the trace marks
- Press each board with your fingertips, and then smooth with a bone folder to remove excess air
- Turn the board over and smooth the cover paper softly with a bone folder
- Tip: The paper will be wet from the glue, so try placing a sheet of wax or waste paper between the cover paper and bone folder to prevent damage
- Once smoothing is finished, return the cover paper to a face down position (exposed board up)
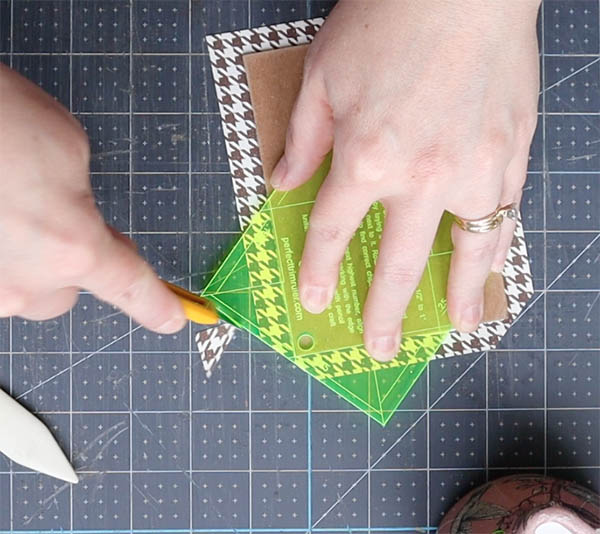
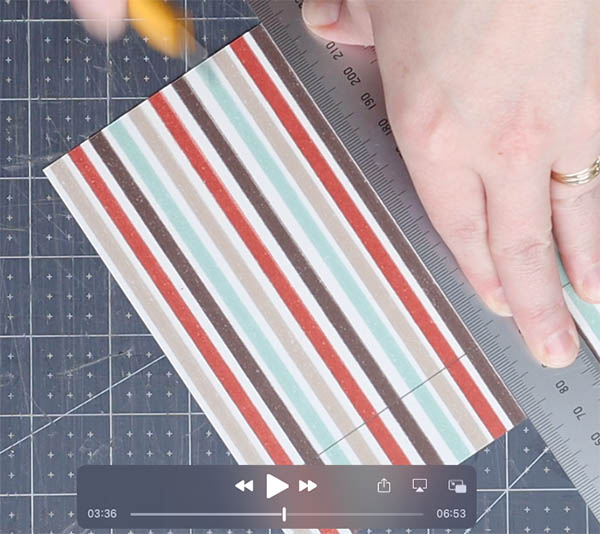
- Using your ruler, measure outward from each corner about 3mm or 1/8″
- Tip: Use a corner jig to make this fast & easy
- Use an Olfa knife (or scissor) to cut diagonally across the mark for each corner
- Apply adhesive to the top and bottom edges (head and tail) using a paste brush
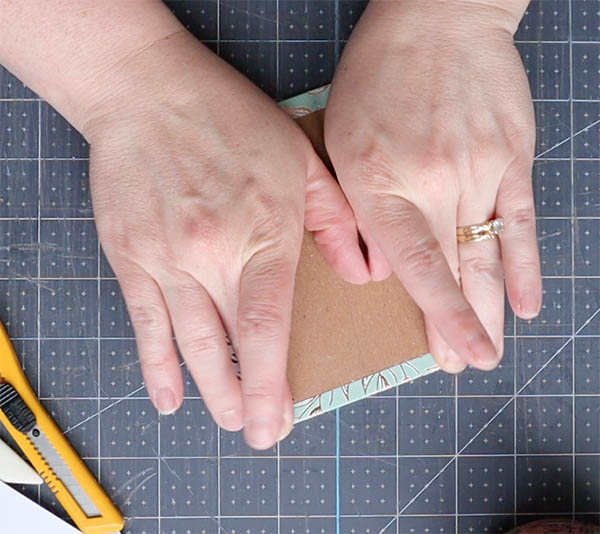
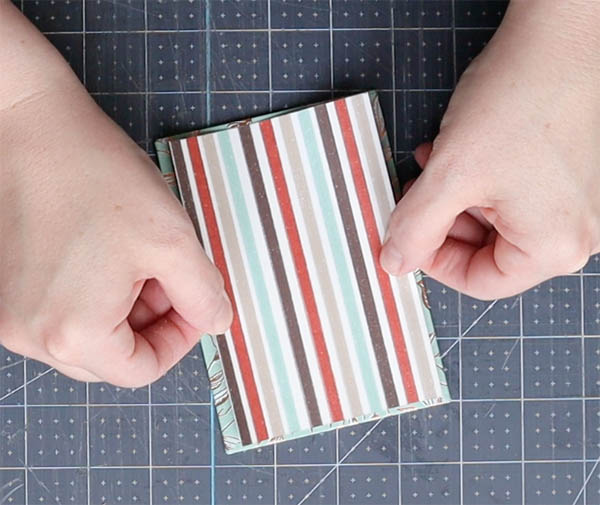
- Fold the head and tail edges over the board and press with your fingertips to remove excess air and glue
- Apply adhesive to the left and right fore edges using a paste brush
- Turn in each corner using the tip of your bone folder (technical video below)
- Fold the edges over the board and press with your fingertips to remove excess air and glue
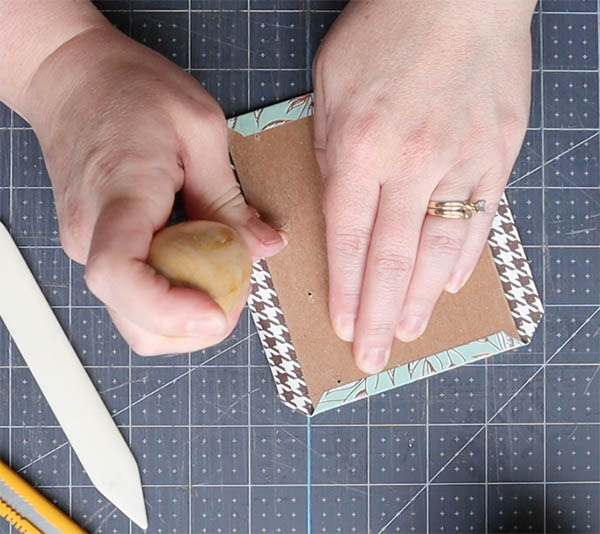
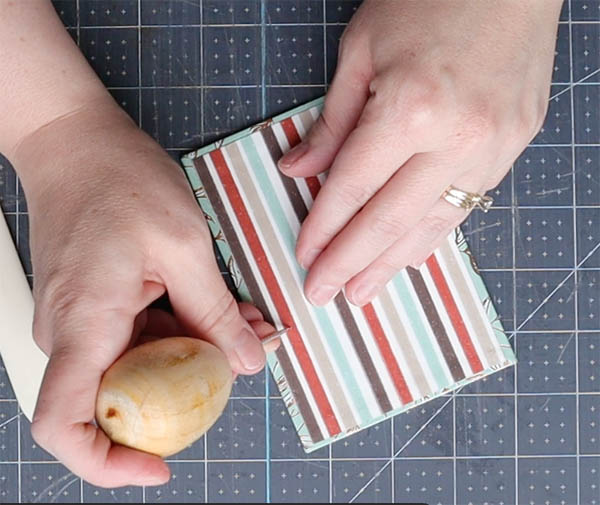
- Use an awl to re-pierce each sewing station hole. This will create a pin prick mark on the cover paper side.
- Turn the board over. Use an awl to define each sewing station hole. Be careful, because the paper is still wet with glue and may tear.
- Sandwich the boards between a sheet of newsprint. Place a heavy book or weight on top and set aside for 5 minutes

Video Technique: measuring & turning corners
*More on this and cover creation can be found here in my Casebinding tutorial series
Glue down the endpapers
- Turn each board over so the cover paper is face down. The exposed board should be facing up at you
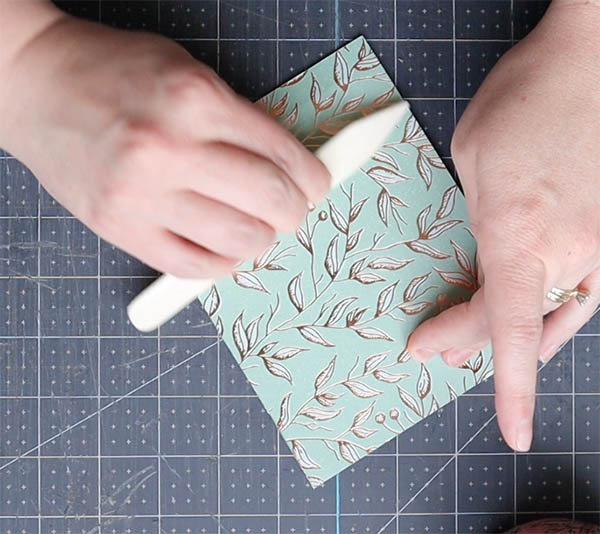
- Apply a thin layer of PVA to the back of each endpaper and position it on the board so it is roughly centered with 3-4mm around each edge
- Press the sheet into place with a bone folder, removing excess air bubbles
- Repeat this process with the second board
- The endpapers will cover up the holes you’ve pierced, and that’s okay! Use your awl and the defined holes on the cover paper to “re-pierce” each hole. This creates a smaller, less visible hole on the endpapers
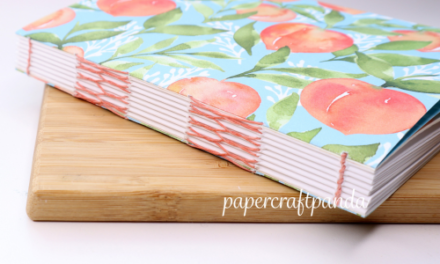
Sew the four needle coptic binding
Unlike single needle coptic bindings that move from right to left along the spine before going vertical, multi-needle coptic bindings only go vertical. They don’t need to move along the spine because each sewing station has its own needle.
The steps to attach the boards can be hard to understand in written text, but I’m going to give it my best try! I’ve broken this into four stages:
- Attaching the front board and first signature
- Sewing the second signature
- Sewing the remaining signatures
- Attaching the back board
Sewing the front board + first signature
This is probably the most tricky part (and of course, it comes right at the beginning)! The idea of this step is to “tie” the front cover to the first signature. To do this, we’ll sew through the first signature and into the holes you’ve pierced on the cover. If at any time you’re unsure, check the images below.
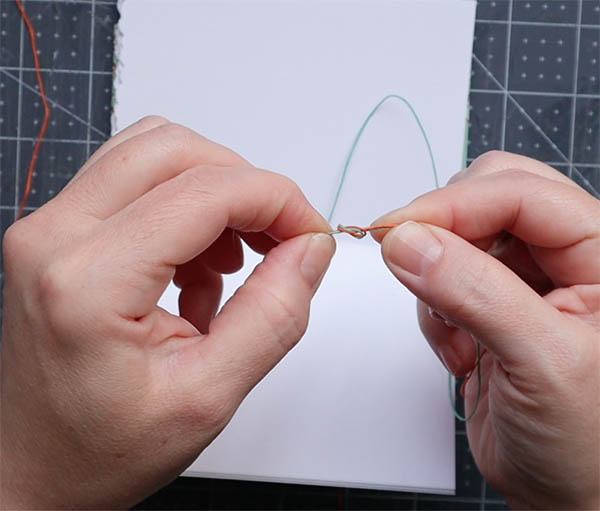
- Pick up two of the four pieces of thread. Tie the ends together using a square knot.
- Attach one needle to the end of each piece of thread (4 ends = 4 needles).
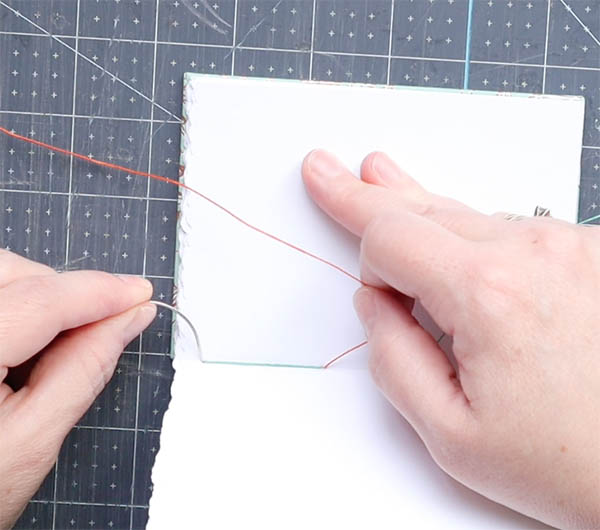
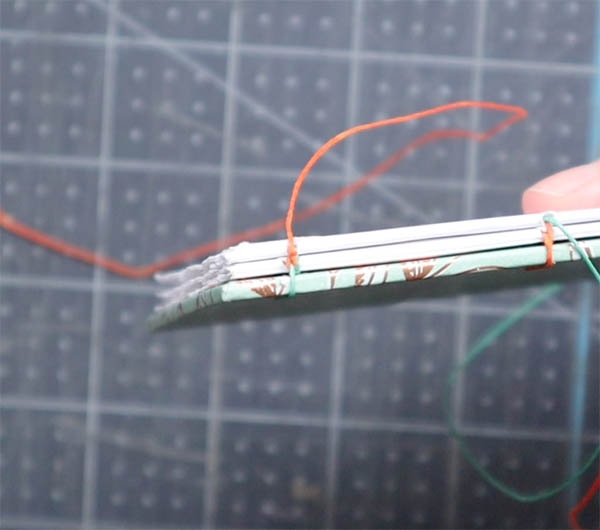
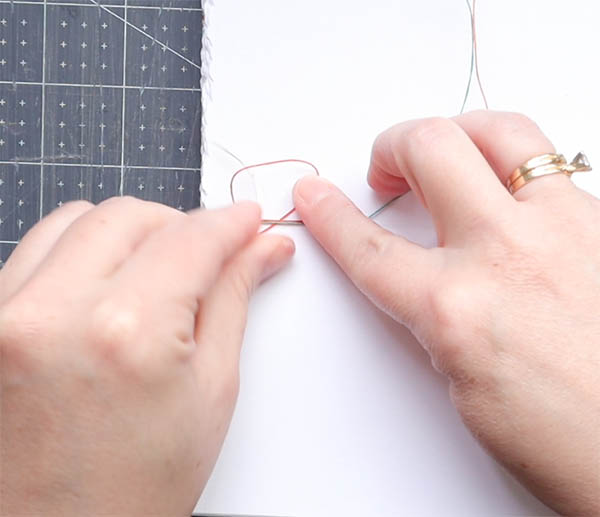
- Start at the first hole inside the first signature at the bottom of the book. Pull one needle until it’s just through the hole.
- Move to the second hole directly to the right of the first. Pull the second needle until it’s just through the hole.
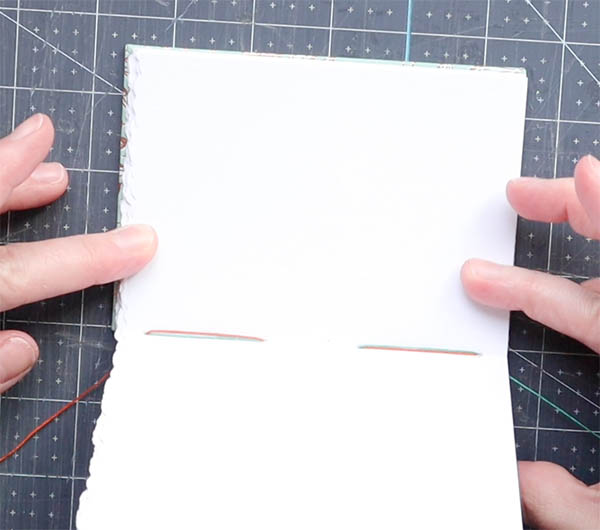
- Holding both needles carefully in one hand, pull the threads until the knot you’ve tied sits evenly between the two holes (check picture below).
- Repeat steps 1-4 with the second set of threads, needles and holes.
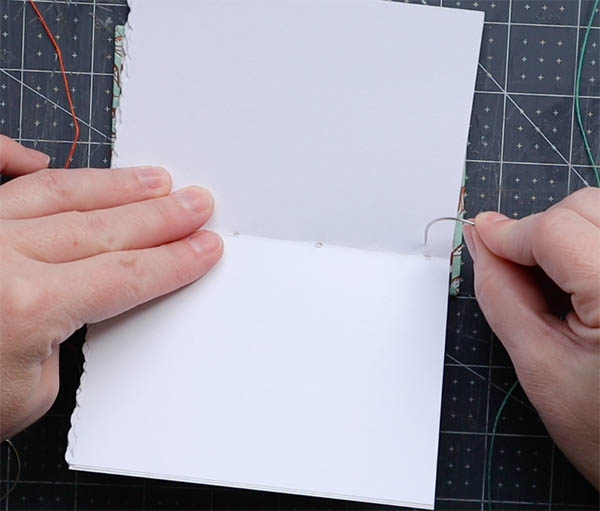
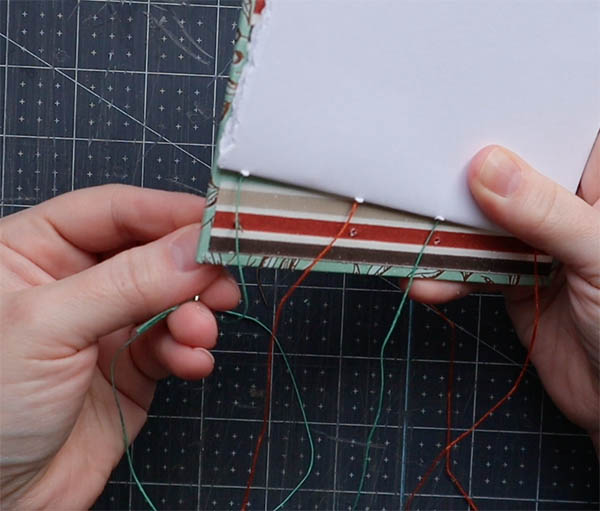
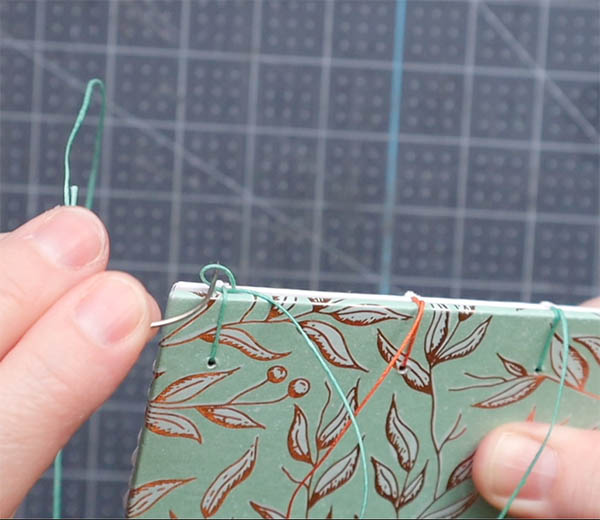
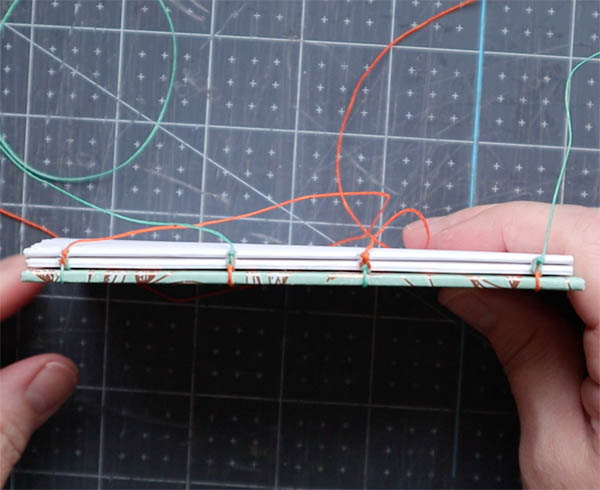
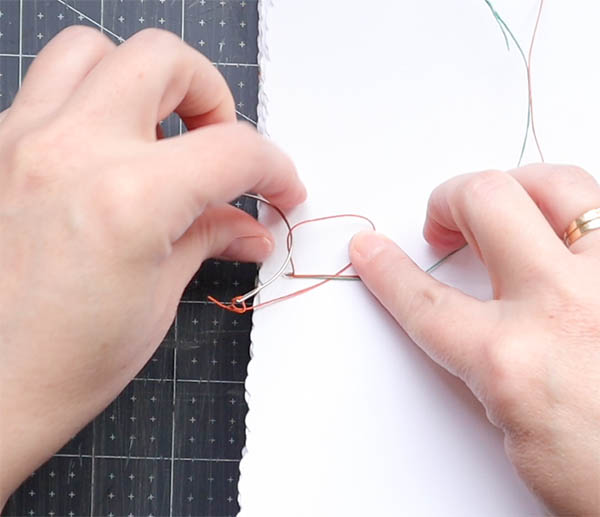
- Pick up the first needle and move around the spine edge onto the outside of the side cover. Go through the corresponding hole on the cover, from outside to inside. Run the needle along the left side of the thread as you pull it through.
- Repeat this process with the remaining three holes.
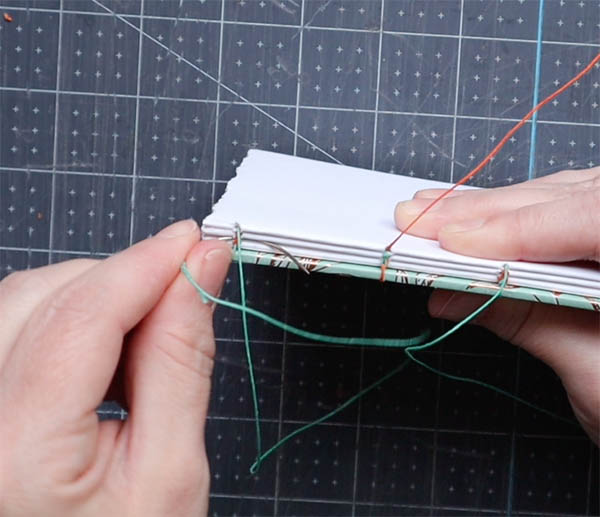
- Once all needles have looped through the cover, move the board down so it is flush with the first signature. Pull the threads along each sewing station until they’re tight. This will tie the board and first signature together.
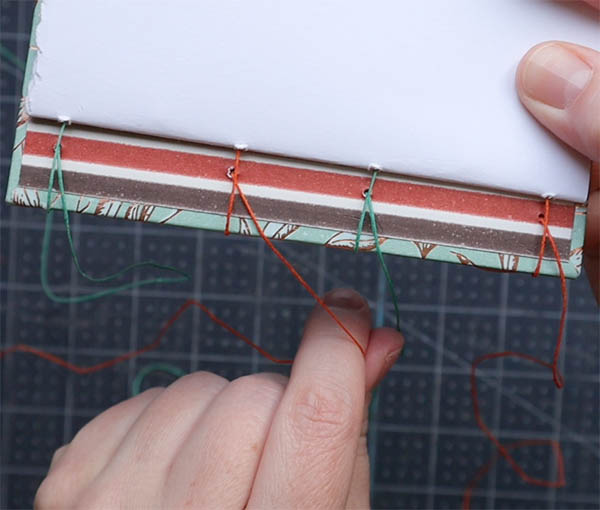
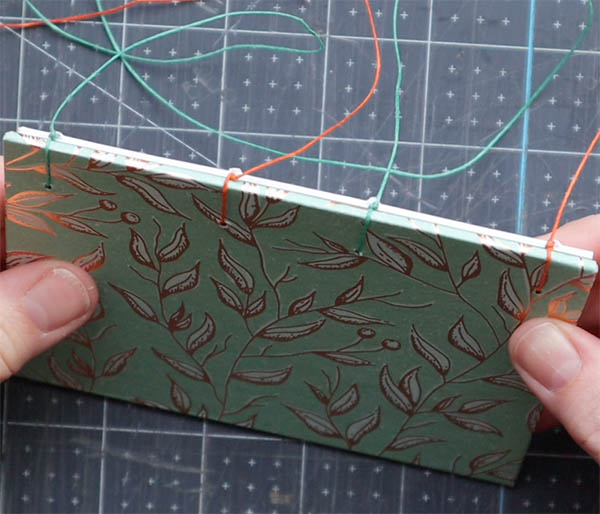
- Pick up the first needle and slip it behind the thread that connects the first signature and board. Pull it through, but leave a tiny loop. Feed the needle through the tiny loop and pull away from the spine until tight. This will create the braided look we’re going for.
- Repeat this process with the three remaining needles.
When finished, all needles should be outside and ready to go back into a new signature.
Sewing the second signature
While the first signature is arguably the “hardest,” the second one can also be tricky. This is because you’re securing the second signature to the first by looping your needle behind the thread holding the first signature and board together.
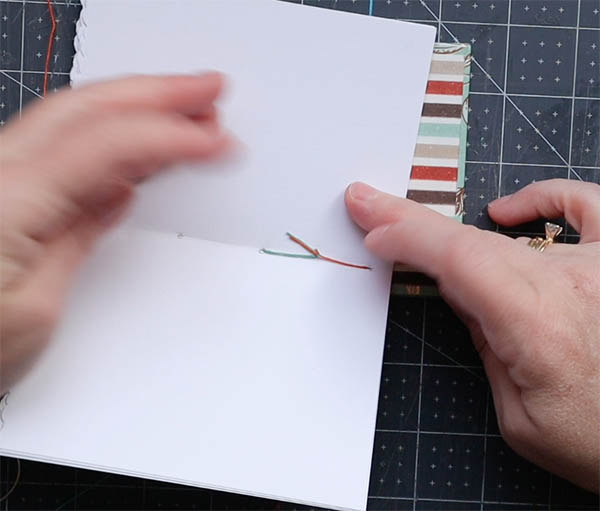
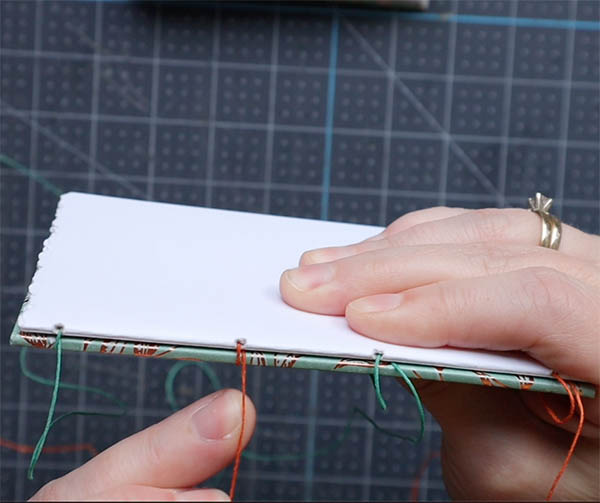
- Add the second signature on top and return each needle into the corresponding hole.
- Once all needles are inside the second signature, use a bone folder to lightly press the fold. This helps to keep the thread firmly in place inside the signature.
- Open the signature and make sure it stays aligned on the one below it.
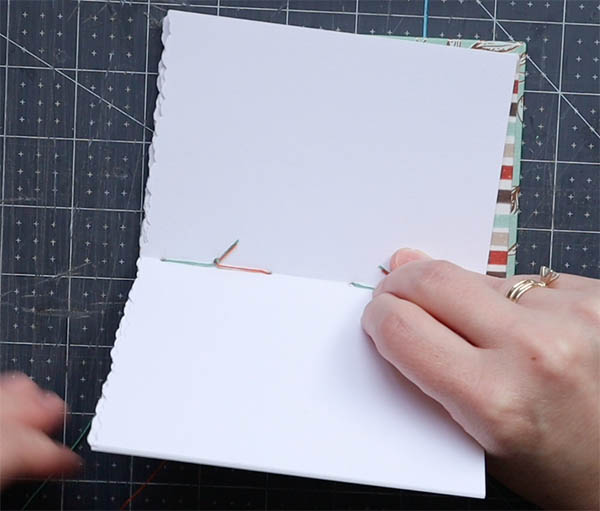
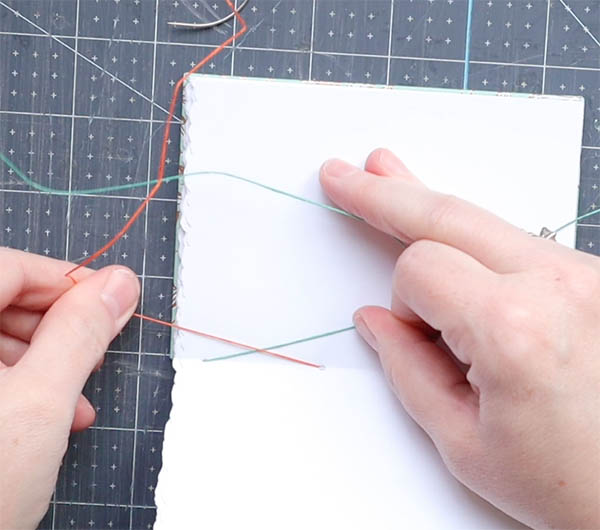
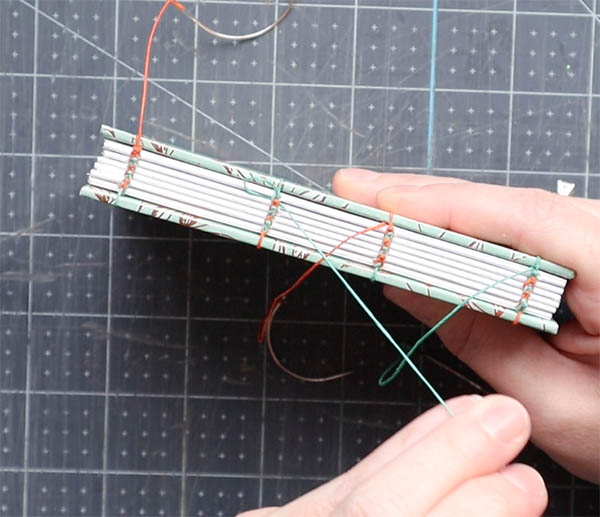
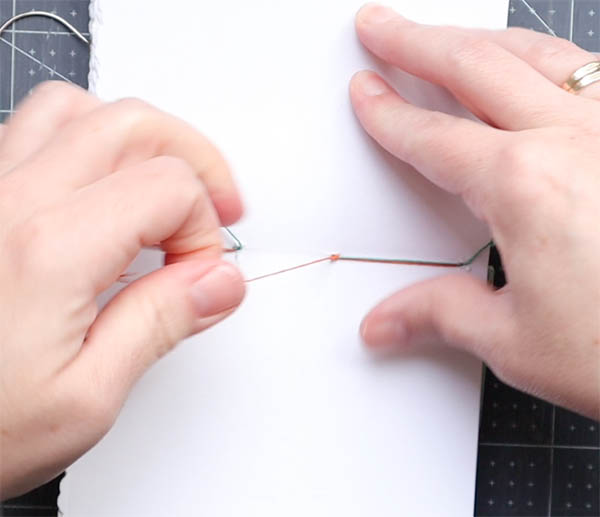
- Start at the bottom of the book. Grasp the last two threads and cross their positions. Return the right needle into the left needle’s hole. Return the left needle into the right needle’s hole. Pull both threads until they’re laying tightly inside the fold.
- Repeat this process for the top two needles.
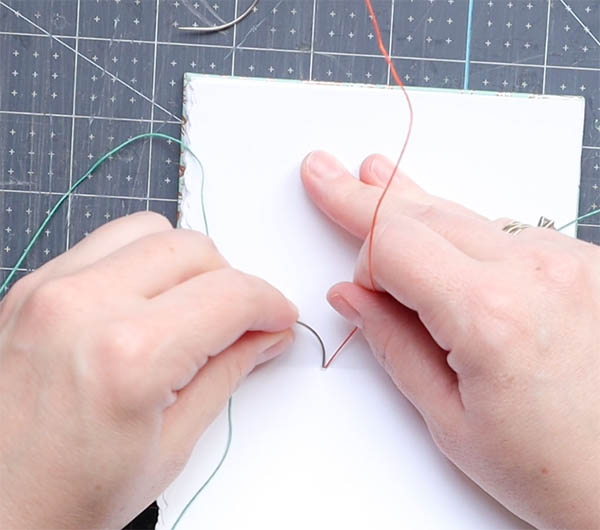
- All needles should now be outside the signature. Start with the bottom sewing station. Loop the needle behind the thread holding the board and first signature together. Pull until there is a small loop of thread remaining. Return the needle through this loop and pull away from the spine. This will create the first braid.
- Repeat this process with the remaining needles.

Sewing the remaining signatures
- Add the third signature on top of the second.
- Repeat steps 2-7 until all signatures are attached.
- The needles of the third signature should loop behind the thread attaching the second and first signatures together.
- The needles of the fourth signature should loop behind the thread attaching the third and second signatures together, and so on.
Attaching the back board
We’re going to attach the back board the same way that we attached the first, but it will feel “reversed” given the direction the back board is facing (cover paper up toward you).
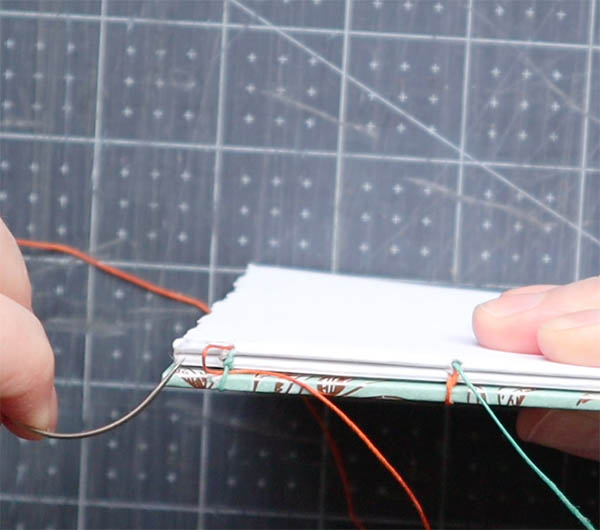
- Start at the bottom of the book. Move the first needle into the board from outside to inside at the corresponding hole. Pull the needle toward you so it creates a loop around the board. Don’t tighten it yet.
- Repeat this process with the three remaining needles.
- Align the board with the signatures and pull each thread until it’s tight, much like you did with the first board.
- Take the first needle and wrap it around the thread like you did when connecting the first signature and board. Create the same braid by passing the needle through the last bit of loop remaining.
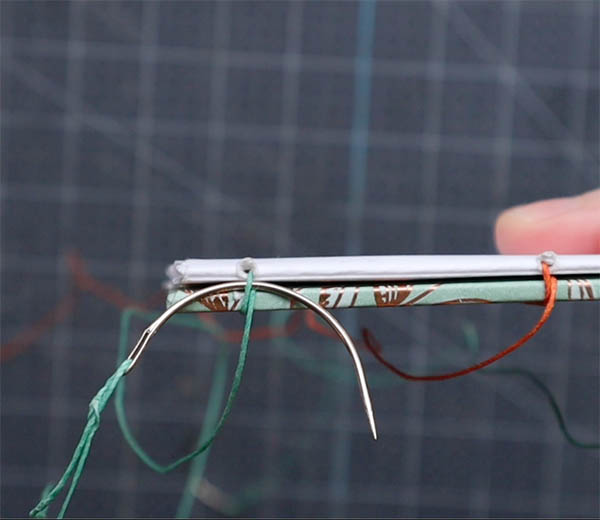
- Turn the book over and open up the last signature. Place one hand inside the fold while holding the book with your thumb.
- Return the needle into the corresponding hole of the final signature. This will be a little tough because the hole can be hard to see with the thread in the way, so take your time. See photo below.
- Once inside the signature, use your fingers to pull the needle through.
- Repeat this process with the remaining three needles.
- Turn the book over and open up to the last signature. You should see all four needles.
- Tie off each needle by looping it behind the thread just prior and into a knot. You can do this twice if you want a tighter knot. See photo below.
- Using a scissor, trim away any excess thread.
More bookbinding goodness
✨ What tools do I need to get started bookbinding?
- Bookbinding Tools & Supplies Quick Start Guide – learn all about book making tools, which to buy first & where to go online
- Pick up my popular Complete Starter Bookbinding Tools Kit – all the bookbinding essentials in one spot
🌟 Looking for a simple way to start making books?
Try a Complete Book Materials Kit. Each one has everything you need (+ tutorials & videos) to make a beautiful book without all the fuss.
Thank you for taking me along on your book making journey!
Misty


