Today, I’m giving you an overview of the Coptic binding method. This is a beginner-friendly technique is a great option for any binder because it requires very few tools and builds on the Pamphlet binding method by introducing multiple sections and optional hard covers. Cool fact – original coptic books had covers made of solid wood and did not require any adhesive.
The Coptic binding method is one of the oldest methods still in regular practice today and takes its name from the Copts, a group of peoples inhabiting Egypt and Northern Africa since antiquity. Coptics are widely considered to be the first original codex (multiple signatures) and first appeared around the 2nd century C.E. As with all historical writings, some believe it was the 4th century C.E, so exact dates are still up for debate. The method was used regularly until around the 11th century C.E., when a more robust codex design emerged. The overall design is still in use today because it yields a strong binding despite the exposed spine.
This method is easily recognized for 4 reasons:
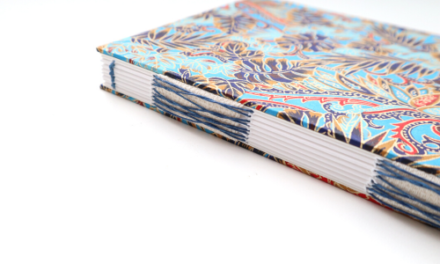
- Exposed spine with chain link stitching,
- Lay-flat design,
- Single needle and multiple needle configuration sewing,
- Excellent option for sewing single sheets or pages
Now that you’ve got some basics, let’s jump into the details.
What is a Coptic binding?
- Bookbinding Method or Technique: Coptic Binding
- Minimum Skill Level: Beginner
- Characteristics: Hard covers sewn to the first and last signatures, exposed spine, chain link stitching, single & multiple needle sewing options, curved needles
- Great for: Any book that needs to lay flat, journals, watercolor art books, sketchbooks, single page sewing
- Bad for: Books that require heavy spinal support
The “dots” along the spine were created by my printer and are not related to the binding at all.
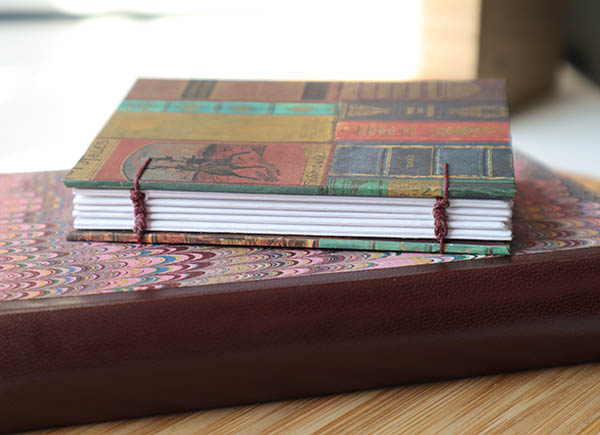
Characteristics of a coptic binding
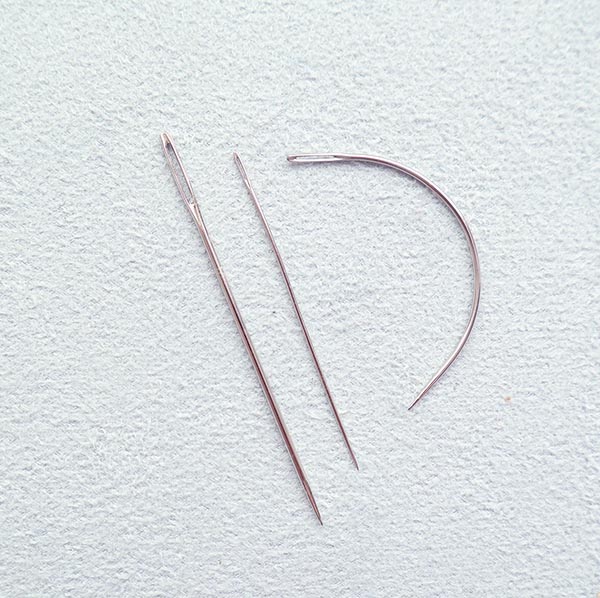
Coptic bindings are have an exposed spine with chain link stitching and multiple sections. The covers are usually hard, but may also be soft or protected with leather. Like a Pamphlet binding, the book block is traditionally flush with the head, tail and fore edge. This makes it an easy book for beginners and intermediate book artists who may not know how (or have the equipment to) trim these three edges. The covers are sewn directly to the first and last signatures, so there is zero adhesive required (unless you’d like to cover the boards first). A straight needle can be used to sew these bindings, but most people find curved needles easier to use.
Coptic binding types
Single-needle Coptic binding
Coptic bindings are usually sewn using a single needle and string of thread.. A chain link stitch is created along the spine and Kettle stitch at head and tail. If the thread should run out, it can be easily extended with a Weaver’s Knot in the center of a signature. Waxing the thread prior to sewing adds tack and security to each stitch.
Sewing with a single needle takes more effort and time, but results in a secure, uniform spine.
Learn more about Single Needle Coptic Bindings.
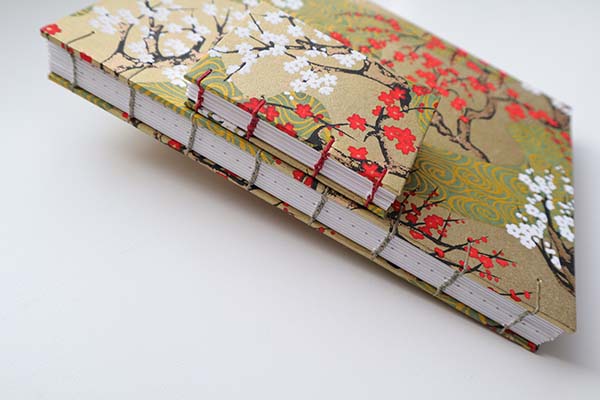
Multi-needle Coptic binding
Multiple needles can be used to sew braid-like stitches across the spine for truly artistic designs. To do this, the binding must have an even number of holes that run in pairs of two (2, 4, 6, 8, etc.). There is one string of thread with a needle at each end for every two holes (one string and two needles for a 2-hole coptic, two strings and four needles for a 4-hole coptic, three strings and three needles for a 6-hole coptic and so on).
Sewing with multiple needles is faster but may be more complicated given the volume of needles and threads there are to manage. Even so, this technique allows the book maker to use multiple colors and combinations of thread on their books.
Now that we know a few things about the Coptic binding, let’s jump into the steps required to make one.
Learn more about Double Needle Coptic Bindings and Four Needle Coptic Bindings.
Basic steps for any Coptic binding
There are 4 basic steps involved in the creation of a Coptic binding:
- Make the covers,
- Create the book block,
- Determine & pierce sewing stations,
- Sew the book
Step 1: Make the covers
Coptic bindings usually have hard covers make of solid wood (if you’re going for the ancient design) or book board (modern design). The outside of the boards are usually protected by a covering of your choice (book cloth, paper, leather, etc.). The inside of the board may feature the same paper or a coordinating endsheet.
Quick tip: Since the sewing stations will be punched directly through the material and board once dry, be sure to select a board, covering and endsheet material that can be pierced by your awl.
Step 2: Create the book block
To create the book block of a Coptic binding, you’ll need a minimum of three signatures. Five signatures are recommended because it provides enough width to properly display the stitches. Depending on the chosen paper weight, these signatures may contain anywhere from three to five pages each.
Stack the papers together before folding them down. This “fold down” method words great for Coptics because it forces all the pages in each signature to sit closely together. The close seating makes it easier to sew later on.
Quick tip: Coptic bindings will lay flat, so choose a paper that matches the purpose. For example, if you are creating a watercolor sketch book, use a thicker paper like Arches. If the book will be a journal, use a text weight paper like my favorite bookbinding paper.
Step 3: Determine & pierce sewing stations
Coptic sewing stations are pierced through the signatures and covers, allowing you to connect the first and last signatures to the front and back covers. While the signatures are all pierced on the spine fold, cover sewing stations sit slightly in from the spine edge (minimum of 3mm).
The number of sewing stations and inset distance depends on book size (larger books may have more stations and a deeper inset for added hold), the number of needles, and the bookbinder’s design decisions. Each book should have one station at the head and tail with a minimum of one station (two recommended) in between for support.
Create a punch template
Once the number and location of sewing stations has been decided, I recommend creating a punch template. Punch templates help us transfer sewing locations to the same position on all signatures and covers. If sewing station locations differ even slightly, it can cause the entire book block to sit askew within the covers.
Quick tip: the back cover is a reflection of the front cover, so be sure to flip the sewing station template horizontally before piercing the back cover locations.
Step 4: Sew the book
While this step is detailed, it is not a comprehensive set of instructions. Please refer to this Coptic tutorial for more detail.
The sewing process itself will be different if you have a single vs. multi-needle approach.
Single needle Coptics are sewn along the spine. This means the sewing will start at the tail and work horizontally toward the head of the book. Once the head is reached, it continues horizontally along the spine toward the tail and so on.
Multi-needle Coptics are sewn across the spine. This means the sewing starts wherever the needles are anchored and continues upward vertically across the spine.
In either case, the book should have a Kettle stitch positioned at least 6mm down from the head and tail edge.
Coptic bindings have 3 stages to consider when sewing:
- attaching the front cover to the first signature,
- sewing the signatures in between,
- attaching the back cover
Whether you’re sewing a single or multi-needle Coptic, the attachment step is the same. Thread is looped around the cover and through the signature to create a knot. The process is repeated for each sewing station.
Once the cover is in place, a second signature is added to the stack. This signature is sewn to the first by looping the needle behind the attachment knot before re-entering the second signature’s station hole. The process is repeated for each sewing station and signature thereafter.
In single needle coptics, the final signature is attached to the back cover using a similar technique as the first signature/front cover. The only difference is that the final signature must be sandwiched between the signature and back cover before thread is looped around. This can be a tough adjustment for newer binders and often results in a loose back cover. Don’t worry, your technique will improve over time!
Multi-needle coptics are slightly easier in that the last signature does not have to be directly attached to the back board. Instead, it is sewn the same way as all previous signatures. The back board is finally attached to the book block the same way as the front board, creating a continuous braided look.
I really hope you enjoyed and learned something new from this overview of the Coptic binding bookbinding method.
Good luck!
More bookbinding goodness
✨ What tools do I need to get started bookbinding?
- Bookbinding Tools & Supplies Quick Start Guide – learn all about book making tools, which to buy first & where to go online
- Pick up my popular Complete Starter Bookbinding Tools Kit – all the bookbinding essentials in one spot
🌟 Looking for a simple way to start making books?
Try a Complete Book Materials Kit. Each one has everything you need (+ tutorials & videos) to make a beautiful book without all the fuss.
Thank you for taking me along on your book making journey!
Misty


