Today, I’m taking you back to the 15th century with an overview of the Medieval Binding method. This method falls in with other hardcover binding techniques (such as the case binding). It stands on its own due to the unique development of the style during the Renaissance period (1400-1500) and modern western fascination with medieval fantasy.
The style developed over time across different regions, which yielded similar but different variations, including:
- Carolingian
- Romanesque
- Gothic
I won’t go into these styles individually today, but I plan to revisit each of them later this year. On to the basics!
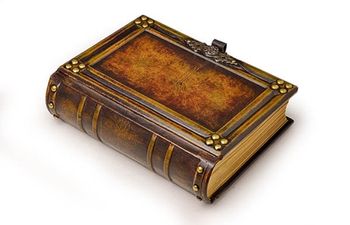
This method is easily recognized for 3 reasons:
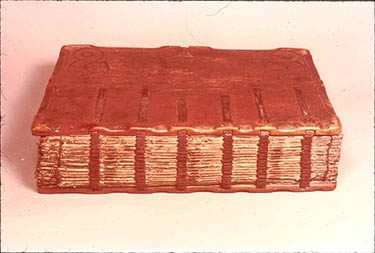
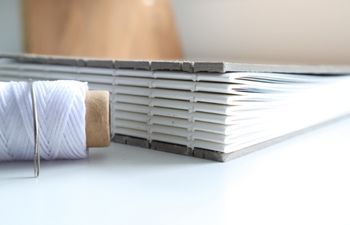
- Flat spine with raised or recessed bands,
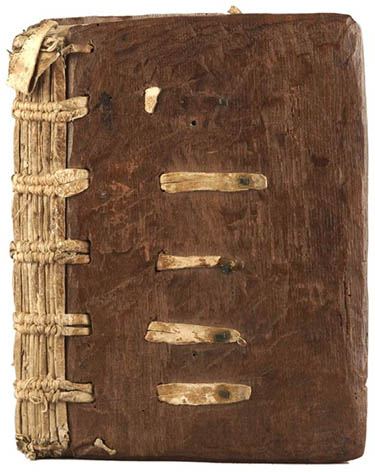
- Covers sewn directly onto the text block,
- Wooden covers with straps or clasps
What is a Medieval binding?
- Bookbinding Method or Technique: Medieval Binding
- Minimum Skill Level: Intermediate
- Characteristics: Flat spine, recessed or raised bands, wood covers, leather coverings, closure straps & clasps
- Great for: Period pieces, cosplay, intermediate to advanced book makers, leather covers & tooling
- Bad for: Any book where daily use is required
Characteristics of a Medieval binding
All Medieval bindings have a flat spine and are sewn on cords or throngs made of twine or leather. The rounded spine we’re familiar with today didn’t appear until the late 15th or 16th centuries.
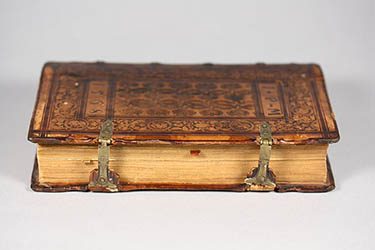
Paper wasn’t widely available until around 1450 or later, so most Medieval bindings used parchment for the book block. Parchment is porous animal skin and will expand according to environmental temperature and humidity levels. This causes a wedge shape, where the spine is thicker than the fore edge, and is another characteristic of books created in this period. To keep the book closed, Medieval bindings used heavy wood boards and metal clasps or leather straps.
While I’ll be covering some steps of book assembly, this is not an in-depth tutorial. This article is intended as an overview of the book’s creation under this technique and recommendations for how you can create a modern version in your art.
Steps to create a Medieval binding
There are five original steps involved in the creation of a Medieval binding:
- Parchment making,
- Writing,
- Illumination,
- Binding,
- Decoration
Note: Each step in the process was usually managed by a different person. Scribes managed writing while illumination was handled by an experienced artist or craftsman, and so on.
I’ll talk about each of these steps from a high level point of view.
Parchment making
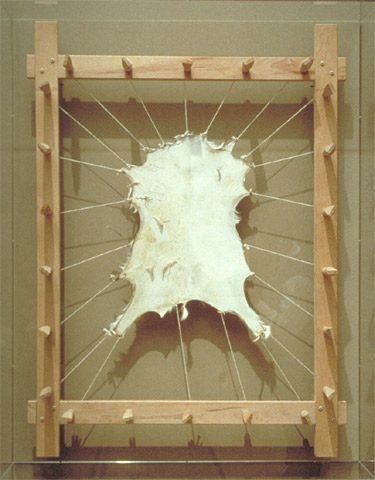
Since paper wasn’t available until the 15th century, Medieval binders had to make their own using animal skin. This type of paper is called parchment (or vellum) and is created using a process that could take up to 7 days to complete.
First, the animal pelt is soaked in a lime solution to loosen and remove the fur. The hide is then attached to a wooden stretching frame. Parchment makers adjusted the tension over time until the desired thickness was achieved.
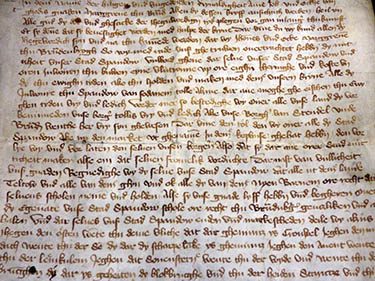
Writing
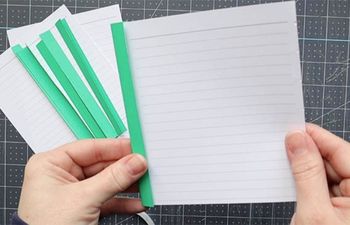
Once the parchment was prepared, lines (rules) were added to each page using lead or ink. These lines helped the scribe write evenly and played a part in the overall design of the book.
After rules were in place and dry, scribes would begin to write or copy the manuscript. For a 400 page book, this process could take anywhere from 4-6 months. Over time, scribes improved their processes and shortened this time to 15 days or less.
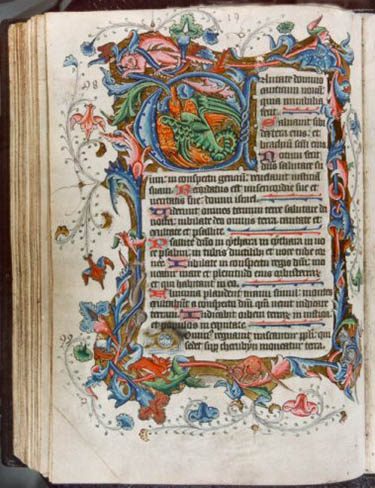
Illuminating
Manuscript illumination was a unique process that incorporated gold or silver leaf onto each page using a sticky substance called bole (refined red clay) or tree sap. The gold and silver were burnished (rubbed) to create a shiny surface that sparkled as pages were turned.
Paints were added throughout the book by the artist using a mixture of coloring agents (minerals, plant extracts, etc.), making each book a unique work of art.
Binding
After the pages were ruled, written and illuminated, the text block was bound. First, parchment sheets were folded and nested into gatherings. Today, we refer to these gatherings as “folios” or “signatures.”
The signatures were sewn together on cords or leather thongs for support. Next, the cords were woven through openings carved in the front and back covers of the book and held in place using animal glue. Once dry, the binding was covered in leather or fabric.
Decoration
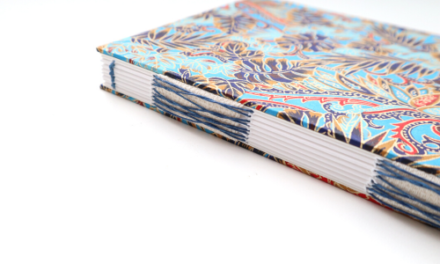
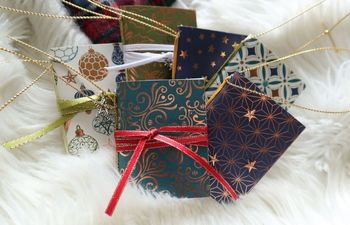
For protection and decoration, stunning metal corner pieces and other unique ornamentations were added to the front and back covers of the binding. Leather covered books were usually tooled or stamped using special designs indicative of the book’s purpose or artist. Pieces of brightly colored parchment were sometimes inset on the cover to create a stained-glass-window effect.
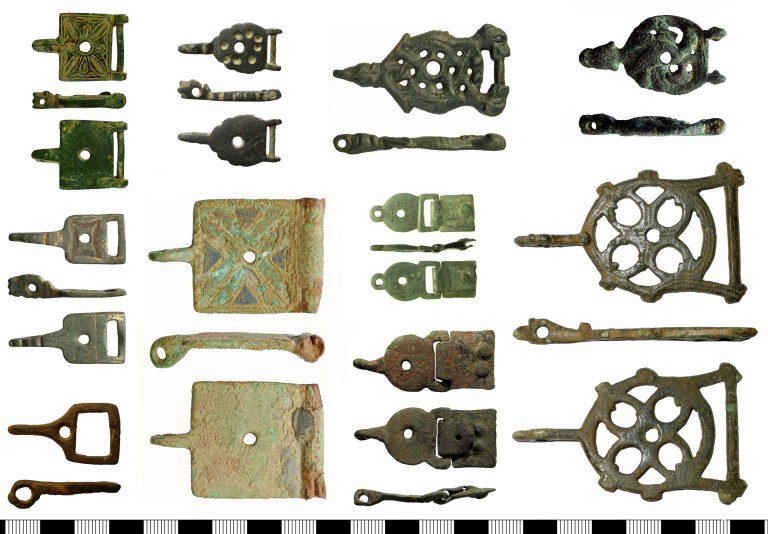
Keeping the book closed
Medieval text blocks would expand and contract over time due to the porous nature of parchment. This process warped and distorted pages, making it impossible for the book to stay closed on its own. To fix this problem and avoid spine damage, clasps or leather straps were added to the front and back covers. These closures were usually created by metalsmiths and differed in style depending on the region.
Clasps remained popular even after paper entered the scene in the late 15th century. Eventually, wooden covers gave way to book board. Metal clasps and associated hardware were too heavy and burdensome for lighter book board, so ribbon and fabric closures became popular.
Some tips for modern Medieval bindings
Today, book making enthusiasts seek the experience of recreating Medieval bindings as true to form as possible. Some binders will even go so far as to make their own parchment and ruling inks.
If you’re thinking of making one of these gorgeous books, here are five helpful tips:
- Vellum is much more accessible today and recreates the look and feel of traditional parchment
- Choose 1-2mm thick cord (I use twine) and don’t forget to double them up (traditional Medieval bindings sewed on two cords at each station)
- Softwoods like pine, cedar and redwood are excellent cover board materials. While these are lighter than traditional covers, they’re much easier for modern binders to work with
- If you’d like to use animal glue, try some hide glue pellets. Learn more about various bookbinding glues for more ideas and substitutes
- If you’re uncomfortable using animal hide as a covering, fabric is an excellent alternative. Believe it or not, Medieval bindings used fabric if leather wasn’t available
Fun fact: Medieval bindings do not require full coverings unless desired. If the book has an exposed spine, it’s very important for the sewing and construction to be as neat and tidy as possible.
I really hope you learned something new from this overview of the Medieval binding method. Good luck!
More bookbinding goodness
✨ What tools do I need to get started bookbinding?
- Bookbinding Tools & Supplies Quick Start Guide – learn all about book making tools, which to buy first & where to go online
- Pick up my popular Complete Starter Bookbinding Tools Kit – all the bookbinding essentials in one spot
🌟 Looking for a simple way to start making books?
Try a Complete Book Materials Kit. Each one has everything you need (+ tutorials & videos) to make a beautiful book without all the fuss.
Thank you for taking me along on your book making journey!
Misty


