Today, I’m showing you how to make a letter size lined paper template for bookbinding. While this size is only ideal for A6 books, it’s the most abundant size and therefore extremely easy to come by for beginners. I want to make it as easy as possible for you to start making books, so I hope this template helps you get there!
8-1/2 x 11 is always long grain
Before we get started, there’s something you need to know: 8-1/2 x 11 paper is always long grain.
If you’re new to bookbinding, it’s important to study The Most Important Rule in Bookbinding | Grain Direction. If you don’t respect this rule, your book will warp. There’s no two ways around it.
Most people want to use 8-1/2 x 11 size paper because it seems easy enough to fold it in half on the short side, creating a book that is 8-1/2″ tall by 5-1/2″ wide. Unfortunately, this goes against the grain direction and will cause the paper (and therefore the book itself) to warp. Sadness.
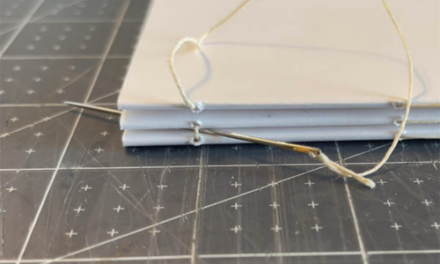
Side note: if you’re brand new and have never sewn a signature in your life, move forward anyway. It’s better to get practice than to never start at all, especially if you only have access to this size paper.
A6 saves the day
Here’s the good news: when folding this size paper along the grain, one can create a perfect size A6 book (4-1/8″ x 5-7/8″). I personally feel this is a great size for beginners because it’s not too big, not too small, doesn’t require much in the way of materials and is easy to maneuver when sewing. A win-win if you ask me!
Instructions
I used Adobe InDesign to create the template because InDesign is used to organize text and other content for catalogs, books, portfolios and more. It’s very straight-forward and intended for this type of work.
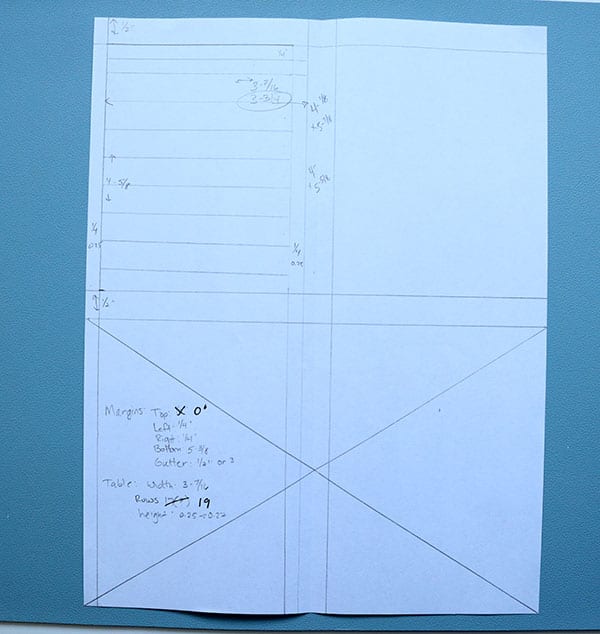
Before sitting down in front of a computer, I will sketch the page on a sheet of paper beforehand. It’s not pretty, but it allows me to visualize the end result. This is important for me because I am visual/kinesthetic.
8-1/2×11 Page layout
Page height: 8.50”
Page width: 11.0”
8-1/2×11 Page settings (for one size A6 signature)
- Margin-top: 0”
- Margin-bottom: 5.375”
- Margin-inside: 0.25”
- Margin-outside: 0.25”
- Columns: 2 (each column is a page)
- Gutter: 0.5”
8-1/2×11 Table settings
- Table Setup:
- Border: 0pt (I’m removing any border around the entire table)
- Space before/after: 0
- Row Strokes:
- First Rows: 0 (the header is technically the first “row”, so I skip the program’s idea of a first row with a zero)
- Next: 19 rows / 0.25pt
- Skip: 0
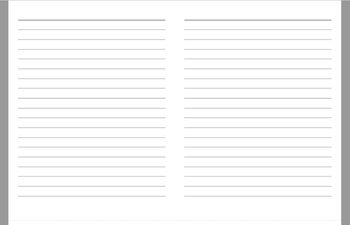
Creating the lined pages
After creating the table style, it’s time to create the table itself. To do this, you’ll go to Table > Create table and enter the number of columns, rows, headers and footers necessary.
Each table just needs one column, one header and 19 rows. No footer.
Once the table is “drawn”, you’ll start to see the page coming together.
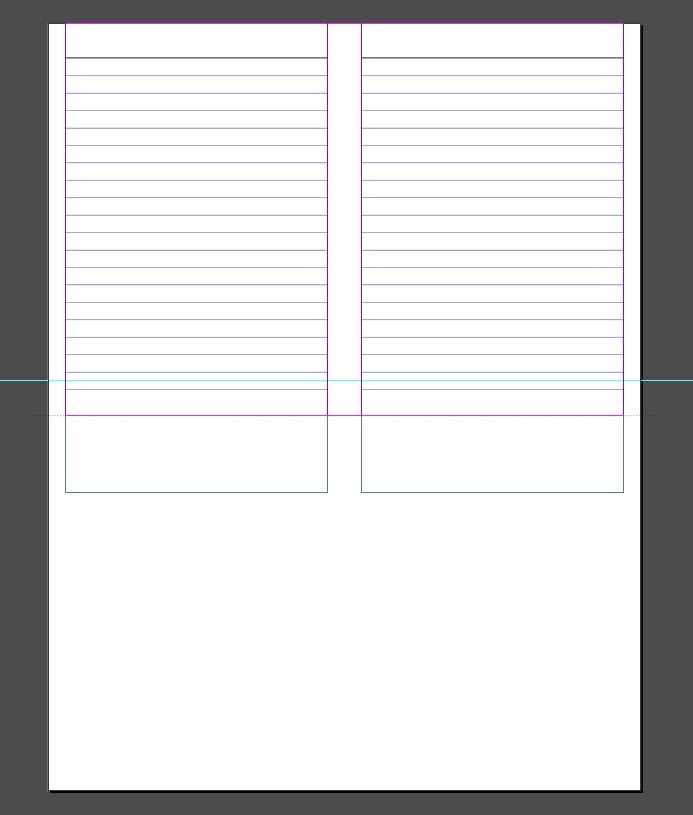
Creating the page title
Next, I set the height of the header row to be 1/2.” This gave the top of the page enough room for a date, entry title or anything else I might want to write before journaling. Since it’s a “header” row, the line is darker by default.
The main body of lines were set to a height equal to 0.25″ each. While I usually like my lines a little taller (around 0.27), this is a nice size for a small page like this.
Finally, I gave the last row of the table a height of 1/2″ to add balance.
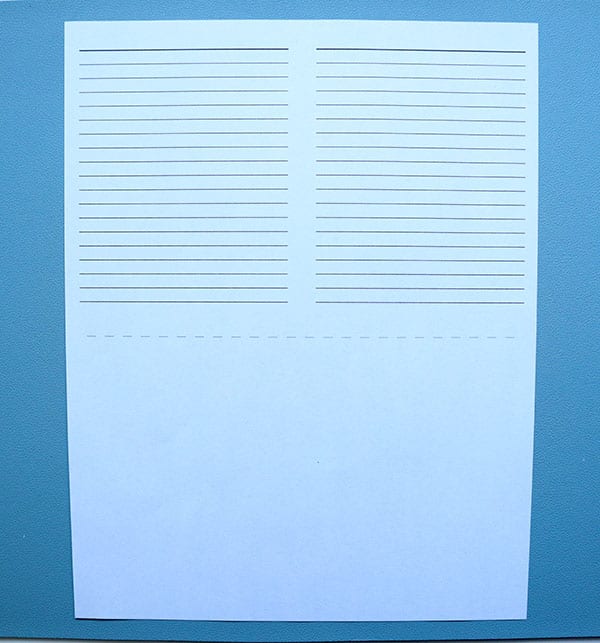
Adding a cut line
Since only one A6 signature would fit on this size paper, I added a cut line at the very bottom of the signature to make it easy to trim once printed. The dotted line is so light, you can barely see it, but it’s there.
Rinse and repeat
Once the first table is created, it’s as simple as copy/paste! I copied the table two times – top left and top right.
Printing
This can be easily printed at home, but If you don’t have a printer, export your template as a PDF, load it on a thumb drive and take it to any big box office supply store (Office Max, Office Depot, Staples, etc.). Just be aware – most of these places charge anywhere from 25 to 39 cents per sheet for double-sided printing.
If you’re printing at home, turn the sheet over and run it through again to print on the other side. This makes one signature with 4 total pages. If you have a printer with double-sided print capability, this won’t be an issue (lucky you!!).
My preferred paper & printer
I print my lined paper on a Canon Pixma Pro-100 Inkjet printer using some of my preferred paper. I choose paper that is 100% recycled, environmentally-friendly and compatible with nearly all printers.
Hope you found this helpful!
More bookbinding goodness
✨ What tools do I need to get started bookbinding?
- Bookbinding Tools & Supplies Quick Start Guide – learn all about book making tools, which to buy first & where to go online
- Pick up my popular Complete Starter Bookbinding Tools Kit – all the bookbinding essentials in one spot
🌟 Looking for a simple way to start making books?
Try a Complete Book Materials Kit. Each one has everything you need (+ tutorials & videos) to make a beautiful book without all the fuss.
Thank you for taking me along on your book making journey!
Misty


