Today, I’m giving you an overview of the French Link Stitch pattern. This beginner-friendly sewing pattern is used to combine multiple signatures into a text. The link stitch (also called “unsupported link stitch”) falls under the Coptic bookbinding method. It’s a basic single thread/single loop structure that creates a decorative “x” pattern on the spine of the text block.
The French Link Stitch sewing pattern appears to have originated in France in the 16th century. It was likely borrowed from embroidery patterns of the time.
This method is well-known for 3 reasons:
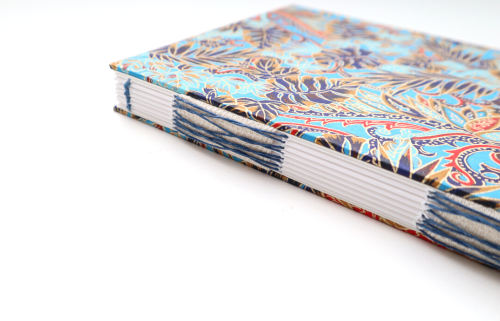
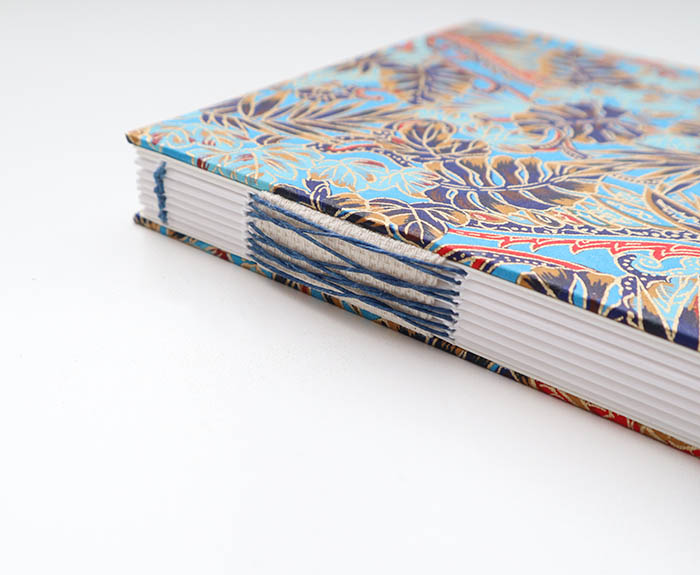
- The stitch creates an “x” pattern on the exposed spine,
- It’s easy to learn and create,
- The book will lay flat when opened
Now that you’ve got some basics, let’s jump into the details.
What is the French Link Stitch pattern?
- Bookbinding Method or Technique: Coptic binding, French Link Stitch pattern
- Minimum Skill Level: Beginner
- Characteristics: Exposed spine*, lays flat, sewing patterns take center stage
- Great for: New book makers, artistic expression, any book that you want to lay flat
- Bad for: Single sheets, large or heavy books
*usually, though it can also be used with a closed spine
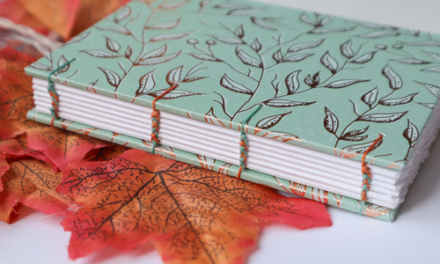
Characteristics of the French Link Stitch
French Link Stitch-sewn books are characterized by an exposed spine with sewn patterns ranging from simple to intricate. Since the sewing structure is unsupported, a soft cover is best as there is less weight to support. Hard covers are definitely possible and usually include traditional Coptic techniques to attach the cover to the text block with tape supports running perpendicular to the spine (under the link stitch pattern itself).
The book block is historically flush with the spine, top and bottom edges and may have a slight overhang on the fore edge (though not always). The combination of a flush book block and patterned sewing make for a beautiful binding.
While I’ll be covering some steps of book assembly, this is not an in-depth tutorial. This article is intended as an overview of the book’s creation under this technique and recommendations for how you can use this method in your art.
Steps to create the French Link Stitch pattern
There are 3 main steps involved in creating a book with this technique:
- Folding signatures,
- Punching the sewing stations,
- Sewing the pattern(s)
Fold the signatures
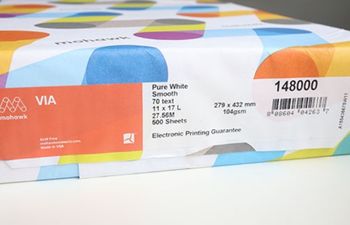
When sewing an unsupported French Link Stitch, it’s good to choose a lighter weight paper with fewer sheets per signature. I like to use a 70lb text weight paper with 8 or fewer signatures holding 3-4 sheets each. Each signature should be assembled and folded using the Fold Down Method for best results.
For the cover, choose a heavier weight cardstock (I like to use 100-120lb). Double-sided decorative cardstock is a great choice because there are a ton of artistic options and combinations. The cover will need to fit the text block perfectly (some overhang on the fore edge is okay) and should be folded as a single sheet.
I prefer to tip on a set of endsheets to protect the first and last signatures. I use a 100lb textured linen paper in a color that compliments the outside design. This step isn’t required, but does make for a lovely book.
Quick tip: “Tipping on” is a term used in bookbinding to describe the technique of attaching (using adhesive) endpapers to the first and last signatures of a book (usually 3mm wide) along the spines.
Pierce the sewing stations
Before piercing stations, you’ll want to design a punch template. The template should have an even number of stations and include:
- a Kettle stitch at the head and tail,
- at least two sections in the center for the French Link Stitch pattern (each section will contain two sewing stations each)
Since the spine is unsupported, I usually go with a size somewhere between A5 and A6. These two sizes will give you plenty of room to space out the French Link so it’s noticeable.
Once the template is ready, it’s time to punch the sewing stations. Some things to keep in mind:
- Line up the template with the inside of each folded signature
- Using an awl, pierce through the spine of each signature at the marked location. Use care not to make the hole too big. The needle should be able to pass through with very little drag
- Apart from the signatures, you’ll also punch the front and back covers in the same locations.
- If you’re using endpapers, do not punch them. They should be glued to the first and last signatures only.
Sew the French Link Stitch pattern
French Link Stitch designs range from simple to intricate, but we will focus on the simple method in this post. To begin, assemble the covers, endpapers (if you have them) and signatures in the following order:
- Front cover, folded and pierced
- Endpaper, folded and tipped onto the first signature (if applies)
- Signatures in the order they were assembled
- Endpaper, folded and tipped onto the last signature (if applies)
- Back cover, folded and pierced
Once the text is assembled, the sewing is broken into three primary steps:
- Attach cover to first signature,
- Sew signatures together,
- Attach final cover to last signature
The art of sewing the French Link Stitch is really easy. Typically, we will work from the back to front covers, sewing from the tail kettle to head kettle along the way.
To create the “X” design, you’ll simply:
- slide the needle behind the thread of the previous signature
- loop around that thread,
- return the needle into the next sewing station
Quick tip: When moving behind the thread with your needle, try to stay as close to the current sewing station as possible. This allows more of the thread to “lift” when the needle is fed into the next station, creating a clear “x” pattern


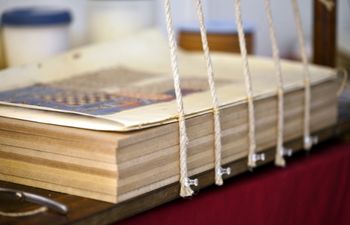
Supported French Link Stitch
I would be remiss if I didn’t mention the supported version of the French Link Stitch. It’s very common and a ton of fun to play with.
In this version, the link stitch is often sewn over supports such as linen tapes, ribbon or thongs. These supports add an additional element of design while giving the spine more stability.
If the book has a hardcover, the supports are laced into the hardcovers. How these are laced really depends on the book artist and how they want the final design to appear.
In my work, I will usually lace the tapes into the boards from outside to inside in order to improve structural stability. I will also run the stitches into the hardcovers at the front and back using the traditional Coptic binding method.
Here are a few examples (credited) from fellow artists:

Image courtesy: Ruth Bleakly
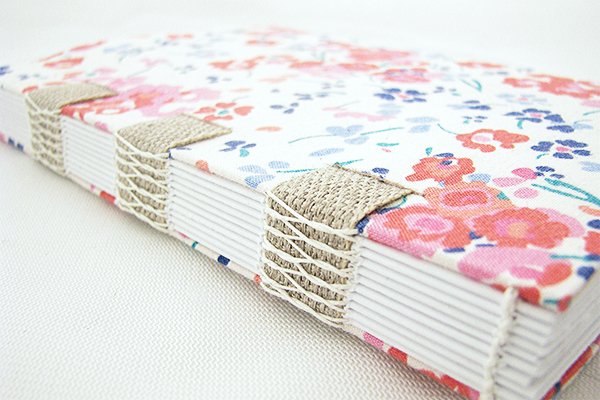
Image courtesy: Vintage Page Designs
Other considerations
Support types
There are a bunch of different options for supports. Try mixing and matching colors and materials. Here are a few examples you might want to try:
- linen tapes
- twill tapes
- ribbon (lace, satin, etc)
- leather thongs
- elastic
Thread types
While I prefer to use colorful waxed threads in 2 or 3-ply, anything goes here. Some stuff I’ve used before:
- embroidery thread
- linen thread
- yarn
- twine
As an artist, you can literally use anything you’d like. Try to maintain the structure of the book overall and you’ll do great.
I hope this post has helped you learn a bit more about the French Link Stitch. It’s an incredibly fun and beautiful exposed spine technique that I think you’ll love to use in your books.
Complete book materials kits
Each kit includes all the tools, supplies & materials to make one beautiful book.
More bookbinding goodness
✨ What tools do I need to get started bookbinding?
- Bookbinding Tools & Supplies Quick Start Guide – learn all about book making tools, which to buy first & where to go online
- Pick up my popular Complete Starter Bookbinding Tools Kit – all the bookbinding essentials in one spot
🌟 Looking for a simple way to start making books?
Try a Complete Book Materials Kit. Each one has everything you need (+ tutorials & videos) to make a beautiful book without all the fuss.
Thank you for taking me along on your book making journey!
Misty


