I spent two weeks in August studying the Fundamentals of Full Leather Binding at the AAB (American Academy of Bookbinding). in Colorado. Two days before the end of class, I received an email from a community member with just one question: is the Fundamentals of Full Leather Binding class worth the time and money?
For those who may not know, the Fundamentals of Full Leather Binding course I refer to in this post is offered by the American Academy of Bookbinding out of Telluride, Colorado. You can read more about this class here (opens in a new tab).
In today’s post, I’ll review the class and give my opinion on whether or not I personally think it was worth two weeks of time and $1,850 (cost at the time of this post).
First, I’ll go over the class’s intended focus and learning goals. Then, I’ll walk you through the steps we completed each week. Finally, I’ll give you my thoughts and answer some common questions I’ve been asked while away.
Fundamentals of Full Leather bookbinding class focus & learning goals
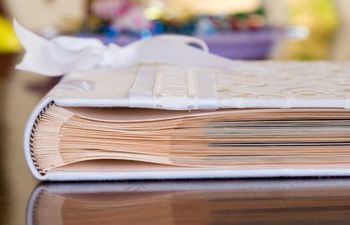
The primary goal of the class was to introduce students to leather as a covering material and laced-on board structure. This included binding and design techniques that work hand-in-hand to inform the final look of the book.
As an example, the laced-on board structure was created using linen tapes. These tapes add visible bumps to the spine of the book. Students were asked to conceal these bumps using spine fill techniques and very specific materials. The end goal was a smooth, fully reversible (in terms of adhesive) spine the leather could easily adhere to. If the student wanted to, they could create a second book sewn on cords (I did!) where no fill was necessary.
By the end of two weeks, each student was expected to finish at least one full leather binding. In my experience, there was enough time to complete a second full leather binding (although I only finished about 2/3 of mine… I was slow). The finished book is reviewed and graded by the instructor and their assistant.
First week of class

On the evening before the first day of class, all students gather at the Academy studio to meet one another and get started. Once introductions are complete, we nailed down our individual design choices (paper, endsheets, endpapers, leather, etc) and worked with the instructor to understand what might work best in the time we’re given.
From the first day of class until the end of the first week, we focused on:
- folding, collating and preparing signatures
- endsheet prep (sewn on or hooked endsheets, as an example)
- tape and thread size selection
- sewing on the bench and/or frame
- making wheat paste (each of us took turns throughout the class)
- spine linings
- rounding & backing
- endband sewing
- board treatments, trimming & attachment
The last one or two days of the first week are intended for questions and catch up. This extra time made it possible for us to begin work on our second books.
Second week of class
The second week of class was entirely focused on the leather:
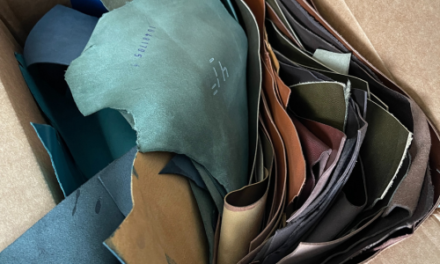
- leather selection (grades, thickness, where to buy)
- paring demonstration & assistance throughout
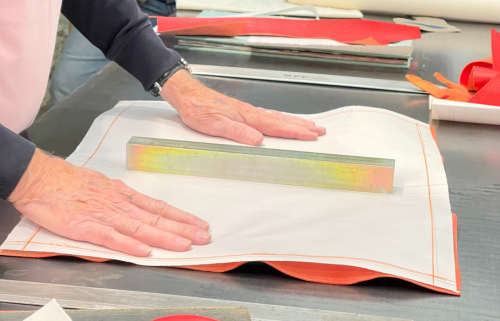
- covering the book in full leather
- forming head caps
- mitering and turning in corners
- filling the boards
- pasting down the endpapers
- pressing & drying
The days are long (and fun!) with many students, including myself, staying on into the evening or coming in before class started. On average, I personally spent around 8-10 hours in the bindery each day.
My thoughts
This class was so good that I would consider taking it again.
Yes, again.
The content and instructor were worth every single penny of the $1,850 I paid to be there. It was a literal gold mine of bookbinding knowledge you’d be hard pressed to find anywhere. In fact, so much of what I’ve read online and in books is conflicting. I often found myself asking 1) why is this information always in contrast to itself? and 2) who is right?
These questions were answered by the instructor in a way that was forgiving of the discrepancies (and explanatory at the same time) so we could make sense of the differences in approach and technique. Never forget that bookbinding is an ancient, global craft. Over thousands of years, things are bound to evolve and possibly conflict. Ironing it all out was priceless.
As you can imagine, there was a lot of specific discussion, demonstration and feedback throughout the class that made some days more intense than others… but every second was worth it!
Now, some of you have asked very specific questions. I think answering these questions in a FAQ format is the easiest way for me to share some additional thoughts and perspectives on the class. Here goes!
FAQ
Did the Fundamentals of Full Leather Binding class really need to be two weeks long?
Yes, I actually felt like it could have been three weeks instead of two. But let’s be realistic… most of us can barely manage to get two weeks off let alone three! The instructor did a great job balancing the level of information against the time allowed, which I very much appreciated.
How many students were in the Full Leather Binding class?
It’s important to keep the number of students at 10 or less. This ensures each student receives one-on-one help and advice from the instructor. Our leather class had 9 students, including me, and I always received help or advice whenever I needed it.
What does the class fee include?
The fee includes almost all of your materials and tools with the exception of the following:
- leather. You’ll need to buy your own leather, but the AAB has skins available at a good price if you’re unsure or don’t have your own.
- paring knife. I was confused about this at first, but then I realized how personal a paring knife is. This is not a one-size-fits-all situation. Your knife is YOURS and it’s important to invest in one you will use for many years.
The AAB has two types of knives available if you need to buy one (Swiss and English style) for a decent price. I personally own one of each and prefer the swiss style knife over the English, but you can try both at the studio before buying one.
Telluride, CO is a pretty expensive ski town. Was room and board included, or did you have to pay for accommodations?
A little of both. The AAB works hard to provide students with housing arrangements by working with locals to lend their homes, condos and apartments for student use. We pay a weekly fee for either a single or shared room (determined at the time you apply), which is a fraction of what it would normally cost to stay in town.
If you don’t want to pay for housing, you can choose to camp nearby. There is a lovely camp ground for tents and campers. As with the housing arrangements, camping is first-come, first-serve so be sure to apply and/or reserve early.
Was food included?
No, food is an expense you’ll need to cover. The rentals provided by the AAB generally include a full kitchen, so you can buy groceries locally and make your own breakfast, lunch and dinners. There are also plenty of places to dine out in Telluride if you get bored, but they definitely have “ski town” prices.
Misty tip: To get around the expense and lack of certain items in the grocery stores, I chose to mail some of my favorite dry foods ahead of time. Sending it all in a flat rate box made it easy (and less expensive) than shopping locally. Of course, I still had to buy milk, creamer, eggs and things like that. If possible, buy these items in Montrose (closest larger city nearby) before heading up to Telluride.
What was one thing you learned in Fundamentals of Full Leather Binding that you’d like to share with all of us?
It’s hard to narrow it down to just ONE thing, so I’ll share two:
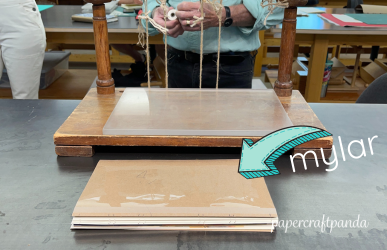
- Use mylar (also known as “acetate sheets”) as an external “dirt sheet” to protect your text block while working. Mylar comes in various thicknesses and will prevent moisture absorption, scratches or globs of extra paste that may fly off the leather while covering. I’m telling you, mylar is the BEST tip I received from this class! Just make sure the acetate you buy is acid-free or pH neutral.
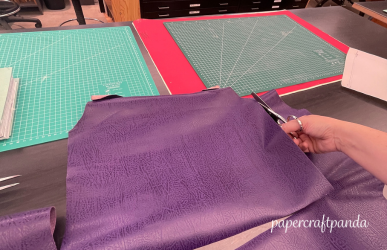
- It’s OK to go with low grade leather if you’re just starting out. Leather comes in various grades from 4 to 1 (four being the lowest grade and 1 begin the “best” grade). Even the lowest grades are VERY nice, so save your money until you’ve gained some experience. I personally bought a level 2 skin ($174) and ruined half of it, so learn from my mistake!
Is there anything else you’d like us to know about this class or any class at the American Academy of Bookbinding?
Yes. If you’re serious about bookbinding, be willing to take a class like this.
In my experience, there is only so much you can learn from books and online sources. Having the opportunity to work with an instructor one-on-one (either via Zoom or in person) is SO important. It’s absolutely worth the time and money invested to improve your skills and knowledge. Increases like these lead to faster, more efficient work. In bookbinding, this can be the difference between whether or not you get hired for a job or end up profitable in your business. It’s something to consider!
Finally, the AAB is a nonprofit that really cares about the craft and its students. Each class is carefully planned and carried out to offer you the best learning experience possible. Aside from that, you are taken care of like family. Everything you might need is considered and provided (where possible).
I really hope you enjoyed this post and learned something new!
More bookbinding goodness
✨ What tools do I need to get started bookbinding?
- Bookbinding Tools & Supplies Quick Start Guide – learn all about book making tools, which to buy first & where to go online
- Pick up my popular Complete Starter Bookbinding Tools Kit – all the bookbinding essentials in one spot
🌟 Looking for a simple way to start making books?
Try a Complete Book Materials Kit. Each one has everything you need (+ tutorials & videos) to make a beautiful book without all the fuss.
Thank you for taking me along on your book making journey!
Misty


