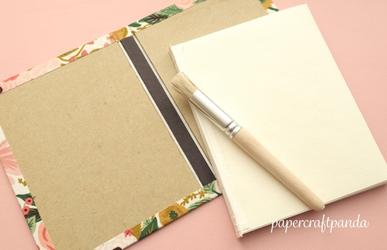
When buying a glue brush for bookbinding, you might think that “any old paste brush will do.” While this is okay in the beginning (and I encourage it to keep things simple), there comes a point where glue brush size and type can make or break your next binding. In this post, I’ll explain why paste brushes make a huge difference and a general rule of thumb to help you pick the right brush every time.
To truly understand why paste brush sizes and types matter in bookbinding, let’s start at the end and work our way backwards.
Why does the size of my glue brush matter for bookbinding?
When looking up “bookbinding glue brush” on the internet, you’ll probably see a bunch of different size brushes appear. Some are available in sets of various sizes, while others are sold individually in 1/4″ (6mm) or 1/8″ (3mm) size increments. There’s a good reason for this.
If a glue brush is too big or small, you’ll end up with too much glue for the given area. A too-small brush means you’ll need to refill it several times, leading to large pools of glue in many places. A too-large brush means you’ll drop a lot of glue in one area, or an even layer of too much glue everywhere.
In each case, you risk:
- paper tears
- uneven paper expansion
- wrinkled endsheets, hinges and more
- paper curls that are REALLY hard to work with
- glue everywhere
No one wants to end up with torn paper or a mess all over the covers, boards, their hands – you get the picture!
Why does the type of glue brush matter for bookbinding?
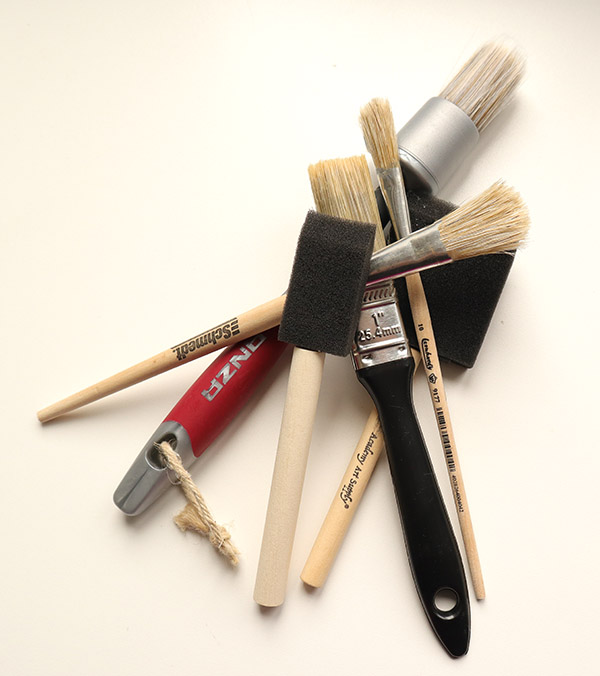
When I refer to glue brush “type,” I’m referring to the material the bristles are made from. Searching up a paste brush for bookbinding will yield tons of brushes made from various materials, such as:
- foam
- animal hair
- silicone
- + too many more to list
Natural materials like boar and horse hair have pores that will soak up some of the glue. This makes it easier to dispense an even layer on a material’s surface.
Synthetics like foam and silicone have their uses, too. Foams impersonate porous materials by mimicking absorption and dispersion. They’re also soft and less likely to tear wet surfaces.
Silicones and other plastic bristle brushes won’t absorb the glue and are easier to wash and maintain. While animal hair bristles get soft and flexible as liquid is absorbed, synthetic bristles are created to remain firm yet pliable at all times. A brush that can maintain constant pressure is important, so don’t count these out until you’ve given them a try.
Now that we understand why glue brush size and type matter, let’s put this information together to make the best choice possible.
“Rule of Thumb” for choosing a glue brush for bookbinding jobs
The brush you choose should be able to cover the paper in a single layer of glue, spreading from the center outward, in 8 strokes or less with a max of one glue reload in between (if at all).
Every project is different, so here are some extra tips for success:
- always start at the center of the paper and work outward toward the edges
- use the longest strokes possible to cover more space in a single swipe
- if you’re running out of glue well before reaching the edge, the brush is too small or not holding enough glue
- if you’ve got a bunch of extra glue reaching the edge, then the brush is too large or holding too much glue
- move with a moderate rate of speed. Going too slow will lead to more glue than you want. Going too fast will have the opposite effect
- if you need to go back over your strokes, it’s okay. Just be careful. The paper could tear with too much force or you might end up with more glue than you need

Practice makes perfect
*Dry run on a small sheet of material first!
This is hands-down the best advice I can give you.
When I first started, I used wayyyyy too much glue. There was glue all over everything by the time I finished. To make matters worse, the paper was a nightmare to work with because it was super wet and flimsy. I eventually learned how to apply the right amount of glue and pressure, but it took a lot of failed attempts and frustrated moments to get here.
Give yourself some grace and be sure to practice a few times before working on the real project. Good luck!
More bookbinding goodness
✨ What tools do I need to get started bookbinding?
- Bookbinding Tools & Supplies Quick Start Guide – learn all about book making tools, which to buy first & where to go online
- Pick up my popular Complete Starter Bookbinding Tools Kit – all the bookbinding essentials in one spot
🌟 Looking for a simple way to start making books?
Try a Complete Book Materials Kit. Each one has everything you need (+ tutorials & videos) to make a beautiful book without all the fuss.
Thank you for taking me along on your book making journey!
Misty


