“How do you fold paper, cloth or leather around corners?” I get this question a lot. So much, in fact, I decided to write a post dedicated to the topic of folding handmade book corners. I could give you a bunch of tips to make your corners look pro, but I’d rather shed light on the top 3 mistakes I see bookbinders make when learning to fold corners so you can avoid them altogether.
Mistake #1: Incorrect order of turn-ins
Turn-ins are the flaps of book cloth on the head, tail and fore edges of the case that are folded (“turned in”) and secured with glue. As a bookbinder, I was taught to follow a specific order of operations for folding handmade book corners:
Fold in…
- Head first
- Tail second
- Left fore edge third
- Right fore edge last
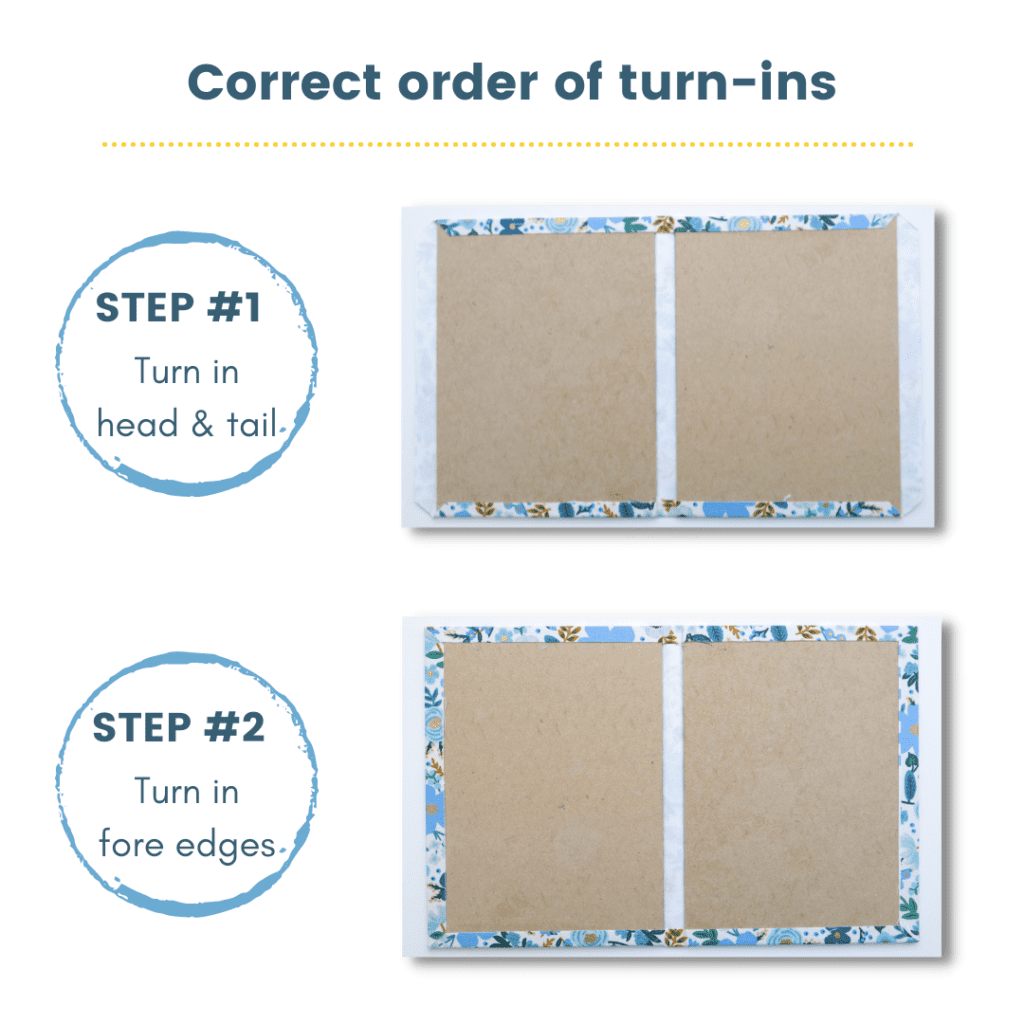
You’ll notice the head and tail are folded in first and second. These can be swapped (tail first, head second), but the fore edges must always come last.
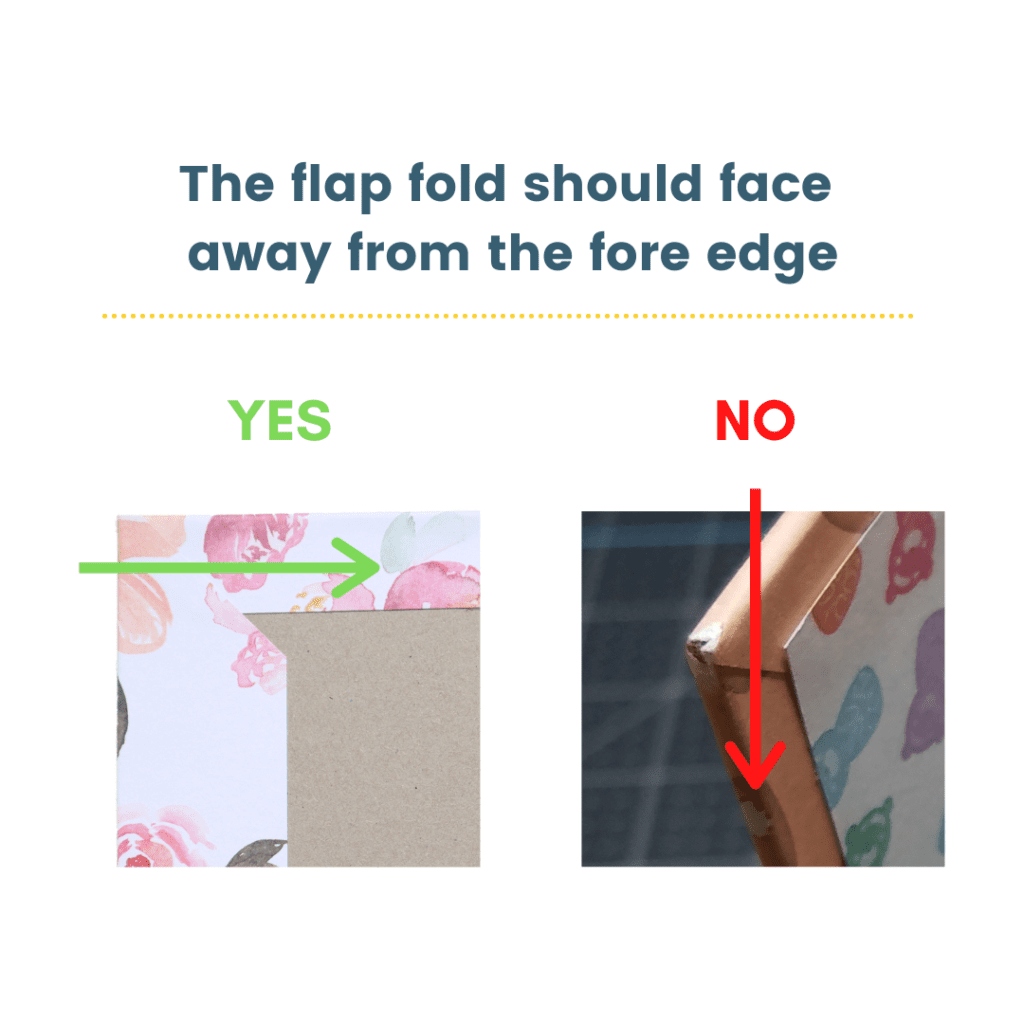
This order requirement might seem silly, but let me explain. It forces the topmost turn-in edge at the corner to face away from the fore edge. Since the corners are handled most often, they need the most finishing. This flap direction gives extra protection from on/off shelf wear or a reader’s absentminded fingers pulling at the edges.
Note: the order of turn-ins stays this way regardless of the book’s size or shape. I.E, if your book is square in shape, you will still fold the head and tail first with the fore edges last.
Mistake #2: Too-close cuts
When folding handmade book corners, it’s important not to cut corners when…cutting corners ?
Seriously, though… trimming corners in preparation for folding can be a nightmare. If you cut away too much, there won’t be enough material to cover the board (and you’ll have to start over). If you cut away too little, the corner will be bulky, misshapen and at risk of unraveling from normal wear and tear. What’s a bookbinder to do, then?
Method #1: Use the formula
Thankfully, there’s an easy formula for the perfect corner every time:
- The distance from each corner should be around 1.5x the width of the book’s board
- Example: if the book board is 1mm thick, each corner should have 1.5mm of material between the corner and the cut
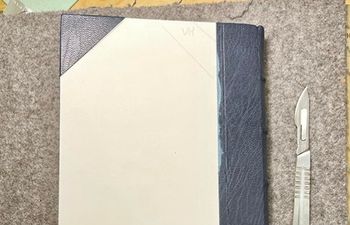
I’ve measured a 90 degree angle from the corner outward in order to demonstrate the angle to cut. The distance between the cut and the corner is equal to 1.5x the thickness of board used.
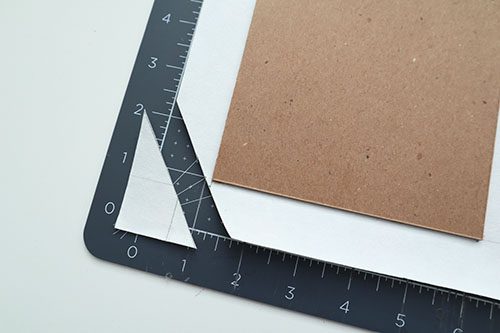
Note: It’s better to have more material than not enough, so don’t be afraid to cut further away from the corner until you’re completely comfortable with the recommended distance.
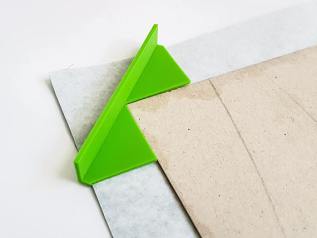
Method #2: Use a jig
Bookbinding corner jigs are amazing tools designed to help us move quickly while maintaining the accuracy we crave.
Plastic cornering jigs are the most cost effective. Some are multifunctional like my Perfect Trim Ruler (below) while others are 3D printed and molded to fit a 90 degree corner.
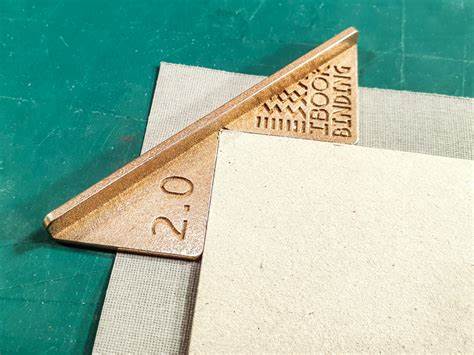
Metal cornering jigs are a bit fancier and available in different metals (aluminum, brass & steel are most common). They have a nice weight that makes it easier to hold in place while cutting with an Olfa knife.
I’ve added a couple of resources below if you’re looking for one of these.
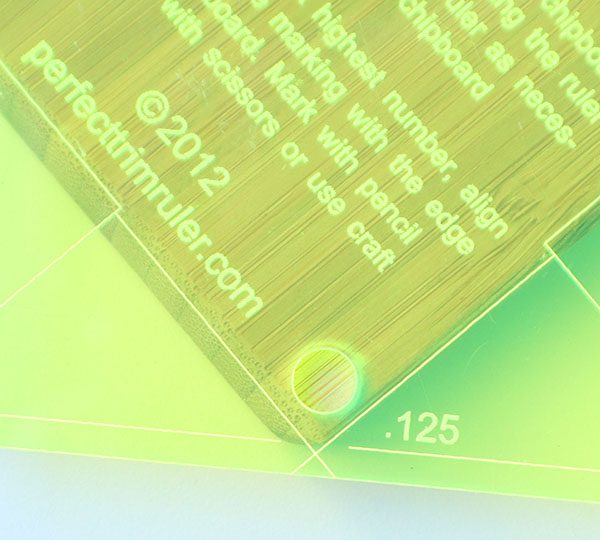
Note: 3D printed and metal versions will require one jig in each size, whereas the Perfect Trim Ruler is one tool to fit many different sizes.
Mistake #3: Bulky corners
This brings us to the final mistake: bulky corners.
Bulky corners happen for many reasons:
- Excess material after trim
- Overall material thickness (leather, canvas, etc)
- Too much glue / not enough glue used when folding
While all three reasons should be addressed, excess material is an issue affecting all bookbinders (regardless of experience), so it makes sense to discuss it here.
To get consistently even, non-bulky corners, the following cuts must be perfect:
- width of each flap all the way around the book
- angle from the 90 degree corner
- trim distance from the corner
I personally do not believe perfection is the answer. Instead, we should try for a more professional look by making small changes to account for the inaccuracies naturally present in handmade items.
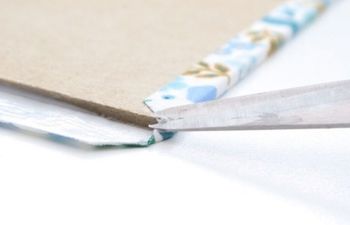
If the previously mentioned cuts are not perfect, you’re bound to end up with some extra material. It’s possible to trim away a small amount of this material during the folding step using a pair of micro tip scissors or snips. These special scissors feature long, slender blades and are exceptionally sharp through the tip. This makes precision cuts in small areas easy.
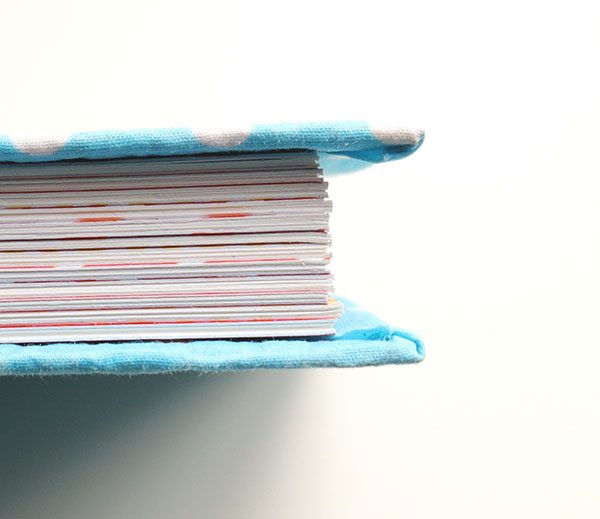
When folding corners, look for a tiny flap of excess material as shown below. Using the micro tip scissors, cut away this tiny bit and then finish the flap fold over. Removing the extra allows the flap to lay flush against the fore edge. A snug fit makes it hard for extra glue and air to gather in the folds, resulting in a nice, flat appearance.
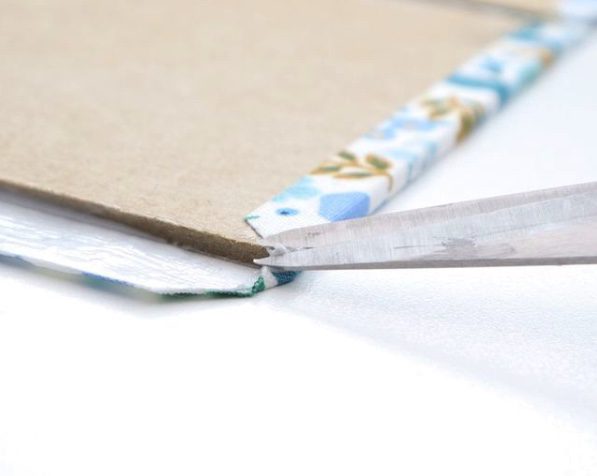
Note: Be careful when cutting. If you remove too much at this step, the board will be exposed. I recommend practicing with an extra piece of book cloth and board before taking on the real thing.
More bookbinding goodness
✨ What tools do I need to get started bookbinding?
- Bookbinding Tools & Supplies Quick Start Guide – learn all about book making tools, which to buy first & where to go online
- Pick up my popular Complete Starter Bookbinding Tools Kit – all the bookbinding essentials in one spot
🌟 Looking for a simple way to start making books?
Try a Complete Book Materials Kit. Each one has everything you need (+ tutorials & videos) to make a beautiful book without all the fuss.
Thank you for taking me along on your book making journey!
Misty


